Health Checking / Monitoring SharePoint 2016

I’ve previously written about health checking/monitoring in the blog posts Health Checking / Monitoring Exchange Server 2013/2016 and Lync Server 2013 Health Checking. These posts are very popular, so I decided to write a similar post about Health Checking / Monitoring SharePoint 2016.

This time however, there weren’t that many useful scripts available. Almost all of the scripts I found were too basic, including just a few PowerShell commands. I on the other hand was looking for something similar to the Exchange health report, including a weekly email and so forth. That said, I finally managed to find a a couple of nice sources:

http://abhayajoshi.blogspot.com/2016/05/sharepoint-server-daily-check.html
https://gallery.technet.microsoft.com/SharePoint-Server-Check-V10-f5e205b4

My own script is a modified version of the one found in the first link, with “borrowed” features from the one found in the second link. The end result looks like this, and is just what I was looking for:

(WordPress is not that cooperative with large pictures, use your browsers zoom feature on this embedded picture instead).

sharepoint_server_report_merged

You’ll get all the important stuff from the email report – ranging from basic information such as memory and disk usage to more advanced stuff like core SharePoint services and application reports including upgrade needs. I don’t mind sharing either, so here’s my modified PowerShell script (with $servers and email addresses censored):


$head='<style>body{font-family:Calibri;font-size:10pt;}th{background-color:black;color:white;}td{background-color:#19fff0;color:black;}h4{margin-right: 0px; margin-bottom: 0px; margin-left: 0px;}</style>'

#Add SharePoint PowerShell Snap-In
Add-PSSnapin Microsoft.SharePoint.PowerShell -erroraction SilentlyContinue

#SharePoint Servers, use comma to separate.
$servers = @("xxxxx")

#===============#
# Server Report #
#===============#

#Memory Ustilization
#Modified to display GB instead of byte, source:
#https://www.petri.com/display-memory-usage-powershell

#I'm skipping the free percentage stuff //JS

#$Memory = Get-WmiObject -Class Win32_OperatingSystem -ComputerName $servers| Select CsName , FreePhysicalMemory  , TotalVisibleMemorySize , Status | ConvertTo-Html -Fragment

$Memory = Get-Ciminstance Win32_OperatingSystem | Select @{Name = "Total(GB)";Expression = {[int]($_.TotalVisibleMemorySize/1mb)}},
@{Name = "Free(GB)";Expression = {[math]::Round($_.FreePhysicalMemory/1mb,2)}} | ConvertTo-Html -Fragment

#Disk Report
$disk = Get-WmiObject -Class Win32_LogicalDisk -Filter DriveType=3 -ComputerName $servers |
Select DeviceID , @{Name="Size(GB)";Expression={"{0:N1}" -f($_.size/1gb)}}, @{Name="Free space(GB)";Expression={"{0:N1}" -f($_.freespace/1gb)}} | ConvertTo-Html -Fragment

#Server UpTime
$FarmUpTime = Get-WmiObject -class Win32_OperatingSystem -ComputerName $servers |
Select-Object __SERVER,@{label='LastRestart';expression={$_.ConvertToDateTime($_.LastBootUpTime)}} | ConvertTo-Html -Fragment

#Core SharePoint services
#Borrowed and modified from https://gallery.technet.microsoft.com/SharePoint-Server-Check-V10-f5e205b4 //JS
$coreservices = Get-WmiObject -Class Win32_Service -ComputerName $servers | ? {($_.Name -eq "AppFabricCachingService") -or ($_.Name -eq "c2wts") -or ($_.Name -eq "FIMService") `
-or ($_.Name -eq "FIMSynchronizationService") -or ($_.Name -eq "Service Bus Gateway") -or ($_.Name -eq "Service Bus Message Broker") -or ($_.Name -eq "SPAdminV4") `
-or ($_.Name -eq "SPSearchHostController") -or ($_.Name -eq "OSearch15") -or ($_.Name -eq "SPTimerV4") -or ($_.Name -eq "SPTraceV4") -or ($_.Name -eq "SPUserCodeV4") `
-or ($_.Name -eq "SPWriterV4") -or ($_.Name -eq "FabricHostSvc") -or ($_.Name -eq "WorkflowServiceBackend") -or  ($_.Name -eq "W3SVC") -or ($_.Name -eq "NetPipeActivator")} `
| Select-Object DisplayName, StartName, StartMode, State, Status| ConvertTo-Html -Fragment

#====================#
# Application Report #
#====================#

#SharePoint Farm Status
$SPFarm = Get-SPFarm | select Name , NeedsUpgrade , Status , BuildVersion |ConvertTo-Html –Fragment

#Web Application Pool Status
#Source: http://stevemannspath.blogspot.com/2013/06/sharepoint-2013-listing-out-existing.html
$WAppPool = [Microsoft.SharePoint.Administration.SPWebService]::ContentService.ApplicationPools | select Name, Username,Status | ConvertTo-Html -Fragment

#Web Application Status Check
$WebApplication = Get-SPWebApplication | Select Name , Url , ContentDatabases , NeedsUpgrade , Status | ConvertTo-Html -Fragment

#IIS Total number of current connections
$IIS1 = Get-Counter -ComputerName $servers -Counter "\web service(_total)\Current Connections" |
Select Timestamp , Readings | ConvertTo-Html -Fragment

#Service Application Pool Status
#Returns the specified Internet Information Services (IIS) application pool. NOTE, these are the SERVICE app pools, NOT WEB app pools.
$SAppPool = Get-SPServiceApplicationPool | Select Name , ProcessAccountName , status | ConvertTo-Html -Fragment

#Service Application Status
$ServiceAppplication = Get-SPServiceApplication | Select DisplayName , ApplicationVersion , Status , NeedsUpgrade | Convertto-Html -Fragment

#Service Application Proxy Status
$ApplicationProxy = Get-SPServiceApplicationProxy | Select TypeName , Status , NeedsUpgrade | ConvertTo-Html -Fragment

#Search Administration Component Status
$SPSearchAdminComponent = Get-SPEnterpriseSearchAdministrationComponent -SearchApplication "Search Service Application" | Select Servername , Initialized | ConvertTo-Html -Fragment

#Search Scope Status
$SearchScope = Get-SPEnterpriseSearchQueryScope -SearchApplication "Search Service Application" | Select Name , Count | ConvertTo-Html -Fragment

# WARNING: The command 'Get-SPEnterpriseSearchQueryScope' is obsolete. Search Scopes are obsolete, use Result Sources instead.
# The below code is maybe not an exact alternative to search scope, but at least something...
# Source: https://docs.microsoft.com/en-us/powershell/module/sharepoint-server/get-spenterprisesearchresultsource?view=sharepoint-ps
# Still using Get-SPEnterpriseSearchQueryScope though, as the output from Get-SPEnterpriseSearchServiceApplication/Get-SPEnterpriseSearchResultSource is not exactly what I want.

#$ssa = Get-SPEnterpriseSearchServiceApplication -Identity 'Search Service Application'
#$owner = Get-SPEnterpriseSearchOwner -Level SSA

#$SearchScope = Get-SPEnterpriseSearchResultSource -SearchApplication $ssa -Owner $owner | select Name, Description, Active | ConvertTo-Html -Fragment

#Search Query Topology Status
#Using Get-SPEnterpriseSearchTopology instead of Get-SPEnterpriseSearchQueryTopology
$SPQueryTopology = Get-SPEnterpriseSearchTopology -SearchApplication "Search Service Application" | select TopologyId , State | ConvertTo-Html -Fragment

# $SPQueryTopology = Get-SPEnterpriseSearchQueryTopology -SearchApplication "Search Service Application" | select ID, State | ConvertTo-Html -Fragment
# The term 'Get-SPEnterpriseSearchQueryTopology' is not recognized as the name of a cmdlet, function, script file, or operable program.
# ID not in use, using TopologyId instead (with Get-SPEnterpriseSearchTopology).

#Content Sources Status with Crawl Log Counts
$SPContentSource = Get-SPEnterpriseSearchCrawlContentSource -SearchApplication "Search Service Application" |
Select Name , SuccessCount , CrawlStatus, LevelHighErrorCount, ErrorCount, DeleteCount, WarningCount | ConvertTo-Html -Fragment

#Crawl Component Status
#$SPCrawlComponent = Get-SPEnterpriseSearchCrawlComponent -SearchApplication "Search Service Application" -CrawlTopology "0e49b522-4b7b-44d5-bc77-99b53e1c9f03"| Select ServerName , State , DesiredState , IndexLocation | ConvertTo-Html -Fragment
$SPCrawlComponent = Get-SPEnterpriseSearchStatus -SearchApplication "Search Service Application" | Select Name , State | ConvertTo-Html -Fragment
# OLD COMMAND: Get-SPEnterpriseSearchServiceApplication | Get-SPEnterpriseSearchTopology
# Not entirely same results as for SharePoint 2010, but it'll do.

#Content Database Status
$DBCheck = Get-SPDatabase | Select Name , Status , NeedsUpgrade , @{Name="size(GB)";Expression={"{0:N1}" -f($_.Disksizerequired/1gb)}} | ConvertTo-Html -Fragment

#Failed Timer Jobs, Last 7 days
$f = Get-SPFarm
$ts = $f.TimerService
$jobs = $ts.JobHistoryEntries | ?{$_.Status -eq "Failed" -and $_.StartTime -gt ((get-date).AddDays(-7))} 
#$failedJobs=$jobs.Count      //.Count seems to do nothing. This one does something on the other hand:
$failedjobs = $jobs | select StartTime,JobDefinitionTitle,Status,ErrorMessage | ConvertTo-Html -Fragment

#SharePoint Solution Status
#$SPSolutions = Get-SPSolution | Select Name , Deployed , Status | ConvertTo-Html -Fragment

#=======================#
# Table for html output #
#=======================#

$legendStat="The checks are considered 'Green' in terms of RAG Status when status values are one of the following: <br>
<b>OK, Online, Ready, Idle, CrawlStarting, Active, True</b>"

ConvertTo-Html -Body "
<font color = brown><H2><B><br>Server Report:</B></H2></font>
<font color = blue><H4><B>Memory Usage</B></H4></font>$Memory
<font color = blue><H4><B>Disk Usage</B></H4></font>$disk
<font color = blue><H4><B>Uptime</B></H4></font>$Farmuptime
<font color = blue><H4><B>SharePoint Server Core Services Status</B></H4></font>$coreservices

<font color = brown><H2><B><br>Application Report:</B></H2></font>
<font color = blue><H4><B>Note :</B></H4></font>$legendStat
<font color = blue><H4><B>Farm Status</B></H4></font>$SPFarm
<font color = blue><H4><B>Web Application POOL Status</B></H4>$WAppPool
<font color = blue><H4><B>Web Application Status</B></H4>$WebApplication
<font color = blue><H4><B>IIS: Current number of active connections</B></H4></font>$IIS1
<font color = blue><H4><B>Service Application POOL Status</B></H4>$SAppPool
<font color = blue><H4><B>Service Application Status</B></H4>$ServiceAppplication
<font color = blue><H4><B>Service Application Proxy Status</B></H4>$ApplicationProxy
<font color = blue><H4><B>Search Administration Component Status</B></H4></font>$SPSearchAdminComponent
<font color = blue><H4><B>Search Scope Status</B></H4></font>$SearchScope
<font color = blue><H4><B>Search Query Topology Status</B></H4></font>$SPQueryTopology
<font color = blue><H4><B>Content Sources Status with Crawl Log Counts</B></H4></font>$SPContentSource
<font color = blue><H4><B>Crawl Component Status</B></H4>$SPCrawlComponent
<font color = blue><H4><B>Content Database Status</B></H4></font>$DBCheck
<font color = blue><H4><B>Failed Timer Jobs, Last 7 days</B></H4></font>$failedJobs
" -Title "SharePoint Farm Health Check Report" -head $head | Out-File C:\software\scripts\ServerAndApplicationReport.html

#Document Inventory Module
#Document Inventory Report
[void][System.Reflection.Assembly]::LoadWithPartialName("Microsoft.SharePoint")
function Get-DocumentLibraryInventory([string]$siteUrl) {
$site = New-Object Microsoft.SharePoint.SPSite $siteUrl
foreach ($web in $site.AllWebs) {
foreach ($list in $web.Lists) {
if ($list.BaseType -ne "DocumentLibrary") {continue}
foreach ($item in $list.Items) {
$data = @{
                                "Site" = $site.Url
                                "Web" = $web.Url
                                "list" = $list.Title
                                "Item ID" = $item.ID
                                "Item URL" = $item.Url
                                "Item Title" = $item.Title
                                "Item Created" = $item["Created"]
                                "Item Modified" = $item["Modified"]
                                "File Size" = $item.File.Length/1KB
}
New-Object PSObject -Property $data
}
}
$web.Dispose();
}
$site.Dispose()
}

#=================================#
# Send email to SharePoint Admins #
#=================================#

Function logstamp {
$now=get-Date
$yr=$now.Year.ToString()
$mo=$now.Month.ToString()
$dy=$now.Day.ToString()
$hr=$now.Hour.ToString()
$mi=$now.Minute.ToString()
if ($mo.length -lt 2) {
$mo="0"+$mo #pad single digit months with leading zero
}
if ($dy.length -lt 2) {
$dy="0"+$dy #pad single digit day with leading zero
}
if ($hr.length -lt 2) {
$hr="0"+$hr #pad single digit hour with leading zero
}
if ($mi.length -lt 2) {
$mi="0"+$mi #pad single digit minute with leading zero
}
echo $dy-$mo-$yr
}
$mailDate=logstamp

$To =  "xxxx@xxxx.fi"
$Cc = "xxxxx.xxxxx@xxxx.fi"
$From = "xxxxxxxxxxxx@xxxx.fi"
$SMTP = "xxxx.xxxx.fi"

$Subject = "[SharePoint] Server and Application Report - $mailDate"
$Report = Get-Content C:\software\scripts\ServerAndApplicationReport.html

Send-MailMessage -To $To -SmtpServer $SMTP -From $From -Subject $Subject -BodyAsHtml "$Report" -Cc $Cc


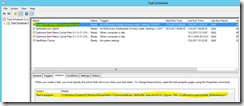
The script itself is located in c:\software\scripts on the server, and is ran from task scheduler once a week. It produces the report shown in the first screenshot.

The weekly run-command is available in the the screenshot below.

sharepoint_server_report_task_scheduler


Side note:

You can also get SharePoint’s own Health Analyzer Alerts from PowerShell (should you have the need to):

http://itgroove.net/mccalec/2015/03/13/getting-current-health-analyzer-alerts-with-powershell/


And that’s all there is to it – pretty short and effective post this time around 🙂 Enjoy!

Exchange 2013/2016: Switching from Zen Load Balancer to HAProxy

I’m still a huge fan of Zen (Zevenet) Load Balancer, and it’s been serving our Exchange servers for a couple of years. HOWEVER, Zen’s features are a bit limited and not enough for us anymore. It does a very good job with basic load balancing, but unfortunately it lacks in the logging department. This was a deal breaker for us, as we weren’t able to get the client IP’s logged. If you’re using any load balancer in Source NAT (SNAT)/reverse proxy configuration (most certainly you are), this is the default behavior. You’ll then end up with the load balancer IP instead of the client IP in the (Exchange IIS) logs. Also, with Zen LB, you’ll get NO client logs at all on the load balancer itself. This is not ideal. Furthermore, when I was testing http mode instead of L4xNAT in Zen, I couldn’t get it working as intended (including x-forward-for). I configured it with no persistency/affinity, but Outlook wouldn’t simply start. I scratched my head with this for far too long, and I had to give up. This seems like a bug in Zen if you ask me. (Exchange 2013 is btw designed to work without session affinity/persistence, see https://blogs.technet.microsoft.com/exchange/2014/03/05/load-balancing-in-exchange-2013/).

This left us no other choice than to look for alternative load balancers. We finally settled for HAProxy, as the price tag was just right (free). That said, I ALMOST had to throw in the towel with HAProxy also, as the Mac Outlook clients wouldn’t work no matter what. Luckily I got it sorted out in the end though, more about that later on.

The SNAT/client IP dilemma is a big deal, but the whole architecture/algorithm/method behind it isn’t really the point of this blog post. None the less, you should read at least some homework. Here are a couple of nice articles describing the dilemma and also different load balancing methods:

HAProxy: Microsoft Exchange 2013 architectures (check the limitations in reverse-proxy mode/source NAT)
Logging Client IP Address in IIS When Using Load Balancing with Source NAT
What are the best load balancing methods and algorithms?

Now that you know a little bit more about the LB methods, it’s time to think about how to configure HAProxy itself. HAProxy with Exchange 2013 (2016), that is.

First off, you’ll need L7 load balancing (http), so you’ll get the possibility to insert the x-forward-for header. This is the trick for getting the client IP in the logs (See https://www.loadbalancer.org/blog/iis-and-x-forwarded-for-header/ for information how to configure x-forward-for on the Exchange servers). I found a very nice blog post describing how to install and configure HAProxy for Exchange, “Highly Available L7 Load Balancing for Exchange 2013 with HAProxy”. I have to say it’s TOTALLY AWESOME. I couldn’t have done the configuration without help from this blog post. No other article I found on the Internet had such deep detail and demonstration regarding L7 load balancing for Exchange. That said, I added some custom stuff to the configuration file, and I also configured/installed HAProxy + keepalived a bit different (easier) than in the above guide. Well, enough talking. Here are my steps, based on Zoltan’s blog post:

  • I didn’t install a PKI infrastructure. Most of you probably have a working PKI infrastructure in production already.
    • I use public certificates on Exchange so I have no need for an internal PKI (in this specific case).
  • I didn’t install any Exchange servers either (obviously).
  • I installed CentOS 7 (two servers) in cooperation with our Linux team. This way I got the optimal installation (no extra crap, and centralized management with Puppet).
  • I started following the guide from part 5, http://ezoltan.blogspot.com.au/2014/10/highly-available-l7-load-balancing-for.html
    • Please read the chapter Brief HAProxy Certificate Primer to get an idea of what you’re trying to accomplish!
    • Take note that we’re not doing SSL offloading, we’re in fact doing SSL bridging


Certificate preparation

  • I’m using a public certificate, so there’s no need to update the root and intermediate cert store stuff (yet). (In fact the intermediate certificate needed some configuration, more about that later on).
  • I started following the guide more to the letter from the chapter Upload the Exchange Certificate and Private Key onwards
  • I extracted the private key from the pfx file and removed the password protection from the private key. When asked, I entered the password gotten from the public certificate provider. I then entered a new PEM pass phrase (just pick a new one):

           haproxy_extract_private_key

  • Now it’s time to remove the password protection from the private key. You’ll be prompted for the PEM pass phrase entered in the above step:

           haproxy_remove_pw_from_private_key

  • We’re now ready for the final stage – extracting the certificate from the pfx file:

           haproxy_extract_certificate_from_pfx_file

  • We now have all files needed, and we just need to combine the certificate and the private key files, as HAProxy doesn’t allow use of separate files.
    • cat exchange_certificate.pem exchange_private_key_nopassword.pem > exchange_certificate_and_key_nopassword.pem
  • Moved the file to its final destination:
    • mv exchange_certificate_and_key_nopassword.pem /etc/ssl/certs/
    • I’ll now copy/paste Zoltan; “Well, let’s give ourselves a pat on the shoulder, we deserve it. We are through the most difficult part, at least in my opinion, of this lab. Well done!” 🙂 I have to agree with the guy here…


HAProxy installation

I did NOT compile HAProxy from scratch, instead I just yum installed the HAProxy package. Much more straight forward. Here are my steps:

  • yum install haproxy
  • I used a “dummy” haproxy.conf –file (for Exchange). It was modified down the road, see the working example from the config file chapter later on.
  • Apart from the info in the blog, you should also edit another line in rsyslog.conf. Add local0.none to the following line:
    • *.info;mail.none;authpriv.none;cron.none,local0.none          /var/log/messages
  • There’s no need to create a log rotate-script when yum installing HAProxy, it gets created automatically!
    • I edited the log rotate-script and changed the rotate parameter to “30”. One month is a suitable time for us to keep the logs.
  • Same thing goes for HAProxy automatic startup at boot. There’s no need for complicated scripts, just execute the following command instead:
    • systemctl enable haproxy:

              haproxy_autostart_centos

  • I then configured the firewall.
  • You should now do some testing. I had previously done some tests in my virtual environment, so I had no need for any tests right now.
  • Thus far, everything is working:

          haproxy_service_status_ok

  • Happy days!
 

HAProxy HA

Now that we have one node working (master), it’s time to think about High Availability. I continued following the excellent guide at http://ezoltan.blogspot.com.au/2014/10/highly-available-l7-load-balancing-for_48.html. Yet again had some changes in my environment. Comments below:

  • I did not compile keepalived from scratch, instead I yum installed it.
  • Added net.ipv4.ip_nonlocal_bind=1 to /etc/sysctl.conf
  • No need to create keepalived.conf, it’s pre-created when yum installed.
  • Edited keepalived.conf to match our environment (copy pasted the blog config and edited email / interface / IP parameters)
  • Edited the hosts file following the blog information
  • There’s yet again no need for a startup script when you have yum installed. Keepalived will autostart at every boot when you execute the following:
    • systemctl enable keepalived
  • I made firewall changes based on the blog.
  • Did all the tests, everything worked like a charm 🙂
  • Made the same changes to the other server/node (backup)
    • priority was set to a lower value than on master node
    • other small changes which are written in Zoltan’s blog
  • Did keepalived-testing following the blog. Everything was fine! 🙂
 

Testing

This has to be my favorite chapter from Zoltan’s blog. I have to say he does a VERY good job explaining all the testing and troubleshooting. READ IT CAREFULLY! I myself also noticed “weird” clients connecting to the “unspecified protocol” back-end “be_ex2013”. If all ACL’s match, there should be no traffic passing through this back-end. I found some autodiscover and ews urls that had mixed upper/lower case letters however. This was easily fixed by adding a few more ACL’s. I’ll paste the config (including the ACL’s) in the next chapter so you’ll get a better understanding of the whole thing.


Config file, haproxy.conf

Well, this is the most important part of the whole setup, no doubt. Also the most time consuming. Here’s the config, I’ll explain it in more detail after the paste:

#---------------------------------------------------------------------
# Example configuration for a possible web application.  See the
# full configuration options online.
#
#   http://haproxy.1wt.eu/download/1.4/doc/configuration.txt
#
#---------------------------------------------------------------------

#---------------------------------------------------------------------
# Global settings
#---------------------------------------------------------------------

global
    # to have these messages end up in /var/log/haproxy.log you will
    # need to:
    #
    # 1) configure syslog to accept network log events.  This is done
    #    by adding the '-r' option to the SYSLOGD_OPTIONS in
    #    /etc/sysconfig/syslog
    #
    # 2) configure local2 events to go to the /var/log/haproxy.log
    #   file. A line like the following can be added to
    #   /etc/sysconfig/syslog
    #
    #    local2.*                       /var/log/haproxy.log
    #

    log         127.0.0.1 local2 info
    chroot      /var/lib/haproxy
    pidfile     /var/run/haproxy.pid
    user        haproxy
    group       haproxy
    daemon

    # turn on stats unix socket
    stats socket /var/run/haproxy.stat     


#--------------------------
# SSL tuning / hardening
#--------------------------
    ssl-default-bind-options no-sslv3
    ssl-default-bind-ciphers ECDH+AESGCM:DH+AESGCM:ECDH+AES256:DH+AES256:ECDH+AES128:DH+AES:RSA+AESGCM:RSA+AES:!aNULL:!MD5:!DSS
    ssl-default-server-options no-sslv3
    ssl-default-server-ciphers ECDH+AESGCM:DH+AESGCM:ECDH+AES256:DH+AES256:ECDH+AES128:DH+AES:RSA+AESGCM:RSA+AES:!aNULL:!MD5:!DSS
    tune.ssl.default-dh-param 2048
   
#---------------------------------------------------------------------
# common defaults that all the 'listen' and 'backend' sections will
# use if not designated in their block
#---------------------------------------------------------------------

# Regarding timeout client and timeout server:
# https://discourse.haproxy.org/t/high-number-of-connection-resets-during-transfers-exchange-2013/1158/4

defaults
    mode                    http
    log                     global
    option                  httplog
    option                  dontlognull
    option                  forwardfor       except 127.0.0.0/8
    option                  redispatch
#   option                  contstats
    retries                 3
    timeout http-request    10s
    timeout queue           1m
    timeout connect         10s
    timeout client          15m # this value should be rather high with Exchange
    timeout server          15m # this value should be rather high with Exchange
    timeout http-keep-alive 10s
    timeout check           10s
    maxconn                 100000


#-------------------------------------------------------
# Stats section
#-------------------------------------------------------

listen stats x.x.x.x:444 # VIP
        stats enable
        stats refresh 300s
        stats show-node
        stats auth admin:xxxxxx
        stats hide-version
        stats uri  /stats


#---------------------------------------------------------------------
# Main front-end which proxies to the back-ends
#---------------------------------------------------------------------

frontend fe_ex2013
# http-response set-header Strict-Transport-Security max-age=31536000;\ includeSubdomains;\ preload
  http-response set-header X-Frame-Options SAMEORIGIN
  http-response set-header X-Content-Type-Options nosniff
  mode http
  bind *:80
  bind *:443 ssl crt /etc/ssl/certs/exchange_certificate_and_key_nopassword.pem
  redirect scheme https code 301 if !{ ssl_fc }   # redirect 80 -> 443 (for owa)
  acl autodiscover url_beg /Autodiscover
  acl autodiscover url_beg /autodiscover
  acl mapi url_beg /mapi
  acl rpc url_beg /rpc
  acl owa url_beg /owa
  acl owa url_beg /OWA
  acl eas url_beg /Microsoft-Server-ActiveSync
  acl ecp url_beg /ecp
  acl ews url_beg /EWS
  acl ews url_beg /ews
  acl oab url_beg /OAB
  use_backend be_ex2013_autodiscover if autodiscover
  use_backend be_ex2013_mapi if mapi
  use_backend be_ex2013_rpc if rpc
  use_backend be_ex2013_owa if owa
  use_backend be_ex2013_eas if eas
  use_backend be_ex2013_ecp if ecp
  use_backend be_ex2013_ews if ews
  use_backend be_ex2013_oab if oab
  default_backend be_ex2013


#------------------------------
# Back-end section
#------------------------------

backend be_ex2013_autodiscover
  mode http
  balance roundrobin
  option httpchk GET /autodiscover/healthcheck.htm
  option log-health-checks
  http-check expect status 200
  server exchange1 1.1.1.1:443 check ssl inter 15s verify required ca-file /etc/ssl/certs/ca-bundle.crt
  server exchange2 2.2.2.2:443 check ssl inter 15s verify required ca-file /etc/ssl/certs/ca-bundle.crt


backend be_ex2013_mapi
  mode http
  balance roundrobin
  option httpchk GET /mapi/healthcheck.htm
  option log-health-checks
  http-check expect status 200
  server exchange1 1.1.1.1:443 check ssl inter 15s verify required ca-file /etc/ssl/certs/ca-bundle.crt
  server exchange2 2.2.2.2:443 check ssl inter 15s verify required ca-file /etc/ssl/certs/ca-bundle.crt


backend be_ex2013_rpc
  mode http
  balance roundrobin
  option httpchk GET /rpc/healthcheck.htm
  option log-health-checks
  http-check expect status 200
  server exchange1 1.1.1.1:443 check ssl inter 15s verify required ca-file /etc/ssl/certs/ca-bundle.crt
  server exchange2 2.2.2.2:443 check ssl inter 15s verify required ca-file /etc/ssl/certs/ca-bundle.crt


backend be_ex2013_owa
  mode http
  balance roundrobin
  option httpchk GET /owa/healthcheck.htm
  option log-health-checks
  http-check expect status 200
  server exchange1 1.1.1.1:443 check ssl inter 15s verify required ca-file /etc/ssl/certs/ca-bundle.crt
  server exchange2 2.2.2.2:443 check ssl inter 15s verify required ca-file /etc/ssl/certs/ca-bundle.crt


backend be_ex2013_eas
  mode http
  balance roundrobin
  option httpchk GET /microsoft-server-activesync/healthcheck.htm
  option log-health-checks
  http-check expect status 200
  server exchange1 1.1.1.1:443 check ssl inter 15s verify required ca-file /etc/ssl/certs/ca-bundle.crt
  server exchange2 2.2.2.2:443 check ssl inter 15s verify required ca-file /etc/ssl/certs/ca-bundle.crt


backend be_ex2013_ecp
  mode http
  balance roundrobin
  option httpchk GET /ecp/healthcheck.htm
  option log-health-checks
  http-check expect status 200
  server exchange1 1.1.1.1:443 check ssl inter 15s verify required ca-file /etc/ssl/certs/ca-bundle.crt
  server exchange2 2.2.2.2:443 check ssl inter 15s verify required ca-file /etc/ssl/certs/ca-bundle.crt


backend be_ex2013_ews
  mode http
  balance roundrobin
  option httpchk GET /ews/healthcheck.htm
  option log-health-checks
  http-check expect status 200
  server exchange1 1.1.1.1:443 check ssl inter 15s verify required ca-file /etc/ssl/certs/ca-bundle.crt
  server exchange2 2.2.2.2:443 check ssl inter 15s verify required ca-file /etc/ssl/certs/ca-bundle.crt


backend be_ex2013_oab
  mode http
  balance roundrobin
  option httpchk GET /oab/healthcheck.htm
  option log-health-checks
  http-check expect status 200
  server exchange1 1.1.1.1:443 check ssl inter 15s verify required ca-file /etc/ssl/certs/ca-bundle.crt
  server exchange2 2.2.2.2:443 check ssl inter 15s verify required ca-file /etc/ssl/certs/ca-bundle.crt


backend be_ex2013
  mode http
  balance roundrobin
  server exchange1 1.1.1.1:443 check ssl inter 15s verify required ca-file /etc/ssl/certs/ca-bundle.crt
  server exchange2 2.2.2.2:443 check ssl inter 15s verify required ca-file /etc/ssl/certs/ca-bundle.crt


#######################################
# End of Exchange's own protocols,
# STMP and IMAP next
########################################


frontend fe_exchange_smtp
    mode tcp
    option tcplog
    bind x.x.x.x:25 name smtp # VIP
    default_backend be_exchange_smtp
 
backend be_exchange_smtp
    mode tcp
    option tcplog
    balance roundrobin
    option log-health-checks
    server exchange1 1.1.1.1:25 weight 10 check
    server exchange2 2.2.2.2:25 weight 20 check

#only port 25 needed in our case. The port is open (only) against our Postfix server, which handles the outgoing mail traffic (MTA). In other words, we're using an external send connector in Exchange.

 
frontend fe_exchange_imaps
    mode tcp
    option tcplog
#   bind x.x.x.x:143 name imap  # NO unencrypted imap traffic allowed...
    bind x.x.x.x:993 name imaps # ssl crt /etc/ssl/certs/exchange_certificate_and_key_nopassword.pem  <-- No need, certificate is read straight from the Exchange servers.
    default_backend be_exchange_imaps
 
backend be_exchange_imaps
    mode tcp
    option tcplog
#   balance roundrobin
    balance leastconn
    option log-health-checks
#   stick store-request src
#   stick-table type ip size 200k expire 30m
#   option tcp-check
#   tcp-check connect port 143
#   tcp-check expect string * OK
#   tcp-check connect port 993 ssl
#   tcp-check expect string * OK
    server exchange1 1.1.1.1:993 weight 10 check
    server exchange2 2.2.2.2:993 weight 20 check


Explanations:

For obvious reasons, all IP addresses are censored.

SSL tuning / hardening section was added by me for additional security. As said in many blog posts before, I care about server security. More information regarding this can be found at: http://www.mattzuba.com/2015/07/hardening-haproxy-for-an-a-rating/ for example. At the same time the http-response set-header X-Frame-Options SAMEORIGIN and http-response set-header X-Content-Type-Options nosniff options were added. I still left the option # http-response set-header Strict-Transport-Security max-age=31536000;\ includeSubdomains;\ preload commented though. These options are required when aiming for a A+ score on Qualys SSL Labs SSL Server test.

Btw, HAProxy can also protect you from DDOS attacks and other attacks. Have a look at

https://www.haproxy.com/blog/use-a-load-balancer-as-a-first-row-of-defense-against-ddos/
https://www.loadbalancer.org/blog/simple-denial-of-service-dos-attack-mitigation-using-haproxy-2/

for more information.


Stats section was added to get some nice stats. You can uncomment the the line  #option contstats to get continuous statistics. At the moment it require a manual webpage refresh.

I added http to https redirect on the main front-end with the line: redirect scheme https code 301 if !{ ssl_fc }

I added new ACL’s so the back-ends would fetch every combination of Autodiscover and so forth:

acl autodiscover url_beg /Autodiscover
acl autodiscover url_beg /autodiscover

acl owa url_beg /owa
acl owa url_beg /OWA

acl ews url_beg /EWS
acl ews url_beg /ews


I added a SMTP and IMAP section. We only need port 25 (smtp) to be open, as Postfix is taking care of sending the emails. Exchange only hands them over to Postfix (send connector). IMAPs on the other hand is open to the world, even though we don’t have many users accessing Exchange using imap. (Unencrypted imap isn’t allowed at all). You can use different techniques for configuring imaps (available in comments), but I’ve chosen to use the easiest one. Also note that SMTP and IMAP are using Layer 4 (tcp) load balancing, opposite to Exchanges own protocols. That said, you can still get the imap client IP’s straight from haproxy’s log file (instead of IIS on Exchange).


Problem solving

Apart from mega problems with Mac (sigh), we also had a hiccup with non-domain joined Windows clients. I had to scratch my head quite a bit before finding the reason why a client would prompt for credentials even though the certificate was correctly applied in HAProxy. Well, it turned out to be a certificate problem after all, and Zoltan briefly even described it in Part 5 of his blog:

By the way, even if you acquire a certificate from a commercial CA, there are no guarantees that its intermediate and root CA certificates will come pre-canned with CentOS 7 (or any Linux flavour as a matter of fact), so it is good to know the procedure anyway, just in case”.

I happened to miss this part though, so I was very confused. At the moment I don’t even remember what pointed me in the right direction, but the solution was indeed to add the intermediate certificate from our certificate provider into the .pem file created earlier:

cat /etc/pki/ca-trust/source/DigiCertCA.crt  > /etc/ssl/certs/exchange_certificate_and_key_nopassword.pem

DigiCertCA is automatically deployed to our Linux servers with puppet, the “only” problem was that HAProxy didn’t understand how to use it without the above trick. More information: https://www.happyassassin.net/2015/01/14/trusting-additional-cas-in-fedora-rhel-centos-dont-append-to-etcpkitlscertsca-bundle-crt-or-etcpkitlscert-pem/. Well, it now makes much more sense why it worked on domain joined Windows clients but not on other clients – the domain joined Windows clients were automatically receiving the intermediate certificate via group policies. Oh well. Live and learn 🙂

Finally, the BIGGEST problem of them all, was Outlook for Mac. What a pain in the ass. Even with the above intermediate certificate in place it wouldn’t work. I was completely clueless, and it seemed the whole Internet was equally confused. (I asked in forums for a solution to my Mac dilemma, without success). What helped me in the end, was a colleague noticing that Outlook for Mac is connecting to Exchange using old protocols. Even the newest Outlook for Mac 2016. SHAME ON YOU MICROSOFT! This however opened up a new world of googling for me. That said, here’s some information regarding the dilemma (which ISN’T a HAProxy problem btw):

https://support.microsoft.com/en-ph/help/2955530/outlook-for-mac-clients-cannot-connect-to-exchange-server
https://outlook.uservoice.com/forums/293343-outlook-for-mac/suggestions/15120408-add-support-for-tls-1-0-1-1-and-1-2
https://www.quora.com/Is-there-a-way-to-connect-Mac-Office-Outlook-2016-with-Microsoft-Exchange-Server-2007
https://answers.microsoft.com/en-us/mac/forum/macoffice2011-macoutlook/outlook-2011-to-use-sslv3/7e777e6b-9e92-4a89-8874-d357c4bdf6ef?auth=1

and the solution:

https://support.microsoft.com/en-us/help/980436/ms10-049-vulnerabilities-in-schannel-could-allow-remote-code-execution

haproxy_allowInsecureRenegotiation

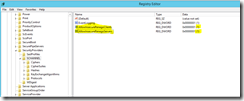
In other words, edit the registry on the Exchange servers to enable Compatible mode. And there you have it, all Mac clients can finally connect through HAProxy 🙂


Final thoughts

As said before, HAProxy’s logging mechanism is amazing. It does produce quite huge logs though – hundreds of MB’s per day. Luckily the logs are very nicely compressed, and the daily log rotated log takes up less than 100MB HDD space. That said, be sure allocate enough disk space for the logs! Analyzing the logs in depth can be a little bit cryptic, but luckily there’s documentation available. For example, check out

https://cdn.haproxy.com/wp-content/uploads/2017/07/aloha_load_balancer_memo_log.pdf for an amazing chart with all the log value codes and explanations..

The termination flags can be found in HAProxy’s own documentation: https://cbonte.github.io/haproxy-dconv/1.5/configuration.html#4-option%20dontlognull. Search for the text “The most common termination flags combinations are indicated below. They are alphabetically sorted, with the lowercase set just after the upper case for easier finding and understanding” and you’re good to go.

Here’s a random screenshot from haproxy.log:

haproxy_log_example_output


You’ll now get all the client IP’s from these logs. For obvious reasons they’re censored in the screenshot though. Furthermore, (and perhaps even more important), you can now also check the IIS logs on the Exchange servers and notice that a column (the last one) has been added for x-forward-for:

2018-06-30 23:59:42 x.x.x.x POST /mapi/emsmdb/ MailboxId=ce9fb341-8f0b-4315-b3d9-3e77591e0a18@abo.fi&CorrelationID=<empty>;&ClientId=I9XPTDBZEATAAVKDG&cafeReqId=d3cdb726-44ae-4237-9bbc-2c5e5f434e13; 443 – x.x.x Microsoft+Office/16.0+(Windows+NT+10.0;+Microsoft+Outlook+16.0.4639;+Pro) - 401 2 5 15 1.2.3.148
2018-06-30 23:59:42 x.x.x.x POST /mapi/emsmdb/ MailboxId=57c56614-6647-470d-a620-f3b1f5e2dc8f@abo.fi&CorrelationID=<empty>;&ClientId=SHDGSCWGKIOLIHQCGSKA&cafeReqId=259f647e-646b-4a62-88c9-5de42df747e7; 443 - x.x.x.x Microsoft+Office/16.0+(Windows+NT+10.0;+Microsoft+Outlook+16.0.4639;+Pro) - 401 2 5 15 1.2.3.149
2018-06-30 23:59:42 x.x.x.x POST /mapi/emsmdb/ MailboxId=43aacf1f-5def-4d3d-9fdb-899ba3c49ec3@abo.fi&CorrelationID=<empty>;&ClientId=IQWDWWOIDUSFPCVQTPW&cafeReqId=4d9bc40c-3d2d-4771-a0bb-024d32ea509c; 443 - x.x.x.x Microsoft+Office/16.0+(Windows+NT+10.0;+Microsoft+Outlook+16.0.4639;+Pro) - 401 2 5 0 1.2.3.30
2018-06-30 23:59:42 x.x.x.x POST /mapi/emsmdb/ MailboxId=57c56614-6647-470d-a620-f3b1f5e2dc8f@abo.fi&CorrelationID=<empty>;&ClientId=SHDGSCWGKIOLIHQCGSKA&cafeReqId=c064ab51-5e49-4c86-9e22-ba7a33ca7223; 443 - x.x.x.x Microsoft+Office/16.0+(Windows+NT+10.0;+Microsoft+Outlook+16.0.4639;+Pro) - 401 1 2148074254 0 1.2.3.14

The last column (“1.2.3.x” ) in the above log snippet is the real client IP (obviously censored yet again).

And there we have it. Logging problem solved! 🙂 Now we can finally start tracking down the bad guys…

Content Database upgrade from SharePoint 2013 to SharePoint 2016 including tweaks and problem solving

As promised, here’s the follow-up blog post to Installing and configuring SharePoint 2016 on-prem (with a combination of PowerShell and Configuration Wizards). Now that SharePoint is up ‘n running with the needed services, it’s time to think about the content. The team site created in the previous blog post had no content, so now we need to import the old content (database) from SharePoint 2013. This is done by upgrading the content database from SharePoint 2013 to SharePoint 2016. Part of the upgrade process happen on the SQL server, as you have to move the existing content database (file) from the old SQL server to the new one. At least this was the case for us, as we also deployed a brand new SQL server (2016) together with SharePoint 2016.

After the content database upgrade process is done, I’ll discuss how to check the status of the upgrade and how to remove old MySites. I’ll also cover Health Analyzer/Timer Job/Event Viewer problem solving, but for now, let’s focus on the content database upgrade. I’m yet again a huge fan of Shane Young’s videos, and in this specific case the video Content database upgrade from SharePoint 2013 to SharePoint 2016.

If you prefer printed text instead of videos, here are a couple of links to get you going:

https://docs.microsoft.com/en-us/SharePoint/upgrade-and-update/overview-of-the-upgrade-process
https://docs.microsoft.com/en-us/SharePoint/upgrade-and-update/create-the-sharepoint-server-2016-farm-for-a-database-attach-upgrade
https://docs.microsoft.com/en-us/SharePoint/administration/move-all-databases
https://www.advaiya.com/blog/how-to-migrate-sharepoint-server-2013-to-sharepoint-server-2016/


Here are my own (video)steps recapped:

  • Had a look at our current (old) SharePoint Server to check the content database in use (CA –> Application Management –> Manage content databases):

          sp2016_cdb_view_current_cdbs

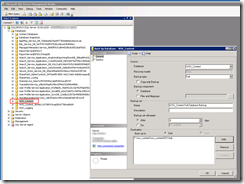
  • Went to the old SQL server and looked up the same database (note the ugly DB names btw 🙂 )
    • Right clicked the DB and chose “Tasks –> Back Up…”:

                sp2016_cdb_view_current_cdbs_from_old_sql_management_studio


  • On the NEW SQL server, I right clicked on Databases -> Restore Database.
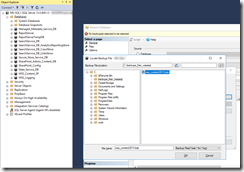
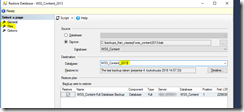
    • I chose the previously backed up database, which was located in c:\backups_from_vasasql:

                sp2016_cdb_restore_cdb_in_sql_management_studio

    • I renamed the database during restore:

                sp2016_cdb_restore_cdb_in_sql_management_studio_choose_name_to_restore

    • I also checked the “Files” tab
      • Nothing to change in my case. The file names were already in the correct format (wss_content_2013.mdf and wss_content_2013_log.LDF).
      • Clicked OK and waited for the restore.
      • Done!


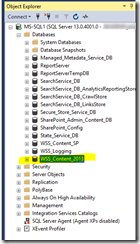
  • After a successful restore, I had a look at the database (note the nice DB names btw 🙂 ):

          sp2016_cdb_restored_on_the_new_sql_server

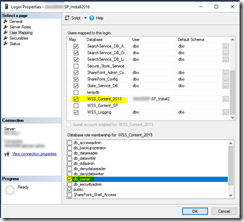
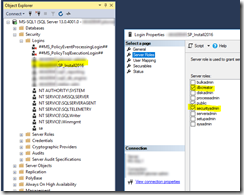
  • I gave the SP_Install2016 account permissions to this newly imported database:
    • Security –> Logins
    • SP_Install2016, Properties
    • Went to the page/tab “User Mapping”
      • put a tick in “WSS_Content2013” and “db_owner”

                sp2016_cdb_access_rights_to_imported_cdb

    • Now moving over to the SharePoint server(s).


On the old SharePoint server…

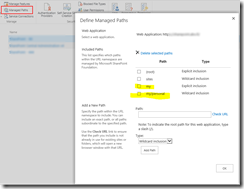
  • checked which managed paths are defined.
    • SP CA –> Manage Web Applications –> Managed Paths:

              sp2016_cdb_check_current_managed_paths

    • my and my/personal are the managed paths that were created from the old “next, next, next-installation”. Not nice. However, I did create these same managed paths on the new server so the content database will have same “layout” after the migration.


On the new SharePoint server…

  • I added the above paths on the new server.
  • We now have to delete the current (empty) content database to avoid conflicts when importing the old one.
    • Go to SP CA –> Application Management –> Databases –> Manage content databases
    • Click on the database name (and check that the portal web application is selected).
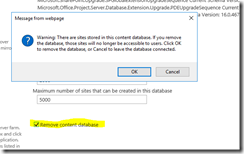
    • Scroll down until you find “remove content database”

             sp2016_cdb_remove_content_db

    • Click OK to remove it.
  • The content database list is now empty:

            sp2016_cdb_content_databases_overview_empty_list_after_deletion


  • It’s now time to import the migrated content database.
    • Shane will actually test the DB before importing it. However, during my tests, I found it easier to first import the database, and do the testing afterwards.Otherwise there are no sites to test against.
    • I actually knew that I had some missing components (intentionally not installed on the new server), and these were easier to deal with after the import.
  • So, we start off by importing/mounting the DB.
    • Start SharePoint 2016 Management Shell as an administrator. Run the following PowerShell command (which I will yet again only provide as a picture):

                sp2016_cdb_mount-spcontentdatabase_powershell

  • It takes some time to complete. In my case it took about 10 minutes. The end result will look something like this:

           sp2016_cdb_mount-spcontentdatabase_powershell_complete

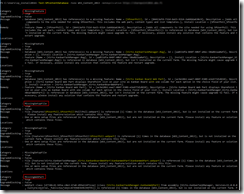
  • I’ll now test the content database for errors. As suspected, the following errors were thrown at me:

           sp2016_cdb_test-spcontentdatabase_powershell_error_overview

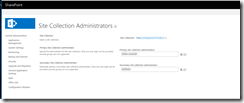
                      sp2016_cdb_change_site_collection_administrators

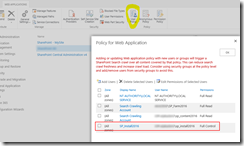
      • another way of adding access to a web application is by changing the policy.
        • SP CA –> Manage web applications –> User policy

                         sp2016_cdb_policy_for_web_application

        • here we give the SP_Install2016 account full permission (which is needed when entering PowerShell commands etc.)
        • I’m not going to copy/paste every single command I ran, so just have a look at the above links and try it yourself.
  • We’re now ready to have a look at the upgrade status.


(Content database) Upgrade Status

Case: Everything seemed to be working fine when/after you upgraded the content database, and you saw no obvious errors during the upgrade. Still, when looking in SP CA –> Upgrade and Migration –> Check upgrade status, you noticed that something went wrong/wasn’t upgraded. This was at least the case for us:

sp2016_cdb_content_databases_upgrade_status

There’s both a Failed and a Succeeded run in the screenshot, as I managed to fix the problem. The problem was luckily quite easily fixed with hints from:

http://www.sharepointdiary.com/2014/02/upgrade-available-server-status-after-sharepoint-patching.html (just hints, not the actual solution)
https://support.microsoft.com/en-us/help/3157397/upgrade-available-status-in-new-sharepoint-server-2016-farm (solution)

All “symptoms” were true in the second link, and here’s just the first symptom checked:

SP CA –> System Settings –> Servers –> Manage servers in this farm:

sp2016_cdb_configuration_database_upgrade_status

Yes, an upgrade was available.


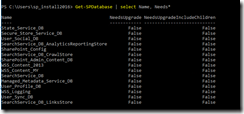
I double checked the same thing using PowerShell:

Get-SPDatabase | select Name, Needs*

The output looked something like this (I’ve cut out the names that didn’t need an upgrade):

Name                                                 NeedsUpgrade        NeedsUpgradeIncludeChildren
——-                                                 ——————         ————————————–
Secure_Store_Service_DB                True                        True
SharePoint_Admin_Content_DB        True                        True
Managed_Metadata_Service_DB       True                        True


I also ran stsadm -o localupgradestatus  to get a summary::

[3] content database(s) encountered.
[1] content database(s) still need upgrade or cannot be upgraded.
[20] site collection(s) are contained in the content databases.
[0] site collection(s) still need upgrade.
[32] other objects encountered, [2] of them still need upgrade or cannot be upgraded.


As said, all symptoms in the second link were true, so I applied the “fix”:

To resolve this issue, use one of the following methods:

1. Run the following in the SharePoint 2016 Management Shell to upgrade the compoments in the Central Administration database:

Get-SPWebApplication <Central Administration URL> | Get-SPContentDatabase | Upgrade-SPContentDatabase

sp2016_cdb_upgrade_central_admin_components_powershell1

It took a couple of minutes to complete.

2. Run the SharePoint 2016 Products Configuration Wizard from the command line:

PSConfig.exe -cmd upgrade -inplace b2b -wait -force -cmd applicationcontent -install -cmd installfeatures -cmd secureresources”

sp2016_cdb_upgrade_central_admin_components_powershell2

sp2016_cdb_upgrade_central_admin_components_powershell3

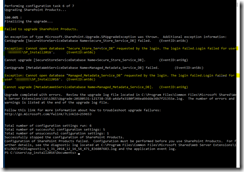
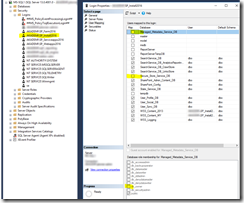
Well, that didn’t go exactly as planned. It was mostly my own mistake though, as I ignored the error I got from the Get-SPFarm | Get-SPPendingUpgradeActions –recursive command 🙂 That said, it was easily fixed with information found at https://docs.microsoft.com/en-us/SharePoint/upgrade-and-update/troubleshoot-database-upgrade-issues-in-sharepoint-2013. The SP_Install2016 account once again needed more permissions on the SQL server:

sp2016_cdb_upgrade_central_admin_components_settings_sql_rights


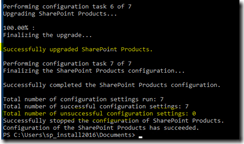
I then ran the above PSConfig.exe command again:

sp2016_cdb_upgrade_central_admin_components_powershell_upgrade_success

Yes, happy days 🙂


Further checks:

SharePoint CA -> System Settings -> Manage servers in this farm:

sp2016_cdb_configuration_database_upgrade_status_no_action_required


SharePoint CA -> Upgrade and Migration-> Review database status:

sp2016_cdb_manage_databases_upgrade_status_ok


via PowerShell:

sp2016_cdb_get-spdatabase_needsupgrade_yes_no_powershell

Everything looks OK!

…and as seen in the first screenshot in this chapter, the “Upgrade Status” is now also “Succeeded”. Happy days, everything is working! I’ll now move over to some tweaking and problem solving instead.


Removing old MySite Site Collections

During the content database migration/import, a bunch of MySites were also imported. To my knowledge, these were in minimal or no usage at all (and had been auto created). My solution was to remove all the unnecessary MySite site collections from the content database. Overall, it was a quite easy procedure based on information found at:

https://sharepoint.stackexchange.com/questions/111263/powershell-delete-remove-all-site-collection-under-a-spesific-managed-path

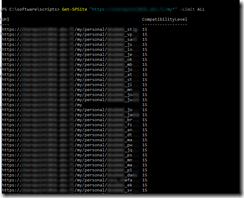
The command Get-SPSite “https://host.yourdomain.com/my*” –Limit ALL will list all current MySites (which are located under the default web application). This is the default location for MySites when using setup wizards to install SharePoint. Let me copy/paste some information regarding this dilemma:

“At first  having My Site host configured on the default web application may not be a big issue but in the medium to large farm deployment scenarios, you would like to configure the My Site host on the dedicated web application. This would allow organizations to configure the My Sites taxonomy, topology, security, and storage allocations on the dedicated web application running in its own IIS application pool under dedicated service account”.

Source: https://nikpatel.net/2011/06/23/why-you-shouldnt-use-the-farm-configuration-wizard-to-build-production-sharepoint-2010-farm/

Here’s an example output from the above Get-SPSite command:

sp2016_cdb_get-spsite_mysites

As seen from the screenshot, MySites are scattered all over the default web application. Not cool – it gets very cramped in the default web application. Instead, we want to have more control and put the MySite host on a separate web application, my.domain.com for example. This won’t bloat your default web application, and allows for more flexibility and control. I won’t go through the configuration though, as it’s already covered in the post Installing and configuring SharePoint 2016 on-prem (with a combination of PowerShell and Configuration Wizards). Well, back to removing the MySites from the default web application. It’s also easily done with one PowerShell command. BEFORE running this command however, we need to take a backup of the old MySites, JUST IN CASE. Information regarding backup/restore can be found at:

https://social.msdn.microsoft.com/Forums/sharepoint/en-US/de4c8066-035b-4bd6-b3b4-ef0816db4b7e/move-mysites-to-its-own-web-application?forum=sharepointcustomization
https://community.spiceworks.com/scripts/show/1824-export-spsite-export-a-sharepoint-site-to-file (Remember to change the $RootSite parameter)
https://community.spiceworks.com/scripts/show/1837-import-spsite-import-sharepoint-site (Remember to change the $RootSite parameter)
https://sharepoint.stackexchange.com/questions/116422/moving-site-collection-to-a-different-web-application (wouldn’t work for me…)

I had to modify the script in the first link to get it working as intended:

sp2016_cdb_exporting_mysites_for_backup_script

There’s no parameter named “-Path”, instead you should use “-ExportPath”. The script wouldn’t work as intended with the “+ bak” –thing either, so I just removed it. I had no use for .bak extensions on the mysite backups. (If the .bak-part is left unmodified, the script will just create a new directory named “.bak” inside the c:\backup directory, and store all the separate mysite directories inside that directory. This is not the desired effect).

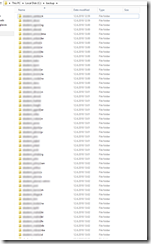
A quick check in c:\backup shows that everything seem ok:

sp2016_cdb_mysites_backup_overview_in_explorer

All MySites are now backed up. The filenames are in the form “$mysite.Name”, which would be domain_username in our case. Even though everything seemed ok, it wasn’t. The log files inside the directories had errors suggesting that my account needed more permissions. Even with the current account added as a Farm administrator and an administrator on the server itself, it wouldn’t work. After much googling I also tried https://social.technet.microsoft.com/Forums/office/en-US/e70019ef-7b18-4fbb-8825-004db9b7deb8/error-while-exporting-subsite-in-share-point-2013-object-reference-not-set-to-an-instance-of-an?forum=sharepointgeneral without success. I then decided that the current backup data was “enough”. Fingers crossed.


Now that we have a backup in place, let’s return to the original PowerShell command:

Get-SPSite “https://host.yourdomain.com/my*” –Limit ALL | Remove-SPSite –Confirm:$false

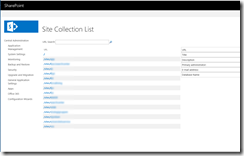
Be warned! The above command will delete all MySite site collections (from the content database). A quick look from the Central Admin confirm that all MySites are gone:

sp2016_site_collection_list_mysites_removed

Yep, all host.domain.com/my/personal/xxxxxx site collections are gone (even though safely backed up).

All NEW MySites will instead be created in their own web application (my.domain.com), because we configured it this way in my previous blog post. The my.domain.com web application doesn’t include the my and my/personal managed paths, because they aren’t needed (and weren’t manually created). Instead, the my.domain.com web application just include the standard managed paths (/personal and /sites). All new MySites will now automatically be created in my.domain.com/personal/username. Good! If I ever want/need to migrate stuff from the old MySites (I doubt it), it’s doable with the backup/restore explained in the links earlier. This is good enough for me. This also quite much summarizes the MySite-part of this blog post. Now let’s look at some other things instead.


Health Analyzer, Timer Job and Event Viewer problem solving

Health Analyzer problems

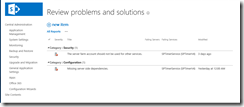
Now that you have upgraded the content database and (think) you have a working environment, it’s time to look at the things that aren’t working 🙂 Start by going to SP CA –> Monitoring –> Health Analyzer –> Review problems and solutions. (Your results may vary, and here I’ll present our “health problems”):

sp2016_cdb_health_analyzer_problems

I have the missing server side dependencies problem “under control”, or lets say that at least I know what the problem is. As discussed earlier, the problem is that some features that were enabled on the old server aren’t enabled on this new server (and won’t be). The solution is to manually delete these features etc. from the content database, following information found at:

http://get-spscripts.com/2011/06/removing-features-from-content-database.html
http://get-spscripts.com/2011/06/diagnosing-missingsetupfile-issues-from.html
http://get-spscripts.com/2011/08/diagnose-missingwebpart-and.html

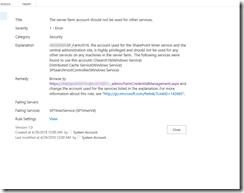
The next “issue” regarding the server farm account is actually a false positive:

sp2016_cdb_health_analyzer_problems2

I’m however following best practices regarding the accounts so I have nothing to worry about. Some more information regarding this false positive:

“Do not change Search Host Controller. For the other services, use one service account for all Service Applications (Instances). There’s no reason to use multiple and will just waste memory/slow down startup time. – Trevor Seward Feb 19 ’17 at 15:06

Thank you for your quick reply, Last query please, Why Host Controller is listed in this case ? and could you please tell me, can I create one service account to run UPS and search? – Mohamed El-Qassas MVP Feb 19 ’17 at 21:35

Because the health rule has no intelligence. It is one of those you will eventually just disable, similar to the 5x RAM free disk space one. Health analyzer rules aren’t hard and fast “best practice”. They’re inflexible and Microsoft isn’t updating them as the product improves; e.g. it will still tell you that 200GB is the limit for content databases, which is far from the truth. – Trevor Seward Feb 19 ’17 at 21:37 “

Source: https://sharepoint.stackexchange.com/questions/208483/the-server-farm-account-should-not-be-used-for-other-services-issue

Furthermore:

SharePoint 2013 Distributed Cache recommendations

The AppFabric “Windows” service should not be touched at all, meaning, don’t change the account manually, nor start/stop the service or change the password for the account. Only exception would be that someone changed the account manually before, and you only want to revert back to the one AppFabric is aware of, but even then it might be better to simply remove and add the server as a Cache Host instead.”

Source: https://blogs.technet.microsoft.com/filipbosmans/2015/10/16/sharepoint-2013-distributed-cache-recommendations/

So, the solution would be to ignore the warning 🙂


Timer Job errors

Go to SP CA –> Monitoring –> Timer Jobs –> Check job status –> Job History (menu on the left). Choose “View: failed jobs” in the upper right corner:

sp2016_cdb_timer_job_history_view_errors

Here you’ll find all the failed timer jobs. I’ve been lucky since I’ve got only one failed job 🙂 (Well, I did have a couple more, but they sorted themselves out after a server reboot and some other stuff I can’t remember right now).

Clicking the “Failed” text will get you more information:

sp2016_cdb_timer_job_history_view_errors_in_detail

Unexpected exception in FeedCacheService.IsRepopulationNeeded: Cache cluster is down, restart the cache cluster and Retry


This is actually the same information that you’ll find in event viewer:

sp2016_cdb_timer_job_error_in_event_viewer


I googled yet again and stumbled upon the following links:

https://blogs.technet.microsoft.com/saantil/2013/03/31/distributed-cache-in-sharepoint-2013-unexpected-exception-in-feedcacheservice-isrepopulationneeded-cache-cluster-is-down-restart-the-cache-cluster-and-retry/
https://social.technet.microsoft.com/Forums/lync/en-US/32e367df-8d79-46a0-9bfe-914f7e8b6492/cache-cluster-is-down-restart-the-cache-cluster-and-retry?forum=sharepointadminprevious
https://ahmedmadany.wordpress.com/2016/02/26/distributed-cache-service-exception-unexpected-exception-in-feedcacheservice-isrepopulationneeded-cache-cluster-is-down-restart-the-cache-cluster-and-retry/
https://guidesharepoint.wordpress.com/2015/05/19/distributed-cache-in-sharepoint-2013-unexpected-exception-in-feedcacheservice-isrepopulationneeded-cache-cluster-is-down-restart-the-cache-cluster-and-retry/

The solution to remove and re-add the Distributed Cache service seemed a bit far fetched. I also checked the third link that mention permissions and accounts, and that part was already OK. I did not try the solution in the fourth link. However, the comment in the second link, “If you can browse your mysite or create a new my site for users it means it’s working. Also check if news feed is updating” made most sense to me. And yes, everything SEEMS to be working so I’ll be ignoring this error for now. Time will tell.


Another test would be to run the Troubleshooting Distributed Cache for SharePoint 2013 On Premise script, found at:

https://gallery.technet.microsoft.com/Distributed-Cache-6e8ace1a

and the “manual” for the script found at:

https://blogs.technet.microsoft.com/filipbosmans/2015/09/07/how-to-check-for-issues-with-distributed-cache-and-the-script/

So, just to be sure, I ran the script:

sp2016_cdb_distributed_cache_check_script

After inspecting the output logs (using information from the second link), I found absolutely no errors. This now confirms my theory “time will tell” (if there’s a problem or not).


Event Viewer errors

The event viewer didn’t actually contain that much critical stuff of relevance. However, one reoccurring error kept popping up: Distributed COM – Event ID 10016. This is not a critical one, it’s more of a cosmetic fix. Some information regarding this error can be found at:

https://jwcooney.com/2017/08/27/dealing-with-event-id-10016-system-error-logs-with-a-fresh-sharepoint-installation/
https://social.technet.microsoft.com/Forums/windowsserver/en-US/dc4c2b99-72f5-40d8-8b65-6dcdfdb9c084/distributedcom-error-10016-sharepoint-server?forum=winserversecurity
http://www.wictorwilen.se/Post/Fix-the-SharePoint-DCOM-10016-error-on-Windows-Server-2008-R2.aspx
https://soerennielsen.wordpress.com/2007/04/16/fixing-those-pesky-dcom-event-log-error-10016-in-a-sharepoint-farm-environment/
https://blogs.technet.microsoft.com/sharepointcomic/2008/10/28/sharepoint-causes-dcom-errors-event-id-10016/

I myself chose to ignore this error for now. Yes, I’m a naughty boy.

Btw, same thing goes for the following errors:

Another one to ignore is “Session “SharePointDiagnostics” failed to start with the following error: 0xC0000035” – Event ID 2. According to Google, this has to do with the fact that I don’t have the Web Analytics Service installed. See:

https://sharepoint.stackexchange.com/questions/20609/no-health-reports-available-though-features-enabled
http://www.sharepointpals.com/post/SharePoint-2010-Site-Collection-and-Sites-Health-Analyzer-through-SharePoint-Web-Analytics-Services
http://iedaddy.com/2011/05/sharepoint-2010using-web-analytics/


Just ignore ‘em all, or at least I did. Do scratch your head even more if you have the energy, or focus on something more interesting/important instead 🙂


HTTP to HTTPS redirect

As a last tweak, I’ll explain how to configure http to https redirect for the main site. (No one likes to type https in front of url name anyways). This can be done either with SharePoint itself (AAM), or with IIS URL Rewrite Module 2.1. (Both methods require that port 80 is open to the Internet, and obviously that a binding for port 80 exist in IIS). I prefer the URL Rewrite method, so go ahead and grab the latest IIS URL Rewrite Module 2.1 from:

https://www.iis.net/downloads/microsoft/url-rewrite

There are many guides available for redirect, and here’s one random:

http://www.sharepointdiary.com/2015/02/redirect-http-to-https-in-sharepoint-2013.html

For more information about SharePoint AAM vs. IIS Redirect, have a look at:

https://social.technet.microsoft.com/Forums/en-US/c02b2d46-2cd1-43b2-b122-d8324790a753/np-sharepoint-http-to-https-redirect-better-to-do-with-url-rewrite-in-iis-or-aam-in-sp-safe-to?forum=sharepointgeneral

As I said before, I prefer the IIS method and a “clean” AAM.

Deploying Skype for Business 2015, including Edge and Reverse Proxy Servers

I was given the task of deploying a full-blown on-premise deployment of Skype for Business Server 2015 for a small company. The deployment also included an Edge Server and a Reverse Proxy server (IIS with ARR). In this blog post I’ll discuss the deployment process in general, and also the problems (and solutions) that were discovered during/after the deployment. I’ll end the post with some check-up/misc. information.

This blog post will be quite massive, so I’ll split it into several chapters.


Planning

General information about planning for Skype for Business Server 2015 can be found at:

https://technet.microsoft.com/en-us/library/dn951427.aspx 

However, as I’ve deployed Lync Edge plus Reverse proxy servers before, much of the planning/homework was already done. I’ve also previously written a blog post titled “Test Lab Guide: Windows Server 2016 with Integrated Exchange 2016, SfB Server 2015 and SharePoint 2016”, where I deployed a front-end server for Skype for Business Server 2015. That said, use these two blog posts as a compliment for this guide – they include some deeper information not discussed here. Front-end DNS entries haven’t been discussed earlier however, so here goes:

Front-end DNS

I used the following entries:

A-record:
fe.domain.com

C-names:
lyncdiscoverinternal.domain.com
sip.domain.com
meet.domain.com
dialin.domain.com
webext.domain.com

The next chapter will present the actual front-end installation, including some dilemmas/gotchas. After that I’ll continue with the Edge and Reverse Proxy installation.


Front-end installation

For the front-end installation I followed TechNet’s deployment article with some twists. As usual, it didn’t quite work as planned 🙂 I’ll now try to explain the process in detail, including some problems along the way.

Before starting the actual setup, I double checked that my network and AD infrastructure was setup correctly. I also checked that I had a working ADCS (not setup by me), so I could get internal certificates assigned on the front-end. (This actually turned into quite a mess, see the next chapter about front-end certificate gotchas). Finally I checked that I had created/requested all the DNS aliases needed in the internal DNS zone.

With all these steps done, it was time to move along to the actual front-end installation. My steps:

  • Installed pre-requisites for Windows Server 2016, which are slightly different compared to Windows server 2012 R2. Information can be found at: https://blogs.perficient.com/microsoft/2017/08/skype-for-business-how-to-install-on-windows-server-2016/ for example. (The issue regarding IIS URL Rewrite module wasn’t a problem in my deployment, btw).
    • Add-WindowsFeature RSAT-ADDS, Web-Server, Web-Static-Content, Web-Default-Doc, Web-Http-Errors, Web-Asp-Net, Web-Net-Ext, Web-ISAPI-Ext, Web-ISAPI-Filter, Web-Http-Logging, Web-Log-Libraries, Web-Request-Monitor, Web-Http-Tracing, Web-Basic-Auth, Web-Windows-Auth, Web-Client-Auth, Web-Filtering, Web-Stat-Compression, Web-Dyn-Compression, NET-WCF-HTTP-Activation45, Web-Asp-Net45, Web-Mgmt-Tools, Web-Scripting-Tools, Web-Mgmt-Compat, Telnet-Client, Windows-Identity-Foundation
  • Installed Silverlight
    • Created the file share (local).
      • Important:
        “The file share cannot be located on the Enterprise Edition Front End Server, but can be located on a Standard Edition server.
        You can define the file share in Topology Builder before you create the file share, but you must create the file share in the defined location you define before you publish the topology”.

                      Source: https://technet.microsoft.com/en-us/library/ms.lync.tb.addfrontendfilestorepage.aspx?f=255&MSPPError=-2147217396

    • Installed administrative tools.
    • Prepared Active Directory, using an AD account with enterprise/schema admin rights.
      • Schema Preparation went fine, but forest preparation failed:

                     sfb2015_saa_forest_prep_fail1

                     sfb2015_saa_forest_prep_fail2

                               sfb2015_saa_forest_prep_fail3

                                 sfb2015_saa_forest_prep_fail_with_success

          • Success! The -GlobalCatalog option was the key.
      • I finally moved over to preparing the domain. The domain preparation worked without problems for a change 🙂
      • I then created and published a new topology, again following https://technet.microsoft.com/en-us/library/dn933913.aspx
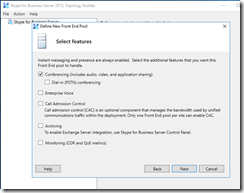
        • Nothing fancy, just the basics with a standard edition front-end and without all the bells and whistles. (Edge server will be configured later):

                           sfb2015_saa_top_builder_select_features

        • Media server is collocated.
        • Web services external url is specified as webext.domain.com (in the DNS front-end information earlier).
        • Simple urls are also specified according to the DNS information.
        • Time to publish the topology…
          • But wait. Read carefully: “If this is Standard Edition, you will need to run the Prepare First Standard Edition Server process from the Deployment Wizard before you publish a topology. This prepares for Standard Edition by installing a SQL Server Express Edition instance and creating the Central Management Store”.
          • Publishing will actually fail if you forget to prepare first! Been there, done that 🙂
        • So, new order is:
          • Prepare
          • Publish
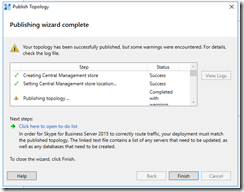
        • Done! …or not 😦 SIGH! New errors:

                           sfb2015_saa_publishing_wizard_completed_with_errors

                           sfb2015_saa_publish_cs_topology_deployment_log1

                           sfb2015_saa_publish_cs_topology_deployment_log2

        • Getting sick of all the (never-before-seen) errors. Much googling led me to the following commands:

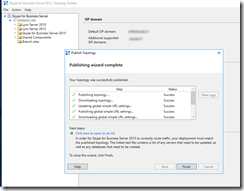
                            sfb2015_saa_cs_management_store_replication_error

                                sfb2015_saa_publishing_wizard_completed_without_errors

        • (Persistent chat and Edge will be enabled later on)


  • Now it was finally time to install the system components, following https://technet.microsoft.com/en-us/library/dn951417.aspx?f=255&MSPPError=-2147217396
    • Make a note of the following: “Before you follow these steps, make sure you’re logged onto the server with a domain user account that’s both a local administrator and a member of the RTCUniversalServerAdmins group”.
  • Ran Step 1, Install Local Configuration Store. No problems.
  • Ran Step 2, Setup or Remove Skype for Business Server Components. No problems.
  • Ran Step 3, Request, Install or Assign Certificates.
    • I checked with the “AD CS guy” that everything was in order for the request. It was.
    • I made a custom request with the private key marked as exportable.
    • I assigned the certificate (both for default and OAuth).
    • (NOTE! Now using a public certificate, read about the gotchas in next chapter)
  • It was now time to start all the SfB services.
    • This is done from SfB management shell with the command “Start-CsWindowsService
    • All good.
  • I finally configured integration between Exchange and Skype for Business (using OAuth). I wrote how to do this in my previous blog post, so have a look there for details.
    • I also enabled MAPI for the company’s Exchange server for a smoother integration between SfB and Exchange. I’ve also written about this procedure in a previous blog post.
  • As a last step, I wanted to bulk-enable a bunch of users from an AD group.

                sfb2015_saa_bulk_enable_users_from_ad-group

    • Checked the result from SfB Control Panel:

                sfb2015_saa_user_list_in_contol_panel

    • Success! 🙂
  • Finally tested a SfB client, everything seemed OK!


Front-end certificate gotchas

Certificate requirements for internal servers in Lync Server 2013 (same for SfB Server 2015) can be found at:

https://technet.microsoft.com/en-us/library/gg398094%28v=ocs.15%29.aspx?f=255&MSPPError=-2147217396

Some notes:

“Although an internal enterprise certification authority (CA) is recommended for internal servers, you can also use a public CA. For a list of public CAs that provide certificates that comply with specific requirements for unified communications (UC) certificates and have partnered with Microsoft to ensure they work with the Lync Server Certificate Wizard, see article Microsoft Knowledge Base 929395, “Unified Communications Certificate Partners for Exchange Server and for Communications Server,” at https://go.microsoft.com/fwlink/p/?linkId=202834.”

Source: https://technet.microsoft.com/en-us/library/gg398094%28v=ocs.15%29.aspx?f=255&MSPPError=-2147217396


“For internal servers (e.g. Front End Servers and Edge Server internal interface), you can request the certificates from your internal CA. For Reverse Proxy and Edge Server external interface, you should have public certificates installed.You can use SAN certificates, for example.”

Source: https://social.technet.microsoft.com/Forums/ie/en-US/5a45b42b-a600-45ac-b056-241b77f9774a/lync-frontend-pool-certificate-requirement?forum=lyncdeploy


“Although this approach technically can work it’s not recommended as (1) it’s not best-practice to use a third party certificate on the internal Front End servers and (2) it’s not advisable to publish your internal server FQDNs and general namespace into an external certificate.”

Source: https://social.technet.microsoft.com/Forums/lync/en-US/4f8a0503-64b0-4429-98d1-7fdf61e9b3b1/same-cert-for-edge-and-front-end?forum=ocscertificates


The above information really begged for internal certificates on the front-end. And yes, I tried the approach. Oh boy, DID I. MANY, MANY times. It always resulted in a mess however. Because of this, we’re now using a public certificate on the front-end. I’ve later realized that I COULD have made it work with internal certificates also. At least to some extent. HOWEVER, you get VERY tired of trying something that works in theory, but not in practice. Let me list some known “problems” (not so easily “found”, at least not in my opinion):

  • using internal certificates on the front-end combined with an Edge server requires SSL offloading on the reverse proxy. This is not that well documented afaik, but kind of logical. Not that logical when you have 100 other things to worry/think about though. See: http://www.uclabs.blog/2014/08/lync-2013-reverse-proxy-solution-with.html. I fought with the ARR rules quite a bit so the SSL offloading part wasn’t the hiccup for me. A bigger issue for me was the fact that:
  • using internal certificates gave a certificate warning in ALL browsers except Internet Explorer / Microsoft Edge. I don’t know of ANY workaround for this, as I can’t make the internal CA root certificates available for Firefox or Chrome. Short version story: a meeting link (https://meet.domain.com/whatever/XXXX) give certificate error no matter what I do on non-MS browsers. It does not matter if the connection is made internally or via the reverse proxy.
  • The SfB / Lync CLIENT is probably happy with the internal certificates (also through IIS ARR with SSL offloading), HOWEVER I don’t see this as a 100% working solution when an external participant could be using the web client for instance (and receiving a certificate error).

I’ve written more about the certificate dilemma in a later chapter also, see “Problems after the deployment / Certificate problem revisited”.


Edge Server installation

As previously mentioned, I’ve blogged about this before in my blog post Adding Edge and Reverse Proxy Servers to an Existing Lync 2013 Environment. There’s absolutely no need to rewrite this information, as it’s completely usable with Skype for Business also. A little recap is always in place though:

  • First, have a look at your network interfaces:

           sfb2015_saa_edge_Get-NetIPConfiguration

All looks good! Three external interfaces and one internal (all renamed). The third one in the list is the internal NIC and it has no gateway specified. (Never mind the blurs 🙂  )

  • Then add the routes needed for the internal traffic:

           route add -p 1.2.3.0 mask 255.255.240.0  1.2.4.40
           route add -p 1.2.5.0 mask 255.255.240.0  1.2.4.40

These are just example values. Subnet 1.2.3.0 and subnet 1.2.5.0 should use the internal NIC/interface and the gateway configured on that NIC (1.2.4.40 in the above example).

(You should also edit the hosts-file on the Reverse proxy, NOT on the edge).

  • You can read about DNS and certificate requirements in my previous blog post. Please do.
  • Check the primary DNS suffix. It should match the suffix from the front-end. This is actually quite an important step so don’t forget to check it!
  • Manually install the internal and external certificates via MMC. Your own method may be different.
    • Also export (from the front-end) and import the internal CA root certificates. This is needed because the edge server is not domain joined. Google if you don’t know how, or read my previous blog post.


“Activating” the Edge service…

The Edge service is activated on the Front-end. I like the guide I’ve used before, namely https://www.sherweb.com/blog/installing-lync-2013-edge-server/. It’s still usable for SfB Server 2015, but feel free to use whatever guide you like. Some notes from the setup:

  • DO make sure that you create the new Edge Pool under the “Skype for Business Server 2015” branch, not under Lync Server 2013.
  • This pool has one server
  • Did not enable federation
  • NOT using a single FQDN and IP for the Edge services
  • Using IPv4 and no NAT.
  • Specified the external FQDN the same way as in my previous blog post
  • …and so forth
  • Published the topology
  • Exported the configuration


Moving over to the Edge server…

Same prerequisites as on the font-end:

Add-WindowsFeature RSAT-ADDS, Web-Server, Web-Static-Content, Web-Default-Doc, Web-Http-Errors, Web-Asp-Net, Web-Net-Ext, Web-ISAPI-Ext, Web-ISAPI-Filter, Web-Http-Logging, Web-Log-Libraries, Web-Request-Monitor, Web-Http-Tracing, Web-Basic-Auth, Web-Windows-Auth, Web-Client-Auth, Web-Filtering, Web-Stat-Compression, Web-Dyn-Compression, NET-WCF-HTTP-Activation45, Web-Asp-Net45, Web-Mgmt-Tools, Web-Scripting-Tools, Web-Mgmt-Compat, Telnet-Client, Windows-Identity-Foundation

  • Ran setup.exe from the install media and continued following Step 5 from the guide at https://www.sherweb.com/blog/installing-lync-2013-edge-server/
  • Certificates were already installed via MMC so no need to import, just assign.
  • Started services (Start-CsWindowsService)
  • Created DNS SRV records (Step 8). The first one is needed, so don’t try without it. It won’t work.
  • Step 9 in the guide is falling a little bit short. There’s no mention about the Access Edge Configuration – you should also check that tab. See screenshot below:

           sfb2015_saa_access_edge_configuration

  • While you’re at it, have a look at the conferencing policy at the same time:

           sfb2015_saa_conferencing_policy

          Be sure to enable needed rights for the anonymous users.

  • Happy days, now moving over to the reverse proxy server installation.


Reverse Proxy server installation

I’ll just do a mini-recap as this installation is almost identical to the existing one in my blog post Adding Edge and Reverse Proxy Servers to an Existing Lync 2013 Environment.

  • Checked the network interfaces (renamed and specified correct IP’s).
  • Defined some hosts in the host-file. Check my above blog post.
  • Installed the certificates via MMC. More detailed information in my previous post.
  • Some newer information for Windows Server 2016:
    • For IIS, just install the basics:
      • Install-WindowsFeature -Name Web-Server, Web-Mgmt-Tools
    • For ARR, download the Microsoft Web Platform installer, and from there choose to install ARR 3.0. Example: https://www.youtube.com/watch?v=ILOC91lAyBE
    • Add the correct certificates to the https bindings in IIS
  • I previously followed http://jackstromberg.com/2014/11/tutorial-deploying-a-reverse-proxy-for-lync-server-2013/ for the IIS ARR rewrite rules. For some reason they didn’t work this time. Well, I’m not surprised, as IIS ARR is VERY picky about the rules. (It can actually be quite a headache to configure these).

Some alternative links for IIS ARR rewrite rules:

https://lucavitali.wordpress.com/2017/06/30/arr-how-to-setup-and-use-with-multiple-lyncsfb-sip-domains/ 
http://www.uclabs.blog/2014/08/lync-2013-reverse-proxy-solution-with.html
http://www.ucguys.com/2014/08/using-iis-arr-30-on-windows-server-2012r2-as-a-reverse-proxy-for-lync-server-2013.html

I used the first link as a guidance for my (new) rewrite rules. I tried many different combinations before I found this one, but to no avail. MANY thanks to Luca Vitali for something that actually works 🙂

I love the fact that you get away with using just ONE server farm/rule for all the simple urls. (We’re not using Office Web Apps).

The rule that work:

Pattern: (.*)

{HTTPS} on

{HTTP_HOST} = (meet|dialin|webext|lyncdiscover).domain.com


As a side note I noticed that you can use multiple SIP domains with this same “one liner”. In that case you just change the line to:

{HTTP_HOST} = (meet|dialin|webext|lyncdiscover).domain.com | (meet|dialin|webext|lyncdiscover).domain2.com

“|” stands for “or” and is the key here. This is an alternative approach to Luca’s implementation. See screenshot below:

sfb2015_saa_revproxy_iis_arr_url_rewrite

I tried this with two different SIP domains, and both domains proxied nicely through IIS ARR with the above change 🙂


Problems after the deployment

All of the above would seem like the perfect deployment, right? Wrong. After some testing you’ll probably notice some problems. My deployment was no exception. When I started the SfB client (after finishing the Edge deployment), I was greeted with the following:

sfb2015_saa_sfb_client_limited_external_calling 


A quick look in SfB Control Panel and event viewer told me something was wrong with the replication:

On the Front-end:

sfb2015_saa_replication_error_in_sfb_control_panel

sfb2015_saa_replication_error_in_event_viewer_front_end


On the Edge server:

sfb2015_saa_replication_error_in_event_viewer_edge


These error messages were new to me but trusty ol’ Google led me to:

https://social.technet.microsoft.com/wiki/contents/articles/7459.troubleshooting-limited-external-calling-in-lync-client.aspx
http://communicationsknowledge.blogspot.fi/2012/06/limited-external-calling.html
http://www.wavecoreit.com/blog/serverconfig/file-transfer-agent-cannot-send-replication-data-to-replica-replicator-on-edge/
https://support.microsoft.com/en-us/help/2759117/lync-server-central-management-store-replication-failures

It didn’t take me long to realize that this was a firewall problem. I thought I had notified the firewall guy about all needed (open) ports, but this one seemed to have slipped. Well, no problem. We opened up the replication port (4443) in the internal firewall, and the replication started working again almost instantly.

To double check that the problem wasn’t with the replication service, I also used netstat and telnet:

On the Front-end:

sfb2015_saa_netstat_front_end


On the Edge server:

sfb2015_saa_netstat_edge


As seen in the screenshots, port 4443 is listening as it should be. This clearly shows that the service is listening, and it shouldn’t be the cause for the problem.

I could NOT telnet to the port however, which implies a firewall problem. After fixing the (hw) firewall and starting the SfB client again, the error was gone:

sfb2015_saa_sfb_client_limited_external_calling_fixed

Warning gone, happy days! 🙂


Certificate problem revisited

As stated in the chapter “Front-end certificate gotchas”, I had problems with the internal certificate. To illustrate the dilemma, let me show you some screenshots:

From a domain joined client:

sfb2015_saa_ie_vs_firefox_cert_problem_meet_internal_ca

To the left we have Firefox. As you can see, the connection is NOT trusted even though I’m testing from a domain joined client.

To the right we have Internet Explorer. The connection IS trusted (root CA is trusted).


Same thing from an external client:

sfb2015_saa_ie_ca_problem_meet_external


“Since Lync simple URL publishing does not require any SSL Offloading if you have the External Web Site in Lync assigned with a Public Certificate, you do not need a certificate installed on the IIS.

Most likely you have assigned a private certificate from your internal Certificate Authority, and you have to assign the IIS ARR an public certificate and reencrypt the traffic for internal use.
Be aware of two point here:

  1. this is called SSL Offloading and requires some extra CPU load on your server
  2. IIS must not be “domain joined” and therefore you need to have the internal Certificate authority Root Certificates assigned as TRUSTED!”

Source: http://www.uclabs.blog/2014/08/lync-2013-reverse-proxy-solution-with.html


Well, I could probably have gotten rid of the Internet Explorer error on the external client (while still using internal certificates) by using SSL offloading on the reverse proxy. It doesn’t solve the problem with other browsers however, afaik. If you have a nice solution to this whole certificate-dilemma, please comment!

All in all I think using a public certificate on the Front-end is easier, even though you’re “going against” best practices to some extent. At least it makes your life a whole lot easier.


Final check-up’s

Skype for Business Configuration Information

You should always check the Skype for Business Configuration Information from the SfB client after a successful deployment. Press the “ctrl” key while right clicking on the Skype for Business icon in the taskbar (down right). Then choose “Configuration Information”. From here, check that everything looks OK:

sfb2015_saa_sfb_client_configuration_information

  • MRAS list the connection to the edge server, and it looks OK.
  • GAL search tells SfB to look for the address book from the Global Address List (Exchange) instead from the internal SfB server Address Book.
  • EWS Internal URL is the connection towards Exchange.
  • Contact List Provider UCS (Unified Contact Store) shows that the Address Book is situated on Exchange – we’re not using a local SfB server Address Book.
  • UCS (see above) Connectivity State says that the connection to Exchange is active as it should be.
  • MAPI Information states that MAPI status is OK (which it should be now that I’ve configured Exchange for MAPI).
  • EWS (Exchange Web Services) is also OK.


Get-DnsAndIP PowerShell script

I found an awesome script to get an overview over deployed DNS records in a Skype for Business deployment. This is a lifesaver if your head is about to explode with all the DNS/certificate/firewall/whatever information 🙂 Get the script from:

https://gallery.technet.microsoft.com/office/Get-DnsAndIPPS1-List-your-a4689878

This script (plus Snooper) actually helped me find a missing DNS SRV record. Phew. A screenshot from the script in action:

sfb2015_saa_dns_and_ip_lookup_script

There are some “false positives” here. Only thing worth mentioning is the missing SRV record at the end. The test was also done with dual SIP domains, which is not the setup anymore. I’ve not added DNS records for federation either, as we’re not federating with any partners (yet).

Lastly, I’m NOT using lyncdiscover.domain.com in the internal DNS (intentionally). I have an explanation for this in my previous blog post Adding Edge and Reverse Proxy Servers to an Existing Lync 2013 Environment.


Snooper

Also worth mentioning is Snooper, which is part of Skype for Business Server 2015 Debugging Tools. It’s downloadable from:

https://www.microsoft.com/en-us/download/details.aspx?id=47263

It is very awesome in debugging client (connection) problems. I used it in combination with the above PowerShell script to find out that my DNS SRV record was missing for example. Here’s a screenshot from that particular “investigation”:

sfb2015_saa_snooper


For some quick information on how to use snooper, have a look at http://lynclead.com/?p=148 for example. The log files for the newest SfB client are located in C:\Users\xxxxx\AppData\Local\Microsoft\Office\16.0\Lync\Tracing btw.


Misc.

I’m also using the ABS Configuration Tool in this deployment to customize the Address Book. Detailed information about this can be found in my blog post Disabled (AD) users still searchable in Lync/SfB. The download link is available at: https://technet.microsoft.com/en-us/library/jj945604.aspx

SSL hardening of the SfB servers were done with IIS Crypto, https://www.nartac.com/Products/IISCrypto. I used the “best practices” template and received an “A” grade on Qualys SSL Labs Server Test, https://www.ssllabs.com/ssltest/. If you’re interested in getting an A+, have a look at https://scotthelme.co.uk/getting-an-a-on-the-qualys-ssl-test-windows-edition/ for example.


This quite much summarizes the whole Skype for Business deployment. Be sure to check my other blog post about Edge and reverse proxy deployment also, as it includes some deeper information not mentioned here.

Test Lab Guide: Windows Server 2016 with Integrated Exchange 2016, SfB Server 2015 and SharePoint 2016

WARNING! This is a pretty long and detailed blog post 🙂

I decided to upgrade (or actually reinstall) my test lab with the most recent version of Windows Server (including the most recent versions of Exchange, SfB Server and SharePoint). All my server virtual machines are built from a clonedGolden Windows Server Image” in VMware workstation, and I also use the same principle for my clients. This way you can deploy new servers/clients very fast, and they will take up much less disk space compared to installing from scratch.

This “custom” TLG is based on:

Windows Server 2012 R2 Test Lab Guide (including the Basic PKI add-on from here) and
Test Lab Guide: Configure an Integrated Exchange, Lync, and SharePoint Test Lab

with my own Exchange add-ons including:

  • A script for configuring the virtual directories
  • Certificate from domain CA
  • Zevenet Load Balancer (formerly known as Zen)
  • A second server (EX2)
  • Another script for copying the virtual directories from an existing server to a new one
  • Database Availability Group (DAG) between EX1 and EX2
  • Moving a user from one database to another

More about these later on.

I’ll start with an overview of the whole TLG, including my own add-ons:

tlg2016_overview

Fig 1. Test Lab overview – a modified picture from the TLG. (I also configured the Internet subnet (131.107.0.0/24), even though not visible in this picture).


The whole project started by following the Windows Server 2012 R2 Test Lab Guide. I then added the Basic PKI infrastructure. These Test Lab Guides were actually “translatable” straight from Windows Server 2012 R2 to Windows Server 2016. I got a “Duplicate IP address error” on one of the servers however, but it was easily solved by following: http://support.huawei.com/enterprise/en/knowledge/KB1000068724. (I have no idea why I got this error (hasn’t happened before), but then again it doesn’t matter now that it was solved).

I then moved over to the Test Lab Guide: Configure an Integrated Exchange, Lync, and SharePoint Test Lab. Step 1 was already done so I moved over to Step 2 and 3 – Installing and configuring a new server named SQL1. Step 3 includes a link to a separate SQL Server 2012 Test Lab Guide, and this TLG also happen to be more or less translatable straight to SQL Server 2016. So yeah, I actually have no further comments about the installation. Step 4 guides you through the Client2-installation, but there’s really nothing to comment about this installation either (pretty basic stuff).


Exchange 2016, EX1

It was now time for the Exchange server, EX1. Note to self: Use at least 6GB ram for the VM or the memory will run out. This installation also has a separate guide:

https://social.technet.microsoft.com/wiki/contents/articles/24277.test-lab-guide-install-exchange-server-2013-on-the-windows-2012-r2-base-configuration.aspx.

It’s fine for the most part, however instead of downloading the evaluation version of Exchange I suggest you download the newest Exchange Server 2016 CU instead. This way you’ll get the newest updates from scratch. And yes, all setup files are included in the CU so you can use it as a “clean install”. The prerequisites for Exchange 2016 (on Windows Server 2016) are a bit different compared to Exchange 2013 (on Windows Server 2012 R2) also. The only thing you need to download and install “separately” is Microsoft Unified Communications Managed API 4.0, Core Runtime 64-bit. There’s no need for Microsoft Knowledge Base article KB3206632 if you have a recent/patched version of Windows Server 2016. After that just copy/paste the PowerShell command from the prerequisites page:

Install-WindowsFeature NET-Framework-45-Features, RPC-over-HTTP-proxy, RSAT-Clustering, RSAT-Clustering-CmdInterface, RSAT-Clustering-Mgmt, RSAT-Clustering-PowerShell, Web-Mgmt-Console, WAS-Process-Model, Web-Asp-Net45, Web-Basic-Auth, Web-Client-Auth, Web-Digest-Auth, Web-Dir-Browsing, Web-Dyn-Compression, Web-Http-Errors, Web-Http-Logging, Web-Http-Redirect, Web-Http-Tracing, Web-ISAPI-Ext, Web-ISAPI-Filter, Web-Lgcy-Mgmt-Console, Web-Metabase, Web-Mgmt-Console, Web-Mgmt-Service, Web-Net-Ext45, Web-Request-Monitor, Web-Server, Web-Stat-Compression, Web-Static-Content, Web-Windows-Auth, Web-WMI, Windows-Identity-Foundation, RSAT-ADDS

Then run setup.exe and install Exchange. Use the default options. After completion, follow Step 6: Demonstrate EX1 as an email server in the Exchange TLG. I did NOT try to send an email message from Chris to Janet at this stage though, as I wanted to try this after the Load Balancer was installed. But for now, happy days, Exchange installed!


Script for configuring the virtual directories

Usually when installing an Exchange server you change the virtual directories/namespace to something other than the server hostname (default). This namespace is the same name that should be included in the certificate. (I didn’t like the fact that this TLG use self-signed certificates so I added my own subchapter about getting a certificate from a domain CA, see next chapter). In a production environment you should plan the namespace and certificate prior to installation, but in this TLG it doesn’t matter that much. I decided to go with the namespace “exchange.corp.contoso.com”. (Autodiscover (DNS url) should also be included in the certificate (request), which it is by default). Anyhow, I first added the mentioned A records (exchange and autodiscover) to DNS. I pointed them to 10.0.0.11 at this stage (but that will change after the Load Balancer installation). I then changed the virtual directories according to the above plan. For this I used a nice script found from:

https://gallery.technet.microsoft.com/office/Set-all-virtual-directories-f4ec71d3

This script is very nice. The only thing that got me worried was the fact that it tried to change the PowerShell virtual directory. Afaik you shouldn’t change that. Anyway, no big deal, I just answered “no” (seen in screenshot) when the script asked me to change this. Here are a couple of screenshots from the script in action:

tlg2016_set_allvdirs_script1

Fig 2. set-allvdirs.ps1 script

tlg2016_set_allvdirs_script2

Fig 3. set-allvdirs.ps1 script, continued


Certificate from domain CA

After all the virtual directories were set, it was time to get a new certificate which reflect the above changes. I headed over to trusty practical 365 to refresh my memory. This time I used EAC when requesting a new certificate. I changed the domains to reflect my newly configured environment. I added exchange.corp.contoso.com and autodiscover.corp.contoso.com and removed all the other hostnames. The other options were pretty basic so nothing special there. I then saved the certificate request and copied it over to my domain CA. However, when I tried to process the certificate request on the CA I was greeted with an error message:

tlg2016_cert_req_error_from_ca

Fig 4. Certificate Request Processor error

A bit of investigation led me to the following url: http://mytechweblog.blogspot.fi/2012/11/the-request-contains-no-certificate.html, which had a solution:

“certreq -submit -attrib “CertificateTemplate: WebServer” WebServerCertReq.txt”

tlg2016_cert_req_manual_submit

Fig 5. Certification request with manual submit.

This solution worked for me, nice! I then saved the .crt file and imported it into Exchange from the same place in EAC where I made the request. However, shortly after this I noticed that EAC and OWA still gave certificate errors. This was strange, but then again nothing new. I had a look in IIS/Bindings, and surely the wrong certificate had been assigned. I corrected this so the newly requested certificate was in use:

tlg2016_cert_assignment_from_IIS_on_ex1

Fig 6. Exchange certificate from domain CA.


Zevenet Load Balancer

It was now time to install the Zevenet Load Balancer. The reason for installing the Load Balancer at this stage had to do with the fact that I had now preconfigured all the Exchange virtual directories + autodiscover in DNS. This also meant that it’ll be very easy to point DNS at the Load Balancer instead of the Exchange server/CAS further down the road.

I headed over to https://www.zevenet.com/products/community/ and downloaded the newest version. I installed it following my own old blog post. The main difference this time was that I didn’t bother to use clustered servers. (I already know that it works and we’re using clustered LB’s in production). After installation I did the initial configuration:

tlg2016_zen_new_virtual_network_interface

Fig 7. New virtual network interface. The new VIP was set to 10.0.0.61 (the server IP is 10.0.0.60).


I then created a new farm, which listens on port 443 on the newly created virtual network interface IP (VIP):

tlg2016_zen_new_farm

Fig 8. New Farm


After this I edited the farm and configured the “real IP”:

tlg2016_zen_edit_real_ip_servers_configuration

Fig 9. Real IP’s. In my case, 10.0.0.11 is the “real” IP for EX1.


I then converted the Exchange certificate (in a Linux VM) for use within Zevenet LB:

openssl pkcs12 -in file.pfx -out file.pem -nodes

Source: https://stackoverflow.com/questions/15413646/converting-pfx-to-pem-using-openssl


It was then time to import it into Zevenet LB:

tlg2016_zen_manage_certificates

Fig 10. Certificate imported


After this I made changes in DNS so that all traffic would go through the Load Balancer:

tlg2016_zen_dns_edited

Fig 11. Editing DNS.


Now it was finally time to check that Outlook was working correctly from client1 (or 2):

tlg2016_outlook_connection_status_through_zen

Fig 12. Outlook Connection Status

Well yes, it was. Perfect! 🙂

That quite much summarizes the Load Balancer part. Now moving over to the installation of the second Exchange server, EX2.


Exchange 2016 – second server, EX2

Now that everything was working as it should with EX1, it was time to add another exchange server to the environment. There were no special notes about this installation, I just followed the same guide as with the first one. One thing that was different however, was the script. I now used a script that could automatically copy the virtual directories from an existing Exchange server during deployment. The script can be found at:

http://www.expta.com/2016/07/new-set-autodiscoverscp-v2-script-is-on.html

I’ll copy/paste some information:

The script is designed to be run during installation. Normally, you would run this script from an existing Exchange server of the same version while the new server is being installed.

That sounded almost too good to be true and I had to try it. That said, I had a test-run from EX1 while EX2 was installing:

tlg2016_set_autodiscover_scp_script1

Fig 13. Set-Autodiscover.ps1 script. Looks promising…

…but it wasn’t:

tlg2016_set_autodiscover_scp_script2

Fig 14. Can’t set the virtual directories.

I had the script running during the whole installation of EX2, but no luck. I suspected that it would be better running the script immediately after the installation instead. That said, I had a go just after the finished installation of EX2:

tlg2016_set_autodiscover_scp_script3

Fig 15. Running the script immediately after the EX2 installation.

Yes, much better this time. All the virt dirs were set within a couple of seconds, and I’d say this “lag” would be fine for a production environment as well. I would also like to “thank” the script for reminding me to install a certificate on this second server. That said, I opened up EAC and chose the new EX2 server from the pull-down menu under certificates. I then chose “import” and used the same certificate I made for EX1. It got imported nicely:

tlg2016_imported_cert_ex2

Fig 16. Imported domain certificate


Be sure to enable all needed services on the newly imported certificate also:

tlg2016_setting_services_on_imported_certificate_ex2

Fig 17. Overwriting existing SMTP certificate. At the same time I also chose to enable the IIS, POP and IMAP services.


Checking certificates from EMS:

tlg2016_checking_certs_from_ems

Fig 18. Checking active certificates. Looks good!


…and while you’re at it, check that OWA won’t give you certificate errors:

tlg2016_checking_that_cert_ís_ok_from_owa

Fig 19. OWA

It doesn’t. All good! (The new certificate wasn’t yet active In Fig 16, therefore the status url bar is red).

Only thing left to do now was to add this second IP (10.0.0.12) to “real servers” in Zevenet Load Balancer. After this change, the “dual exchange server setup” was ready for use.


DAG

With both EX1 and EX2 up ‘n running, it was time to configure a Database Availability Group (DAG) between the servers. I’ve done this many times before, and I’ve always used the same guide whether it’s for Exchange 2013 or Exchange 2016. The guide I’ve used is:

https://practical365.com/exchange-server/installing-an-exchange-server-2013-database-availability-group/

It’s very straight forward without any extra bs. Some notes:

  • I’m using the “SP1 (APP1)” server as the witness server.
  • I pre-staged a computer account in AD named “EXDAG”
  • I did not configure a dedicated replication network. (Overkill for a test lab).
  • I did not move the Default Mailbox Databases from the default folder path onto storage volumes dedicated to databases and transaction log files. (Again, a little overkill for a test lab).

tlg2016_manage_db_availability_group_membership

Fig 20. Manage Database Availability Membership


After this step was done I configured database copies following yet another good (and familiar) follow-up guide from the same series:

https://practical365.com/exchange-server/exchange-2013-dag-database-copies/

I’ve got no additional comments about the database copies, they work just as intended/written in the guide 🙂 Below you’ll find some related screenshots:

tlg2016_add_mailbox_db_copy

Fig 21. Add Mailbox Database Copy


tlg2016_databases_overview_after_db_copy_and_dag

Fig 22. Database overview with database copies.


Moving users

I moved the user “Janet” from the original database on EX1 over to the database on EX2. This way I “spread out” my (two 🙂 ) users so their mailboxes are situated on different servers. This is good for failover testing and so forth.

tlg2016_move_user_janet_to_ex2

Fig 23. Moving Janet to another database (server).


tlg2016_move_user_janet_to_ex2_2

Fig 24. Moving Janet to another database (server), continued.


The above steps now completes the whole Exchange-part of the TLG.


Skype for Business Server 2015, LYNC1

It was now time to move over to the Lync-part of the TLG. The first change was actually the software itself – I’m installing Skype for Business Server 2015 instead of Lync Server 2013. As with other software in this lab, the prerequisites are way different for SfB Server compared to Lync Server. I used a combination of

https://blogs.perficient.com/microsoft/2017/08/skype-for-business-how-to-install-on-windows-server-2016/ and
http://www.garethjones294.com/install-skype-for-business-server-2015-on-windows-server-2016-step-by-step/

as a base for my deployment. Some additional notes:

  • Note to self: Use at least 3GB ram for the VM.
  • (Newest) Cumulative Update has to be installed, otherwise SfB Server won’t work at all on Windows Server 2016.
  • As I installed SfB Server in an isolated network (no internet access), I also had to define the source (which is the Windows Server 2016 DVD) in the PowerShell prerequisite command:

          tlg2016_sfb_install_prereq_from_powershell

          Fig 25. Prerequisites installation for SfB Server 2015 on Windows Server 2016.


I then continued following the TLG guide again, and moved over to the chapter “To prepare Active Directory”. Some notes:

  • Installed newest version of offline-Silverlight manually.
  • Chose not to check for updates.
  • Added the DNS SRV records, but they didn’t work when I tested them (probably outdated info in the TLG). This was no big deal, as lyncdiscoverinternal can be used instead for example. You could also Google for updated information, but I didn’t feel it was necessary for this TLG.
  • Everything went fine until “21. From the Topology Builder Action menu, select Publish Topology.” I was greeted with:

          tlg2016_sfb_publishing_topology

          Fig 26. Publishing Topology error.

          tlg2016_sfb_publishing_topology_error

          Fig 27. Publishing Topology error, continued

Well, after some investigation (googling), it turned out this just had to do with UAC: http://terenceluk.blogspot.fi/2013/03/publishing-new-lync-server-2013.html. Surely, after running the deployment wizard again as an administrator (run as), it worked!


I now moved over to the “To install Lync Server 2013 core components” -part of the TLG. Notes:

  • I was only running step 1 and 2 at this stage.
  • The IIS URL Rewrite Module problem was well known, I’ve even blogged about it.
  • After step 2 was done, it was time to install the newest CU for SfB, otherwise SfB Server won’t run at all on Windows Server 2016.
    • Remember to run the SfB Management Shell as an Administrator.
    • Everything went smoothly with the CU installation!
  • I moved over to Step 3 – Deployment Wizard/SfB Server 2015 Core Components.
    • Everything went fine!
  • Step 4 was different for SfB compared to Lync. You can’t start services from the Deployment Wizard in SfB Server 2015.
    • Instead, you start them from the SfB Management Shell with the command “Start-CsWindowsService
    • The command didn’t run as planned though:

                tlg2016_sfb_start-cswindowsservices_error

                 Fig 28. SfB Server 2015 Deployment Log.

    • I tried to manually start the “Skype for Business Front-end” service from “Services” in Windows.
      • Did not work either, got stuck in “starting…”
      • Tried old school method and rebooted the server.
        • Worked, all services were now up ‘n running after reboot 🙂
  • I moved over to the “To enable users in the Lync Server Control Panel”-part of the TLG and enabled the users.
  • Yep, all done, working! 🙂


SharePoint 2016, SP1

SharePoint was the last (and the “easiest”) software candidate on the list. Yet again the prerequisites were different compared to the 2013 version of the TLG. My notes:

  • SP1 is the server name, not Service Pack 1 🙂
  • I tried various offline methods for the prerequisite installation. What a headache. Spare yourself the pain and DO NOT try to install the prerequisites without an active internet connection. I repeat, DO NOT try it.
  • I then installed the prerequisites with “Install software prerequisites” from default.hta. Everything went smoothly.
  • I continued following the TLG and the “To prepare DC1 and SQL1 –part. Nothing to add or comment here.
  • I continued following the TLG and the “To install SharePoint Server 2013” –part. Nothing to add or comment here.
  • Happy days, SP1 installed!


Configure integration between EX1, LYNC1, and SP1

As a last step in this TLG, I configured server integration between the servers. I would advise you to stay away from the TLG script and use newer information instead. The script has failed me before, and surely it failed this time also when I tried it. In other words, skip the script.

As a first step though, check the SP1/APP1 certificate. The TLG tells you to add a https site binding and select the certificate with the name sp1.corp.contoso.com. This won’t work, at least not for me (never has). Instead, when creating the new https binding, choose the certificate that has been issued to the SP1/APP1 server (never mind the confusing “friendly” name):

tlg2016_sp_checking_cert

Fig 29. Checking SSL certificate in SharePoint/IIS

I got a warning about the certificate already being used for the Default Web Site, but this can be ignored (at least in this TLG).


Now we’re ready to move over to some “fresh” information about integration. For starters, have a look at:

Exchange <-> SfB: http://lyncdude.com/2015/10/06/the-complete-skype-for-business-exchange-2016-integration-guide-part-i/index.html
Exchange –> SharePoint and SfB: https://technet.microsoft.com/en-us/library/jj649094(v=exchg.160).aspx
SfB –> SharePoint: https://technet.microsoft.com/en-us/library/jj204975.aspx
SharePoint –> Exchange: https://technet.microsoft.com/en-us/library/jj655399.aspx
SharePoint –> SfB: https://technet.microsoft.com/en-us/library/jj670179.aspx

All links are compatible with the 2016 versions also. Here are the results from my own environment:


Skype for Business:

tlg2016_oauth_sfb_check_current_cert

Fig 30. Checking current OAuth certificate and OAuth configuration.

tlg2016_oauth_sfb_setting_cs_auth_configuration

Fig 31. Setting OAuth configuration and checking the configuration.


tlg2016_oauth_sfb_to_ex

Fig 32. SfB –> Exchange integration

tlg2016_oauth_sfb_to_sp

Fig 33. SfB –> SharePoint integration


tlg2016_oauth_sfb_to_ex_and_sp_check

Fig 34. Checking partner applications. Both Exchange and SharePoint are integration partners.


Exchange:

tlg2016_oauth_ex_to_sfb

Fig 35. Exchange –> SfB integration

tlg2016_oauth_ex_to_sp

Fig 36. Exchange –> SharePoint integration


tlg2016_oauth_ex_to_sfb_and_sp_checking

Fig 37. Checking partner applications. Both SfB (Lync) and SharePoint are integration partners.


SharePoint:

tlg2016_oauth_sp_to_ex

Fig 38. SharePoint –> Exchange integration

tlg2016_oauth_sp_to_sfb

Fig 39. SharePoint –> SfB integration


tlg2016_oauth_sp_to_ex_and_sfb_checking

Fig 40. Checking partner applications. Both Exchange and SfB are integration partners.


The integration chapter above now finalizes this whole TLG. It was a fun project and I hope someone will find this information useful.

Changing Outlook Connectivity towards MAPI over HTTP

We had a big Microsoft Office 2016 upgrade project this fall. The main reason for this was a non-consistent Office environment with versions dating all the way back to MS Office 2007. The whole upgrade process was done using a System Center Configuration Manger application package, which I also happen to be the author for. The upgrade process went mostly fine, even though it was quite a long process involving many (stubborn) users and computers.

Anyhow, now that a new MS Office version was deployed, it was finally time to think about changing the Outlook protocol and authentication to a more modern one. RPC over HTTP (and basic/ntlm authentication) was getting dated, and the main reason for not using MAPI over HTTP were the old clients. That problem is now gone 🙂

So, what’s up with this MAPI-thing then? I’ll just copy/paste a few things and you can read more about MAPI in the provided links.

“MAPI over HTTP is a new transport used to connect Outlook and Exchange. MAPI/HTTP was first delivered with Exchange 2013 SP1 and Outlook 2013 SP1 and begins gradually rolling out in Office 365 in May. It is the long term replacement for RPC over HTTP connectivity (commonly referred to as Outlook Anywhere). MAPI/HTTP removes the complexity of Outlook Anywhere’s dependency on the legacy RPC technology”.

“The primary goal of MAPI/HTTP is provide a better user experience across all types of connections by providing faster connection times to Exchange – yes, getting email to users faster. Additionally MAPI/HTTP will improve the connection resiliency when the network drops packets in transit. Let’s quantify a few of these improvements your users can expect. These results represent what we have seen in our own internal Microsoft user testing.”

Source: https://blogs.technet.microsoft.com/exchange/2014/05/09/outlook-connectivity-with-mapi-over-http/

MAPI over HTTP is also the default protocol in Exchange 2016 which clearly shows the way Microsoft is going. More information about MAPI:

https://technet.microsoft.com/en-us/library/dn635177(v=exchg.150).aspx
http://markgossa.blogspot.fi/2015/11/exchange-2013-and-exchange-2016-mapi.html
http://searchexchange.techtarget.com/definition/MAPI-over-HTTP-Messaging-Application-Programming-Interface-over-HTTP

What are the requirements for MAPI then?


Main Prerequisites

Complete the following steps to prepare the clients and servers to support MAPI over HTTP.

  1. Upgrade Outlook clients to Outlook 2013 SP1 or Outlook 2010 SP2 and updates KB2956191 and KB2965295 (April 14, 2015).

  2. Upgrade Client Access and Mailbox servers to the latest Exchange 2013 cumulative update (CU). For information about how to upgrade, see Upgrade Exchange 2013 to the latest cumulative update or service pack.

Source: https://technet.microsoft.com/en-us/library/dn635177(v=exchg.150).aspx

No problem, these prerequisites were now in order for us.


Other Prerequisites

Check/Set the MAPI Virtual Directories

Clients can’t connect if you don’t have working MAPI Virtual Directories. Just follow the above TechNet article and you’ll be fine. Our original MAPI virtual directories looked like this:

exchange_mapi_virt_dirs_before_change

Sorry for the blur. All I can say is that the InternalUrl had the Exchange server’s hostname specified instead of the (single) namespace. Changing and verifying the new url’s is done in the following screenshot:

exchange_mapi_virt_dirs_changing_urls

I changed the ExternalUrl on one of our Exchange servers. I then used the same command for the InternalUrl, replacing the word “External” with “Internal”. I also made the same change to our second Exchange server. The end the result would have both external and internal url’s listed, like so:

exchange_mapi_virt_dirs_after_change

Again, sorry for the blur. We’re using a single namespace so all url’s are basically identical.


Enable MAPI over HTTP in your Exchange Organization

This is easily done with one command:

Set-OrganizationConfig -MapiHttpEnabled $true

In theory, this isn’t needed if the user mailboxes already have MAPI enabled:

“To enable or disable MAPI over HTTP at the mailbox level, use the set-Casmailbox cmdlet with the MapiHttpEnabled parameter. The default value is Null, which means the mailbox will follow organization-level settings. The other options are True to enable MAPI over HTTP and False to disable. In either case, the setting would override any organization-level settings. If MAPI over HTTP is enabled at the organization level but disabled for a mailbox, that mailbox will use Outlook Anywhere connections”.

Source: https://technet.microsoft.com/en-us/library/mt634322(v=exchg.160).aspx

Checking if enabled on user level (we had it enabled already):

exchange_checking_mapi_user_mailbox

That said, it’s still a good idea to enable it organization wide (if you have old migrated room mailboxes or public folders). See the following link:

https://social.technet.microsoft.com/Forums/ie/en-US/f4df02af-20cd-423c-8c59-1ea563b7b940/exchange-2013-mapihttp-public-folder-and-room-mailboxes-still-using-rpchttp?forum=exchangesvrdeploy

We enabled it organization wide and It was now time to do some tests.


Testing

Still following the TechNet article:

exchange_checking_mapi_selftest

All good 🙂

The change isn’t instant. A recycle of the MSExchangeAutodiscoverAppPool make things happen faster however. After a MSExchangeAutodiscoverAppPool recycle and a coffee break plus a restart of my own Outlook client, I had a look at the Outlook Connection Status:

exchange_outlook_connection_status_with_mapi

Well, well, well. All connections are now using MAPI over HTTP instead of the old RPC over HTTP.

You’ll see several changes:

  • First change is in the “Server name” column. It’s now a real server name instead of a mailbox GUID.
    • Notice also that the server path includes /mapi/.
  • The protocol (column) has changed from RPC/HTTP to just HTTP.
  • The “Authn” column have changed values from NTLM to Nego* (Kerberos)


Further check-ups

Now that we’re using up2date clients, there’s no need to use old authentication methods for Outlook Anywhere either. (Outlook Anywhere authentication and MAPI authentication are configured/can be configured separately btw). The main reason for sticking with the old Basic/NTLM authentication (at least externally) is when using an Exchange 2010/2013 co-existence environment (and sticking with old “best practices”). This hasn’t been the case for us for a long time. Another reason for still sticking with “Basic” is, well, old clients. A third reason would be a mix of both old clients and an Exchange 2010/2013 co-existence environment. Luckily for us, we now have a “pure” Exchange 2013 environment and (almost) all Windows clients are using Outlook 2016.

Even though Outlook clients are now configured to connect via the MAPI protocol, there will still be some clients connecting via RPC over HTTP. This will probably be the case for quite some time, as the clients are gradually moving towards MAPI. (The change isn’t instant as already stated). Many users don’t restart their Outlook client so often either, which in turn means that they’re using RPC over HTTP until restart (at least from my experience). Correct me if I’m wrong.

As a side note, the MAPI protocol is only used for Windows Outlook clients. The Mac version of Outlook use EWS, and mobile phones use ActiveSync. So yes, you’ll still have many different active protocols in your organization. Don’t disable them 🙂

If you want to read more about the Outlook Anywhere authentication types, have a look at http://msexchangeguru.com/2013/01/10/e2013-outlook-anywhere/ for example.

A checkup of our old settings for Outlook Anywhere:

exchange_checking_outlook_anywhere_auth_methods

As you can see, the servers were still using Basic for external authentication method. Time to change that! This time I’ll use EAC:

exchange_outlook_anywhere_changing_external_auth_from_eac

You’ll get a warning that you shouldn’t enable Negotiate if you’re having Exchange servers older than version 2013 in your environment. Again, no problem!

I did the same for the internal url (must be done from EMS):

exchange_outlook_anywhere_changing_internal_auth_from_ems

Like so. All authentication methods pimped to modern standards 🙂


This should cause no problems at all (and still haven’t). A good referral:

For Exchange 2007/2010

Set-OutlookAnywhere -Identity ‘SERVER\Rpc (Default Web Site)’ -SSLOffloading $true -ClientAuthenticationMethod NTLM -IISAuthenticationMethods Basic,NTLM

For Exchange 2013+ with backwards compatibility with Outlook 2010 and 2007

Set-OutlookAnywhere -Identity ‘SERVER\Rpc (Default Web Site)’ -SSLOffloading $true -ExternalClientAuthenticationMethod NTLM -InternalClientAuthenticationMethod NTLM -IISAuthenticationMethods Basic,NTLM,Negotiate

For Exchange 2013+ with Outlook 2013+

Set-OutlookAnywhere -Identity ‘SERVER\Rpc (Default Web Site)’ -SSLOffloading $true -ExternalClientAuthenticationMethod Negotiate -InternalClientAuthenticationMethod Negotiate -IISAuthenticationMethods Basic,NTLM,Negotiate

Source: https://community.spiceworks.com/topic/1979514-outlook-auto-discover-issue


Lastly, if you’re having trouble with the famous and dreadful Outlook credential-popup, changing the authentication methods should help.

“Basic authentication: If you select this authentication type, Outlook will prompt for username and password while attempting a connection with Exchange”.

Source: http://msexchangeguru.com/2013/01/10/e2013-outlook-anywhere/ 

Similar information can be found at:

http://www.sysadminlab.net/exchange/outlook-anywhere-basic-vs-ntlm-authentication-explained
https://community.spiceworks.com/topic/1979514-outlook-auto-discover-issue

for example. I’ve seen this mentioned on other sites as well, I just can’t remember them right now. We’ve also seen the “popup dilemma” here, but luckily gotten rid of it by now.


Get-ActiveExchangeUsers script

If you want to get some nice details about how your users connect (per protocol), I’d suggest you grab the script from

https://gallery.technet.microsoft.com/office/Get-ActiveExchangeUsersps1-f1642024

As seen in my screenshots below, not everyone is connected over MAPI (yet). Old RPC connections are still used, and that will probably be the situation for a while. If someone wiser than me care to explain why this is the case, please do.

Get-ActiveExchangeUsers_script_server1

Get-ActiveExchangeUsers_script_server2

The user activity was fairly low when these screenshots were taken.


Checking logs

Finally, if you feel like deep diving into the logs, the MAPI-stuff gets logged in:

C:\Program Files\Microsoft\Exchange Server\V15\Logging\MAPI Client Access for the CAS and
C:\Program Files\Microsoft\Exchange Server\V15\Logging\HttpProxy\Mapi for the Mailbox.

If you see any suspicious things in here, do Google (or use common sense 🙂 ).

Moving SpamAssassin’s Spam-flagged Mail Automatically into Outlook’s Junk E-mail Folder

More and more of our users are moving towards a pure Exchange environment. This means that both email and calendar functions are used from Exchange. This is the default behavior for most companies nowadays, but we’ve been using a 3rd party imap server for email. The (slow) migration towards Exchange also brings challenges. One of many challenges is regarding the spam management (on the client). Should it be an automatic or a manual process for the users?

On imap, we have a postfix server in front of the imap server. The postfix server is configured to take care of spam and antivirus using SpamAssassin+Amavis. (Postfix routes email via the SpamAssassin/Amavis server before it “lands” on the imap (and Exchange) “back-ends”). This is still true for Exchange – which is a good thing. There’s no need to install (or buy a license for) a separate Exchange Edge Transport server to handle spam and antivirus when we already have a VERY efficient Spam/AV-solution deployed.

However, Exchange have no idea what to do with these spam-flagged emails by default – it’s delivering them straight into Outlook’s inbox. Here’s an example of a spam-flagged email (without Exchange server-side filters/transport rules):

Exchange_spamexample_without_filters

Fig 1. A Spam-flagged email (by SpamAssassin) from a user inbox. No server-side configuration done yet.

Even though this email is already flagged as spam (***Spam***), it’s not very “nice” having them arrive in your inbox. What you want is an automated process/feature which moves spam automatically into Outlook’s “Junk E-mail”-folder.

On a side note, not all spam in our organization reaches the users. If an email has a spam score over 12, it won’t be delivered to a user mailbox. A spam score between 5-11 is classified as spam, so these emails will be delivered to the users however. Of course emails with a score of 5 or lower will also be delivered, but these emails aren’t flagged as spam 🙂 If you want to get technical and read about spam scores in SpamAssassin, go ahead:

https://en.wikipedia.org/wiki/SpamAssassin
https://litmus.com/help/testing/spam-scoring/
https://help.aweber.com/hc/en-us/articles/204032316-What-is-a-good-Spam-Assassin-Score


Well, how do you automatically sort the spam emails to the Junk E-mail folder then? You can do this on the client-side (Outlook), but the more logical solution is to filter these on the server-side (Exchange). I followed a good guide from http://exchangepedia.com/blog/2008/01/assigning-scl-to-messages-scanned-by.html and got it working. Some info regarding SCL:

https://technet.microsoft.com/en-us/library/aa995744(v=exchg.150).aspx
https://technet.microsoft.com/en-us/library/dn798345(v=exchg.150).aspx

I hadn’t touched the default values (no need) so they looked like this:

Exchange_contentfilterSCLconfig

Fig 2. Content filtering default configuration.


I then followed the guide to make a new Transport Rule. I made it from EAC, but it can easily be created from EMS as well:

Exchange_spam-status-rule

Fig 3. Creating a new Transport Rule.

I made sure that SCL was set to a HIGHER value than the SCLJunkThreshold. In our case “9”. It won’t work otherwise, even though some other guide tells you to put it at a lower value.


It’s also a good idea to check that Junk E-mail configuration is enabled on the mailboxes. Here I do a check on my own mailbox:

Exchange_junkemailconfiguration

Fig 4. Check Junk E-mail configuration. It’s enabled.

Good. Everything is in order. Now we should test and see if a spam email arrives in my Junk E-mail folder instead of the Inbox. I spam-bombed myself to test, and yes, the spam arrives correctly in the Junk E-mail folder:

Exchange_spamexample_with_filter

Fig 5. Spam in the Junk.


Let’s see what the spam looks like in more detail:

Exchange_spamexample_with_filters

Fig 6. A Spam-flagged email, now with the server-side configuration done.

As you can see, Outlook now provides more information. When a message arrives/is situated in the Junk E-mail folder, it has disabled links and is also converted into plain text.

Happy days – spam is now automatically moved into the Junk E-mail folder for each user 🙂


(If you for whatever reason would want to configure this whole procedure on the client side instead of Exchange, you could follow https://www.jyu.fi/itp/en/email/how-to/exchange-spam-filtering for example).

Disabled (AD) users still searchable in Lync/SfB

Well, this was a bit of a nightmare to debug. I started the whole project with some googling on how to (automatically) remove AD-disabled users from Lync (SfB) Server. This procedure is by no means automatic, and If you disable a user in AD they can still use Lync (at least for some time). Have a look at https://ucgeek.co/2014/04/lync-users-can-login-after-domain-account-disabled/ for some deeper details.

My concern wasn’t about the fact that the users still could use Lync however, it was more about the fact that they are “hanging around” like ghosts on the Lync Server for no good reason. In plain English – users should be disabled if their AD account is also disabled.

I’ll now present MANY different ways to get rid of the unwanted users in the Lync/SfB Address Book. One method might work for someone, and another method might work for someone else. Hell, you might even need to use all the methods combined 🙂


Method 1: Disable AD-disabled users on Lync/SfB Server

This idea led me to some PowerShell scripts. Here are a couple of examples that will disable users on the Lync Server if they are disabled in Active Directory:

http://www.markc.me.uk/blog/files/ADDisabled.html
https://www.ucunleashed.com/265
https://trogjels.wordpress.com/2012/08/16/lync-disable-ad-disabled-users/

This worked just fine and I got all the accounts removed from the Lync Server. A little addition to the above links is that I now use this script from a Scheduled Task:

disableADdisabledaccount_task_scheduler


The PowerShell “script” itself looks like this:

# disable_ADdisabled.ps1 , source http://www.markc.me.uk/blog/files/ADDisabled.html
# J.S. 13.9.2017
Import-Module ‘C:\Program Files\Common Files\Microsoft Lync Server 2013\Modules\Lync\Lync.psd1’
Get-CsAdUser -ResultSize Unlimited | Where-Object {$_.UserAccountControl -match “AccountDisabled” -and $_.Enabled} | Disable-CsUser

Well, still no luck. You think your users wouldn’t show up when searching in Lync (Address Book) if they are no longer activated on Lync Server (and also has the –HiddenFromAddressListsEnabled flag, see next chapter). Well, they do. At least for us. This was getting pretty weird. I tried googling but all I could come up with was “Update-CsAddressBook” and so forth. Examples:

http://lyncinsider.com/lync-server-2010/updating-lync-contacts-sync-error-fixes-part-2-of-3/
http://www.fots.nl/lync-address-book-sync-process-information/
http://blog.schertz.name/2010/09/updating-the-lync-2010-address-book/
https://social.technet.microsoft.com/Forums/sharepoint/en-US/2e0d1200-b924-42dd-8700-55893b8cfc03/deleted-lync-user-still-in-list-showing-presence-unknown?forum=officeitpro
https://technet.microsoft.com/en-us/library/gg429695(v=ocs.15).aspx

No. Still no luck. I could see the “old” users which aren’t enabled in AD nor on the Lync Server. This was getting frustrated. Better turn to my old friend Event Viewer. Yes, some hits indeed:

Event ID 21054, Error:
Users are not indexed in the database that should be.

Expected indexed user count: 0
Actual indexed user count: 1999
Cause: User replication issue.
Resolution:
Run Update-CsAddressBook to synchronize all accounts.

Well, what command did I just run? Did it help? No. Then again if you Google the message you’ll soon notice that this error is nothing to worry about:

“As long as “Objects not indexed that should be” and “Abandoned Objects” are zero, the database is okay.” I did run the Debug-csAddressBookReplication and “my” objects were zero. Fine.

Source: https://social.technet.microsoft.com/Forums/lync/en-US/49de4752-a73e-4a55-98d6-a48409a02d94/alert-lync-users-are-not-indexed-in-the-database-that-should-be?forum=lyncdeploy (you can find this information in many other sources as well…)


Method 2: HiddenFromAddressListsEnabled PowerShell command

There are many different flavors of this command, but the one we’re using is something like the one found at https://stackoverflow.com/questions/7974204/powershell-command-to-hide-user-from-exchange-address-lists (and the answer “I use this as a daily scheduled task to hide users disabled in AD from the Global Address List”). We also use it in a Scheduled Task.

This HiddenFromAddressListsEnabled –method was applied at an earlier stage, as we had “problems” with Outlook / Exchange showing disabled users in Global Address List (GAL). The above PowerShell-trick solved the problem on the Outlook/Exchange-side. It SHOULD however also work with Lync/SfB if you are using the Unified Contact Store, UCS. More information about UCS in the next chapter. However, it didn’t work for us. We still saw disabled users in Lync’s Address Book 😦


Method 3: Rollback from UCS

What now? I’m ok with just ignoring the event in Event Viewer, but I still have the same problem. My disabled users are visible in Lync’s Address Book. This got me thinking about the Exchange <-> Lync relationship. I know they are a tight fit. Like all MS products. The https://social.technet.microsoft.com/Forums/sharepoint/en-US/2e0d1200-b924-42dd-8700-55893b8cfc03/deleted-lync-user-still-in-list-showing-presence-unknown?forum=officeitpro post had some hints at the end also. Many, MANY Google searches later got me to https://support.office.com/en-us/article/Set-Personal-options-c09b21ac-7334-49cf-a510-d8c432fcaf01

And there it was. The answer I was (partly) looking for:

You specify how Skype for Business interacts with other Office programs.

  1. In Personal options, under Personal information manager, select either Microsoft Exchange or Microsoft Outlook or None from the drop-down list. When you select Microsoft Exchange or Microsoft Outlook, the Skype for Business search feature uses the Microsoft Outlook Contact list as a source of contacts, in addition to the global address list.

    When you select None, the Skype for Business search feature returns contacts only from the global address list. It doesn’t use either the Windows Address Book or the Outlook Contact list.

Source: https://support.office.com/en-us/article/Set-Personal-options-c09b21ac-7334-49cf-a510-d8c432fcaf01

So, was my solution setting this setting to “None”? You’d think so. Think again. This setting is different in the SfB client. You CAN’T set it to none. Have a look at https://answers.microsoft.com/en-us/msoffice/forum/msoffice_sfb-mso_winother/skype-for-business-2016-personal-information/67d14b5e-23d7-4d23-ab6e-5710739cb0d3 for example.

Well, as my integration is controlled “by my administrator” (which would be myself thank you very much), it got me thinking that it HAS to be a server setting. Now the question was, WHICH setting specifically? Now I honestly don’t remember what I googled to find this, but in the end it got me to http://techgenix.com/integrating-exchange-server-2013-and-skype-business-server-2015-part6/

Well well well. This was all new to me. I ran the command Get-CSUserServicePolicy and found out that UcsAllowed was set to true. It was indeed enabled for ALL our users. I also checked from the SfB client itself, and yes, (not surprisingly) same result:

UCS_screenshot_SfB_configuration_information


So, what is UCS?

Detailed Description

The unified contact store introduced in Lync Server 2013 gives administrators the option of storing a user’s contacts in Exchange instead of in Skype for Business Server 2015; in turn that allows the user to access the same set of contacts in Outlook and Outlook Web Access as well as. (Alternatively, you can continue to store contacts in Skype for Business Server 2015. In that case, users will have to maintain two separate sets of contacts: one for use with Outlook and Outlook Web Access, and one for use with Skype for Business.)

Source: https://technet.microsoft.com/en-us/library/jj205414.aspx

Now the big problem here is that our user accounts used in different systems aren’t disabled at the same time. Users aren’t automatically disabled in Exchange if they get disabled in AD (at least not yet, but this will probably change when our imap-server retires). See the pattern here? What this means is that if a user is still “active” (from Exchange’s point of view), it ALSO lists this person in LYNC’s Address Book. This also means that I’ve found the root problem for our “ghost users”.

The solution is NOT using UCS, and rollback to the system where the contacts are stored on the Lync Server instead of Exchange. Well yeah, you COULD disable UCS, but it feels like going the wrong way. If you still want to test however, the information for this procedure is available here:

https://technet.microsoft.com/en-us/library/jj205224(v=ocs.15).aspx (To rollback unified contact store contacts from Exchange 2013 to Lync Server 2013).
https://technet.microsoft.com/en-us/library/jj688083.aspx

I myself only tried it for a single user as a test, and it worked just fine.

Step one:

New-CsUserServicesPolicy -Identity “NoUCS” -UcsAllowed $False

Step two:

Grant-CsUserServicesPolicy -Identity “mytestuser” -PolicyName “NoUCS”

Step three:

Invoke-CsUcsRollback -Identity “mytestuser”

This removes UCS Address Book from the user and the contacts will be retrieved from the Lync Server instead. This method did INDEED WORK. I did NOT see the disabled users anymore in Lync’s Address Book.

I thought this was the perfect solution/method. However, it feels like going against Microsoft’s thoughts about a more unified Address Book on all MS platforms. I therefore buried this idea.


Method 4: ABSConfig

Even further googling led me to:

http://www.justin-morris.net/how-to-hide-users-from-the-lync-address-book/
https://social.technet.microsoft.com/Forums/lync/en-US/269159b0-3850-4bd6-83ed-1a00516417b8/using-the-abs-configuration-tool-to-limit-the-address-book-to-accounts-which-have-a-sip-address?forum=ocsaddressbook

which use yet another method to hide unwanted users from the Address Book, namely ABSConfig. I changed the configuration to this:

lync_server2013_abs_configuration_tool

…and was then greeted with:

lync_server2013_abs_configuration_tool_changes_applied

Ok, so I did the following:

  1. Restart RtcSrv = Restarted Lync Server Front-End service
  2. Update-CsUserDatabase (https://social.technet.microsoft.com/Forums/lync/en-US/5cb81b13-bed4-4068-af9b-d917a65094a8/lync-server-user-regeneration?forum=ocsaddressbook)
  3. Update-CsAddressBook

Was this finally the solution to all Address Book problems? Well yes, actually it was 🙂

To sum it up: In our case the problem was solved by using methods 1,2 and 4. Results may vary though – what worked for us might not work for you.

Alternative Witness Server for Exchange 2013 DAG

As stated in my previous blog posts, we’re using a two node DAG spanning across two datacenters/two AD Sites. The problem with this scenario is the witness server, or should I say the location of the witness server. I learned this the hard way, as we had minor problems with one of our datacenters. It also happened to be the datacenter where the witness server is located. This resulted in unresponsive/non-working email for some users, even though the HA aspect of Exchange via the Load Balancer was working fine.

I’ll borrow some pictures and text from http://searchexchange.techtarget.com/tip/How-Dynamic-Quorum-keeps-Exchange-2013-clusters-running-during-failure as I’m too lazy to rewrite everything. (We’re using dynamic quorum by default btw, as our servers are Windows Server 2012 R2).

“In a planned data center shutdown — where power to the data center and a host is often cut cleanly — we would have the opportunity to change the FSW to a host in the secondary data center. This allows for maintenance, but it does not help the inevitable event where an air conditioning unit overheats one weekend, servers begin to shut down, email stops working — and somebody has to get everything up and running again.

Dynamic Quorum with Windows Server 2012 and Exchange 2013 protects not only against this scenario above, but also against scenarios where the majority of nodes in a cluster fail. In another example, we see that in the primary site, we’ve lost both one Exchange node and the FSW (Fig 1). (This happened to us).

In our example, Dynamic Quorum can protect against a data center failure while the Exchange DAG remains online. This means that when the circumstances are right (we’ll come to that in a moment), a power failure in your primary data center can occur and Exchange can continue to stay up and running. This can even happen for smaller environments without the need to place the FSW in a third site.”

exchange_dag_witness1

Fig 1. Loss of the first node and FSW with Dynamic Quorum.


The key caveat is that the cluster must shut down cleanly. In the previous example, where the first data center failed, we relied on a mechanism to coordinate data center shutdown. This doesn’t need to be complicated, and a well-designed data center often will have this built in.

This can also protect against another scenario where there are three-node Exchange DAGs in a similar configuration — with two Exchange nodes present in the first data center and a single node present in a second data center. As the two nodes in the first data center shut down cleanly, Dynamic Quorum will ensure the remaining node keeps the DAG online.”

Some similar information can also be found at:

https://practical365.com/exchange-server/windows-server-2012-dynamic-quorum/
http://techgenix.com/exchange-2013-dag-dynamic-quorum-part1/ for example.


Well, this would all be too good to be true if it wasn’t for the “the cluster must shut down cleanly” -part. This got me thinking about alternatives. What about a third Exchange server and skipping the witness server altogether? Well, it doesn’t work any better as stated above. It’s the same dilemma if two of the nodes looses power. The solution as I can see it is (briefly) explained in the below article, DAC – Database Activation Coordination mode. This, together with an alternative witness server is the recipe for a better disaster plan. With DAC and an alternative witness server in place, you can force the exchange servers in a AD-Site to connect to the local witness server. It requires some manual work (in case disaster strikes) though, but it’s doable.


DAC

So, what’s up with the DAC mode and the alternative witness server? Lets have a look. First, let’s do some homework and have a look at DAC:

https://technet.microsoft.com/en-us/library/dd979790.aspx
https://practical365.com/exchange-server/exchange-best-practices-datacenter-activation-coordination-mode/
https://blogs.technet.microsoft.com/exchange/2011/05/31/exchange-2010-high-availability-misconceptions-addressed/

DAC mode is used to control the database mount on startup behavior of a DAG. This control is designed to prevent split brain from occurring at the database level during a datacenter switchback. Split brain, also known as split brain syndrome, is a condition that results in a database being mounted as an active copy on two members of the same DAG that are unable to communicate with one another. Split brain is prevented using DAC mode, because DAC mode requires DAG members to obtain permission to mount databases before they can be mounted”.

Source: https://technet.microsoft.com/en-us/library/dd979790.aspx

Datacenter Activation Coordination (DAC) mode has nothing whatsoever to do with failover. DAC mode is a property of the DAG that, when enabled, forces starting DAG members to acquire permission from other DAG members in order to mount mailbox databases. DAC mode was created to handle the following basic scenario:

  • You have a DAG extended to two datacenters.
  • You lose the power to your primary datacenter, which also takes out WAN connectivity between your primary and secondary datacenters.
  • Because primary datacenter power will be down for a while, you decide to activate your secondary datacenter and you perform a datacenter switchover.
  • Eventually, power is restored to your primary datacenter, but WAN connectivity between the two datacenters is not yet functional.
  • The DAG members starting up in the primary datacenter cannot communicate with any of the running DAG members in the secondary datacenter”.

Source: https://blogs.technet.microsoft.com/exchange/2011/05/31/exchange-2010-high-availability-misconceptions-addressed/

In short: Enable DAC mode on your Exchange servers if using more than two nodes.


Alternative witness server

Now that we have some basic understanding about DAC, let’s look at the Alternative witness server (AWS):

https://www.rutter-net.com/blog/news/alternate-file-share-witness-correcting-the-confusion
https://blogs.technet.microsoft.com/exchange/2011/05/31/exchange-2010-high-availability-misconceptions-addressed/

I think it’s quite well summarized in the first article:

The confusion lies in the event of datacenter activation; that the alternate file share witness would automatically come online as a means to provide quorum to the surviving DAG members and keep the databases mounted. So in many ways, some people view it as redundancy to the file share witness for an even numbered DAG.

In reality, the alternate file share witness is only invoked when an admin goes through procedures of activating the mailbox servers who lost quorum. DAC mode dramatically simplifies the process and when the “Restore-DatabaseAvailabilityGroup” cmdlet is executed during a datacenter activation, the alternate file share witness will be activated.”

The second article also has some nice overall information about High Availability Misconceptions. I suggest you read it.

In short: Manual labor is required even though you have configured an alternative witness server.


Datacenter switchover

So, what to do when disaster strikes? First, have a look at the TechNet article “Datacenter switchovers”:

https://technet.microsoft.com/en-us/library/dd351049.aspx

Then have a look at:

https://smtpport25.wordpress.com/2010/12/10/exchange-2010-dag-local-and-site-drfailover-and-fail-back/ for some serious deep diving into the subject. This has to be one of the most comprehensive articles about DAG/Failover/DAC/you name it on the Internet.

I’ll summarize the TechNet and the smtpport25 articles into actions:

From TechNet:

“There are four basic steps that you complete to perform a datacenter switchover, after making the initial decision to activate the second datacenter:

  1. Terminate a partially running datacenter   This step involves terminating Exchange services in the primary datacenter, if any services are still running. This is particularly important for the Mailbox server role because it uses an active/passive high availability model. If services in a partially failed datacenter aren’t stopped, it’s possible for problems from the partially failed datacenter to negatively affect the services during a switchover back to the primary datacenter”.

The sub-chapter Terminating a Partially Failed Datacenter has details on how to do this, and smtpport25 has even more information. If you start reading from “Figure 19” onwards in the smtpport25 article you’ll find this:

In figure 20. Marked in red has the details about started mailbox servers and Stopped Mailbox Servers. Started mailbox servers are the servers which are available for DAG for bringing the Database online. Stopped mailbox Servers are no longer participating in the DAG. There may be servers which are offline or down because of Datacenter failures. When we are restoring the service on secondary site, ideally all the servers which are in primary should be marked as stopped and they should not use when the services are brought online”.

So, in other words we should move the primary servers into Stopped State. To do that, use the PowerShell command:

Stop-DatabaseAvailabilityGroup -Identity DAG1 -Mailboxserver AMBX1 –Configurationonly

Stop-DatabaseAvailabilityGroup -Identity DAG1 -Mailboxserver AMBX2 –Configurationonly

Source: https://smtpport25.wordpress.com/2010/12/10/exchange-2010-dag-local-and-site-drfailover-and-fail-back/

Then, TechNet and smtpport25 have different information:

TechNet tells you to:

“2.The second datacenter must now be updated to represent which primary datacenter servers are stopped. This is done by running the same Stop-DatabaseAvailabilityGroup command with the ConfigurationOnly parameter using the same ActiveDirectorySite parameter and specifying the name of the Active Directory site in the failed primary datacenter. The purpose of this step is to inform the servers in the second datacenter about which mailbox servers are available to use when restoring service”.

The above should be enough if the DAG is in DAC mode (which it is).

Smtpport25 however doesn’t mention DAC mode at all in this case, instead they use the non-DAC mode approach from TechNet, with a little twist:

  • First, stop the cluster service on the secondary site/datacenter, Net stop Clussvc
  • Then, restore DAG on the secondary site, Restore-DatabaseAvailabilityGroup -Identity DAG01 -ActiveDirectorySite BSite

I honestly don’t know which of the solutions are correct, and I hope I won’t have to find out in our production environment anytime soon 🙂


Next step would be to Activate the Mailboxes Servers, again following different information whether the DAG is in DAC mode or not. I won’t paste all the text here as it is available in the TechNet article.

Then, following on to the chapter Activating Client Access Services:

  • Activate Client Access services   This involves using the URL mapping information and the Domain Name System (DNS) change methodology to perform all required DNS updates. The mapping information describes what DNS changes to perform. The amount of time required to complete the update depends on the methodology used and the Time to Live (TTL) settings on the DNS record (and whether the deployment’s infrastructure honors the TTL).

We do not need to perform this step as we’re using Zen Load Balancer 🙂

And lastly, I won’t copy/paste information regarding Restoring Service to the Primary Datacenter, it’s already nicely written in the TechNet or smtpport25 article. I sure do hope I won’t have to use the commands though 🙂