Deploying Skype for Business 2015, including Edge and Reverse Proxy Servers

I was given the task of deploying a full-blown on-premise deployment of Skype for Business Server 2015 for a small company. The deployment also included an Edge Server and a Reverse Proxy server (IIS with ARR). In this blog post I’ll discuss the deployment process in general, and also the problems (and solutions) that were discovered during/after the deployment. I’ll end the post with some check-up/misc. information.

This blog post will be quite massive, so I’ll split it into several chapters.


Planning

General information about planning for Skype for Business Server 2015 can be found at:

https://technet.microsoft.com/en-us/library/dn951427.aspx 

However, as I’ve deployed Lync Edge plus Reverse proxy servers before, much of the planning/homework was already done. I’ve also previously written a blog post titled “Test Lab Guide: Windows Server 2016 with Integrated Exchange 2016, SfB Server 2015 and SharePoint 2016”, where I deployed a front-end server for Skype for Business Server 2015. That said, use these two blog posts as a compliment for this guide – they include some deeper information not discussed here. Front-end DNS entries haven’t been discussed earlier however, so here goes:

Front-end DNS

I used the following entries:

A-record:
fe.domain.com

C-names:
lyncdiscoverinternal.domain.com
sip.domain.com
meet.domain.com
dialin.domain.com
webext.domain.com

The next chapter will present the actual front-end installation, including some dilemmas/gotchas. After that I’ll continue with the Edge and Reverse Proxy installation.


Front-end installation

For the front-end installation I followed TechNet’s deployment article with some twists. As usual, it didn’t quite work as planned 🙂 I’ll now try to explain the process in detail, including some problems along the way.

Before starting the actual setup, I double checked that my network and AD infrastructure was setup correctly. I also checked that I had a working ADCS (not setup by me), so I could get internal certificates assigned on the front-end. (This actually turned into quite a mess, see the next chapter about front-end certificate gotchas). Finally I checked that I had created/requested all the DNS aliases needed in the internal DNS zone.

With all these steps done, it was time to move along to the actual front-end installation. My steps:

  • Installed pre-requisites for Windows Server 2016, which are slightly different compared to Windows server 2012 R2. Information can be found at: https://blogs.perficient.com/microsoft/2017/08/skype-for-business-how-to-install-on-windows-server-2016/ for example. (The issue regarding IIS URL Rewrite module wasn’t a problem in my deployment, btw).
    • Add-WindowsFeature RSAT-ADDS, Web-Server, Web-Static-Content, Web-Default-Doc, Web-Http-Errors, Web-Asp-Net, Web-Net-Ext, Web-ISAPI-Ext, Web-ISAPI-Filter, Web-Http-Logging, Web-Log-Libraries, Web-Request-Monitor, Web-Http-Tracing, Web-Basic-Auth, Web-Windows-Auth, Web-Client-Auth, Web-Filtering, Web-Stat-Compression, Web-Dyn-Compression, NET-WCF-HTTP-Activation45, Web-Asp-Net45, Web-Mgmt-Tools, Web-Scripting-Tools, Web-Mgmt-Compat, Telnet-Client, Windows-Identity-Foundation
  • Installed Silverlight
    • Created the file share (local).
      • Important:
        “The file share cannot be located on the Enterprise Edition Front End Server, but can be located on a Standard Edition server.
        You can define the file share in Topology Builder before you create the file share, but you must create the file share in the defined location you define before you publish the topology”.

                      Source: https://technet.microsoft.com/en-us/library/ms.lync.tb.addfrontendfilestorepage.aspx?f=255&MSPPError=-2147217396

    • Installed administrative tools.
    • Prepared Active Directory, using an AD account with enterprise/schema admin rights.
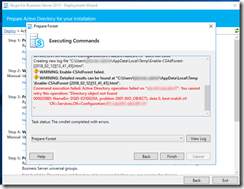
      • Schema Preparation went fine, but forest preparation failed:

                     sfb2015_saa_forest_prep_fail1

                     sfb2015_saa_forest_prep_fail2

                               sfb2015_saa_forest_prep_fail3

                                 sfb2015_saa_forest_prep_fail_with_success

          • Success! The -GlobalCatalog option was the key.
      • I finally moved over to preparing the domain. The domain preparation worked without problems for a change 🙂
      • I then created and published a new topology, again following https://technet.microsoft.com/en-us/library/dn933913.aspx
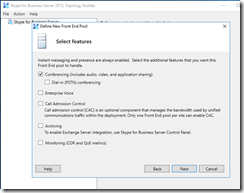
        • Nothing fancy, just the basics with a standard edition front-end and without all the bells and whistles. (Edge server will be configured later):

                           sfb2015_saa_top_builder_select_features

        • Media server is collocated.
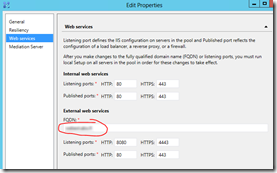
        • Web services external url is specified as webext.domain.com (in the DNS front-end information earlier).
        • Simple urls are also specified according to the DNS information.
        • Time to publish the topology…
          • But wait. Read carefully: “If this is Standard Edition, you will need to run the Prepare First Standard Edition Server process from the Deployment Wizard before you publish a topology. This prepares for Standard Edition by installing a SQL Server Express Edition instance and creating the Central Management Store”.
          • Publishing will actually fail if you forget to prepare first! Been there, done that 🙂
        • So, new order is:
          • Prepare
          • Publish
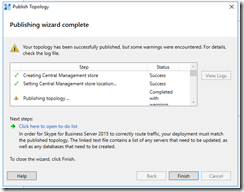
        • Done! …or not 😦 SIGH! New errors:

                           sfb2015_saa_publishing_wizard_completed_with_errors

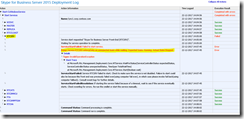
                           sfb2015_saa_publish_cs_topology_deployment_log1

                           sfb2015_saa_publish_cs_topology_deployment_log2

        • Getting sick of all the (never-before-seen) errors. Much googling led me to the following commands:

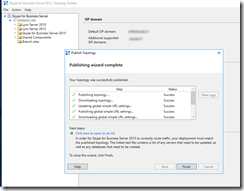
                            sfb2015_saa_cs_management_store_replication_error

                                sfb2015_saa_publishing_wizard_completed_without_errors

        • (Persistent chat and Edge will be enabled later on)


  • Now it was finally time to install the system components, following https://technet.microsoft.com/en-us/library/dn951417.aspx?f=255&MSPPError=-2147217396
    • Make a note of the following: “Before you follow these steps, make sure you’re logged onto the server with a domain user account that’s both a local administrator and a member of the RTCUniversalServerAdmins group”.
  • Ran Step 1, Install Local Configuration Store. No problems.
  • Ran Step 2, Setup or Remove Skype for Business Server Components. No problems.
  • Ran Step 3, Request, Install or Assign Certificates.
    • I checked with the “AD CS guy” that everything was in order for the request. It was.
    • I made a custom request with the private key marked as exportable.
    • I assigned the certificate (both for default and OAuth).
    • (NOTE! Now using a public certificate, read about the gotchas in next chapter)
  • It was now time to start all the SfB services.
    • This is done from SfB management shell with the command “Start-CsWindowsService
    • All good.
  • I finally configured integration between Exchange and Skype for Business (using OAuth). I wrote how to do this in my previous blog post, so have a look there for details.
    • I also enabled MAPI for the company’s Exchange server for a smoother integration between SfB and Exchange. I’ve also written about this procedure in a previous blog post.
  • As a last step, I wanted to bulk-enable a bunch of users from an AD group.

                sfb2015_saa_bulk_enable_users_from_ad-group

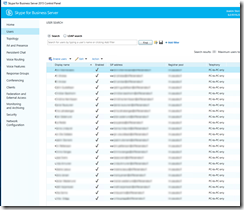
    • Checked the result from SfB Control Panel:

                sfb2015_saa_user_list_in_contol_panel

    • Success! 🙂
  • Finally tested a SfB client, everything seemed OK!


Front-end certificate gotchas

Certificate requirements for internal servers in Lync Server 2013 (same for SfB Server 2015) can be found at:

https://technet.microsoft.com/en-us/library/gg398094%28v=ocs.15%29.aspx?f=255&MSPPError=-2147217396

Some notes:

“Although an internal enterprise certification authority (CA) is recommended for internal servers, you can also use a public CA. For a list of public CAs that provide certificates that comply with specific requirements for unified communications (UC) certificates and have partnered with Microsoft to ensure they work with the Lync Server Certificate Wizard, see article Microsoft Knowledge Base 929395, “Unified Communications Certificate Partners for Exchange Server and for Communications Server,” at https://go.microsoft.com/fwlink/p/?linkId=202834.”

Source: https://technet.microsoft.com/en-us/library/gg398094%28v=ocs.15%29.aspx?f=255&MSPPError=-2147217396


“For internal servers (e.g. Front End Servers and Edge Server internal interface), you can request the certificates from your internal CA. For Reverse Proxy and Edge Server external interface, you should have public certificates installed.You can use SAN certificates, for example.”

Source: https://social.technet.microsoft.com/Forums/ie/en-US/5a45b42b-a600-45ac-b056-241b77f9774a/lync-frontend-pool-certificate-requirement?forum=lyncdeploy


“Although this approach technically can work it’s not recommended as (1) it’s not best-practice to use a third party certificate on the internal Front End servers and (2) it’s not advisable to publish your internal server FQDNs and general namespace into an external certificate.”

Source: https://social.technet.microsoft.com/Forums/lync/en-US/4f8a0503-64b0-4429-98d1-7fdf61e9b3b1/same-cert-for-edge-and-front-end?forum=ocscertificates


The above information really begged for internal certificates on the front-end. And yes, I tried the approach. Oh boy, DID I. MANY, MANY times. It always resulted in a mess however. Because of this, we’re now using a public certificate on the front-end. I’ve later realized that I COULD have made it work with internal certificates also. At least to some extent. HOWEVER, you get VERY tired of trying something that works in theory, but not in practice. Let me list some known “problems” (not so easily “found”, at least not in my opinion):

  • using internal certificates on the front-end combined with an Edge server requires SSL offloading on the reverse proxy. This is not that well documented afaik, but kind of logical. Not that logical when you have 100 other things to worry/think about though. See: http://www.uclabs.blog/2014/08/lync-2013-reverse-proxy-solution-with.html. I fought with the ARR rules quite a bit so the SSL offloading part wasn’t the hiccup for me. A bigger issue for me was the fact that:
  • using internal certificates gave a certificate warning in ALL browsers except Internet Explorer / Microsoft Edge. I don’t know of ANY workaround for this, as I can’t make the internal CA root certificates available for Firefox or Chrome. Short version story: a meeting link (https://meet.domain.com/whatever/XXXX) give certificate error no matter what I do on non-MS browsers. It does not matter if the connection is made internally or via the reverse proxy.
  • The SfB / Lync CLIENT is probably happy with the internal certificates (also through IIS ARR with SSL offloading), HOWEVER I don’t see this as a 100% working solution when an external participant could be using the web client for instance (and receiving a certificate error).

I’ve written more about the certificate dilemma in a later chapter also, see “Problems after the deployment / Certificate problem revisited”.


Edge Server installation

As previously mentioned, I’ve blogged about this before in my blog post Adding Edge and Reverse Proxy Servers to an Existing Lync 2013 Environment. There’s absolutely no need to rewrite this information, as it’s completely usable with Skype for Business also. A little recap is always in place though:

  • First, have a look at your network interfaces:

           sfb2015_saa_edge_Get-NetIPConfiguration

All looks good! Three external interfaces and one internal (all renamed). The third one in the list is the internal NIC and it has no gateway specified. (Never mind the blurs 🙂  )

  • Then add the routes needed for the internal traffic:

           route add -p 1.2.3.0 mask 255.255.240.0  1.2.4.40
           route add -p 1.2.5.0 mask 255.255.240.0  1.2.4.40

These are just example values. Subnet 1.2.3.0 and subnet 1.2.5.0 should use the internal NIC/interface and the gateway configured on that NIC (1.2.4.40 in the above example).

(You should also edit the hosts-file on the Reverse proxy, NOT on the edge).

  • You can read about DNS and certificate requirements in my previous blog post. Please do.
  • Check the primary DNS suffix. It should match the suffix from the front-end. This is actually quite an important step so don’t forget to check it!
  • Manually install the internal and external certificates via MMC. Your own method may be different.
    • Also export (from the front-end) and import the internal CA root certificates. This is needed because the edge server is not domain joined. Google if you don’t know how, or read my previous blog post.


“Activating” the Edge service…

The Edge service is activated on the Front-end. I like the guide I’ve used before, namely https://www.sherweb.com/blog/installing-lync-2013-edge-server/. It’s still usable for SfB Server 2015, but feel free to use whatever guide you like. Some notes from the setup:

  • DO make sure that you create the new Edge Pool under the “Skype for Business Server 2015” branch, not under Lync Server 2013.
  • This pool has one server
  • Did not enable federation
  • NOT using a single FQDN and IP for the Edge services
  • Using IPv4 and no NAT.
  • Specified the external FQDN the same way as in my previous blog post
  • …and so forth
  • Published the topology
  • Exported the configuration


Moving over to the Edge server…

Same prerequisites as on the font-end:

Add-WindowsFeature RSAT-ADDS, Web-Server, Web-Static-Content, Web-Default-Doc, Web-Http-Errors, Web-Asp-Net, Web-Net-Ext, Web-ISAPI-Ext, Web-ISAPI-Filter, Web-Http-Logging, Web-Log-Libraries, Web-Request-Monitor, Web-Http-Tracing, Web-Basic-Auth, Web-Windows-Auth, Web-Client-Auth, Web-Filtering, Web-Stat-Compression, Web-Dyn-Compression, NET-WCF-HTTP-Activation45, Web-Asp-Net45, Web-Mgmt-Tools, Web-Scripting-Tools, Web-Mgmt-Compat, Telnet-Client, Windows-Identity-Foundation

  • Ran setup.exe from the install media and continued following Step 5 from the guide at https://www.sherweb.com/blog/installing-lync-2013-edge-server/
  • Certificates were already installed via MMC so no need to import, just assign.
  • Started services (Start-CsWindowsService)
  • Created DNS SRV records (Step 8). The first one is needed, so don’t try without it. It won’t work.
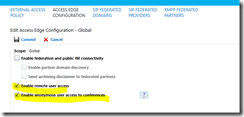
  • Step 9 in the guide is falling a little bit short. There’s no mention about the Access Edge Configuration – you should also check that tab. See screenshot below:

           sfb2015_saa_access_edge_configuration

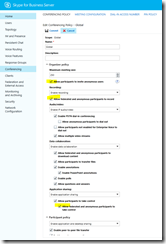
  • While you’re at it, have a look at the conferencing policy at the same time:

           sfb2015_saa_conferencing_policy

          Be sure to enable needed rights for the anonymous users.

  • Happy days, now moving over to the reverse proxy server installation.


Reverse Proxy server installation

I’ll just do a mini-recap as this installation is almost identical to the existing one in my blog post Adding Edge and Reverse Proxy Servers to an Existing Lync 2013 Environment.

  • Checked the network interfaces (renamed and specified correct IP’s).
  • Defined some hosts in the host-file. Check my above blog post.
  • Installed the certificates via MMC. More detailed information in my previous post.
  • Some newer information for Windows Server 2016:
    • For IIS, just install the basics:
      • Install-WindowsFeature -Name Web-Server, Web-Mgmt-Tools
    • For ARR, download the Microsoft Web Platform installer, and from there choose to install ARR 3.0. Example: https://www.youtube.com/watch?v=ILOC91lAyBE
    • Add the correct certificates to the https bindings in IIS
  • I previously followed http://jackstromberg.com/2014/11/tutorial-deploying-a-reverse-proxy-for-lync-server-2013/ for the IIS ARR rewrite rules. For some reason they didn’t work this time. Well, I’m not surprised, as IIS ARR is VERY picky about the rules. (It can actually be quite a headache to configure these).

Some alternative links for IIS ARR rewrite rules:

https://lucavitali.wordpress.com/2017/06/30/arr-how-to-setup-and-use-with-multiple-lyncsfb-sip-domains/ 
http://www.uclabs.blog/2014/08/lync-2013-reverse-proxy-solution-with.html
http://www.ucguys.com/2014/08/using-iis-arr-30-on-windows-server-2012r2-as-a-reverse-proxy-for-lync-server-2013.html

I used the first link as a guidance for my (new) rewrite rules. I tried many different combinations before I found this one, but to no avail. MANY thanks to Luca Vitali for something that actually works 🙂

I love the fact that you get away with using just ONE server farm/rule for all the simple urls. (We’re not using Office Web Apps).

The rule that work:

Pattern: (.*)

{HTTPS} on

{HTTP_HOST} = (meet|dialin|webext|lyncdiscover).domain.com


As a side note I noticed that you can use multiple SIP domains with this same “one liner”. In that case you just change the line to:

{HTTP_HOST} = (meet|dialin|webext|lyncdiscover).domain.com | (meet|dialin|webext|lyncdiscover).domain2.com

“|” stands for “or” and is the key here. This is an alternative approach to Luca’s implementation. See screenshot below:

sfb2015_saa_revproxy_iis_arr_url_rewrite

I tried this with two different SIP domains, and both domains proxied nicely through IIS ARR with the above change 🙂


Problems after the deployment

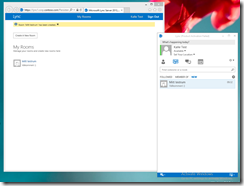
All of the above would seem like the perfect deployment, right? Wrong. After some testing you’ll probably notice some problems. My deployment was no exception. When I started the SfB client (after finishing the Edge deployment), I was greeted with the following:

sfb2015_saa_sfb_client_limited_external_calling 


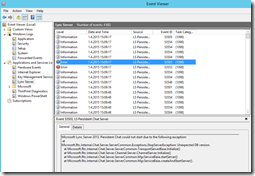
A quick look in SfB Control Panel and event viewer told me something was wrong with the replication:

On the Front-end:

sfb2015_saa_replication_error_in_sfb_control_panel

sfb2015_saa_replication_error_in_event_viewer_front_end


On the Edge server:

sfb2015_saa_replication_error_in_event_viewer_edge


These error messages were new to me but trusty ol’ Google led me to:

https://social.technet.microsoft.com/wiki/contents/articles/7459.troubleshooting-limited-external-calling-in-lync-client.aspx
http://communicationsknowledge.blogspot.fi/2012/06/limited-external-calling.html
http://www.wavecoreit.com/blog/serverconfig/file-transfer-agent-cannot-send-replication-data-to-replica-replicator-on-edge/
https://support.microsoft.com/en-us/help/2759117/lync-server-central-management-store-replication-failures

It didn’t take me long to realize that this was a firewall problem. I thought I had notified the firewall guy about all needed (open) ports, but this one seemed to have slipped. Well, no problem. We opened up the replication port (4443) in the internal firewall, and the replication started working again almost instantly.

To double check that the problem wasn’t with the replication service, I also used netstat and telnet:

On the Front-end:

sfb2015_saa_netstat_front_end


On the Edge server:

sfb2015_saa_netstat_edge


As seen in the screenshots, port 4443 is listening as it should be. This clearly shows that the service is listening, and it shouldn’t be the cause for the problem.

I could NOT telnet to the port however, which implies a firewall problem. After fixing the (hw) firewall and starting the SfB client again, the error was gone:

sfb2015_saa_sfb_client_limited_external_calling_fixed

Warning gone, happy days! 🙂


Certificate problem revisited

As stated in the chapter “Front-end certificate gotchas”, I had problems with the internal certificate. To illustrate the dilemma, let me show you some screenshots:

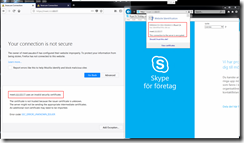
From a domain joined client:

sfb2015_saa_ie_vs_firefox_cert_problem_meet_internal_ca

To the left we have Firefox. As you can see, the connection is NOT trusted even though I’m testing from a domain joined client.

To the right we have Internet Explorer. The connection IS trusted (root CA is trusted).


Same thing from an external client:

sfb2015_saa_ie_ca_problem_meet_external


“Since Lync simple URL publishing does not require any SSL Offloading if you have the External Web Site in Lync assigned with a Public Certificate, you do not need a certificate installed on the IIS.

Most likely you have assigned a private certificate from your internal Certificate Authority, and you have to assign the IIS ARR an public certificate and reencrypt the traffic for internal use.
Be aware of two point here:

  1. this is called SSL Offloading and requires some extra CPU load on your server
  2. IIS must not be “domain joined” and therefore you need to have the internal Certificate authority Root Certificates assigned as TRUSTED!”

Source: http://www.uclabs.blog/2014/08/lync-2013-reverse-proxy-solution-with.html


Well, I could probably have gotten rid of the Internet Explorer error on the external client (while still using internal certificates) by using SSL offloading on the reverse proxy. It doesn’t solve the problem with other browsers however, afaik. If you have a nice solution to this whole certificate-dilemma, please comment!

All in all I think using a public certificate on the Front-end is easier, even though you’re “going against” best practices to some extent. At least it makes your life a whole lot easier.


Final check-up’s

Skype for Business Configuration Information

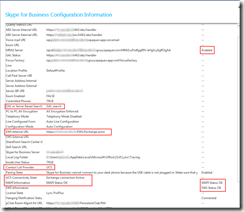
You should always check the Skype for Business Configuration Information from the SfB client after a successful deployment. Press the “ctrl” key while right clicking on the Skype for Business icon in the taskbar (down right). Then choose “Configuration Information”. From here, check that everything looks OK:

sfb2015_saa_sfb_client_configuration_information

  • MRAS list the connection to the edge server, and it looks OK.
  • GAL search tells SfB to look for the address book from the Global Address List (Exchange) instead from the internal SfB server Address Book.
  • EWS Internal URL is the connection towards Exchange.
  • Contact List Provider UCS (Unified Contact Store) shows that the Address Book is situated on Exchange – we’re not using a local SfB server Address Book.
  • UCS (see above) Connectivity State says that the connection to Exchange is active as it should be.
  • MAPI Information states that MAPI status is OK (which it should be now that I’ve configured Exchange for MAPI).
  • EWS (Exchange Web Services) is also OK.


Get-DnsAndIP PowerShell script

I found an awesome script to get an overview over deployed DNS records in a Skype for Business deployment. This is a lifesaver if your head is about to explode with all the DNS/certificate/firewall/whatever information 🙂 Get the script from:

https://gallery.technet.microsoft.com/office/Get-DnsAndIPPS1-List-your-a4689878

This script (plus Snooper) actually helped me find a missing DNS SRV record. Phew. A screenshot from the script in action:

sfb2015_saa_dns_and_ip_lookup_script

There are some “false positives” here. Only thing worth mentioning is the missing SRV record at the end. The test was also done with dual SIP domains, which is not the setup anymore. I’ve not added DNS records for federation either, as we’re not federating with any partners (yet).

Lastly, I’m NOT using lyncdiscover.domain.com in the internal DNS (intentionally). I have an explanation for this in my previous blog post Adding Edge and Reverse Proxy Servers to an Existing Lync 2013 Environment.


Snooper

Also worth mentioning is Snooper, which is part of Skype for Business Server 2015 Debugging Tools. It’s downloadable from:

https://www.microsoft.com/en-us/download/details.aspx?id=47263

It is very awesome in debugging client (connection) problems. I used it in combination with the above PowerShell script to find out that my DNS SRV record was missing for example. Here’s a screenshot from that particular “investigation”:

sfb2015_saa_snooper


For some quick information on how to use snooper, have a look at http://lynclead.com/?p=148 for example. The log files for the newest SfB client are located in C:\Users\xxxxx\AppData\Local\Microsoft\Office\16.0\Lync\Tracing btw.


Misc.

I’m also using the ABS Configuration Tool in this deployment to customize the Address Book. Detailed information about this can be found in my blog post Disabled (AD) users still searchable in Lync/SfB. The download link is available at: https://technet.microsoft.com/en-us/library/jj945604.aspx

SSL hardening of the SfB servers were done with IIS Crypto, https://www.nartac.com/Products/IISCrypto. I used the “best practices” template and received an “A” grade on Qualys SSL Labs Server Test, https://www.ssllabs.com/ssltest/. If you’re interested in getting an A+, have a look at https://scotthelme.co.uk/getting-an-a-on-the-qualys-ssl-test-windows-edition/ for example.


This quite much summarizes the whole Skype for Business deployment. Be sure to check my other blog post about Edge and reverse proxy deployment also, as it includes some deeper information not mentioned here.

Test Lab Guide: Windows Server 2016 with Integrated Exchange 2016, SfB Server 2015 and SharePoint 2016

WARNING! This is a pretty long and detailed blog post 🙂

I decided to upgrade (or actually reinstall) my test lab with the most recent version of Windows Server (including the most recent versions of Exchange, SfB Server and SharePoint). All my server virtual machines are built from a clonedGolden Windows Server Image” in VMware workstation, and I also use the same principle for my clients. This way you can deploy new servers/clients very fast, and they will take up much less disk space compared to installing from scratch.

This “custom” TLG is based on:

Windows Server 2012 R2 Test Lab Guide (including the Basic PKI add-on from here) and
Test Lab Guide: Configure an Integrated Exchange, Lync, and SharePoint Test Lab

with my own Exchange add-ons including:

  • A script for configuring the virtual directories
  • Certificate from domain CA
  • Zevenet Load Balancer (formerly known as Zen)
  • A second server (EX2)
  • Another script for copying the virtual directories from an existing server to a new one
  • Database Availability Group (DAG) between EX1 and EX2
  • Moving a user from one database to another

More about these later on.

I’ll start with an overview of the whole TLG, including my own add-ons:

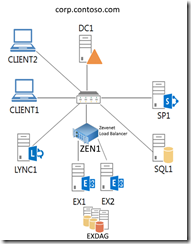
tlg2016_overview

Fig 1. Test Lab overview – a modified picture from the TLG. (I also configured the Internet subnet (131.107.0.0/24), even though not visible in this picture).


The whole project started by following the Windows Server 2012 R2 Test Lab Guide. I then added the Basic PKI infrastructure. These Test Lab Guides were actually “translatable” straight from Windows Server 2012 R2 to Windows Server 2016. I got a “Duplicate IP address error” on one of the servers however, but it was easily solved by following: http://support.huawei.com/enterprise/en/knowledge/KB1000068724. (I have no idea why I got this error (hasn’t happened before), but then again it doesn’t matter now that it was solved).

I then moved over to the Test Lab Guide: Configure an Integrated Exchange, Lync, and SharePoint Test Lab. Step 1 was already done so I moved over to Step 2 and 3 – Installing and configuring a new server named SQL1. Step 3 includes a link to a separate SQL Server 2012 Test Lab Guide, and this TLG also happen to be more or less translatable straight to SQL Server 2016. So yeah, I actually have no further comments about the installation. Step 4 guides you through the Client2-installation, but there’s really nothing to comment about this installation either (pretty basic stuff).


Exchange 2016, EX1

It was now time for the Exchange server, EX1. Note to self: Use at least 6GB ram for the VM or the memory will run out. This installation also has a separate guide:

https://social.technet.microsoft.com/wiki/contents/articles/24277.test-lab-guide-install-exchange-server-2013-on-the-windows-2012-r2-base-configuration.aspx.

It’s fine for the most part, however instead of downloading the evaluation version of Exchange I suggest you download the newest Exchange Server 2016 CU instead. This way you’ll get the newest updates from scratch. And yes, all setup files are included in the CU so you can use it as a “clean install”. The prerequisites for Exchange 2016 (on Windows Server 2016) are a bit different compared to Exchange 2013 (on Windows Server 2012 R2) also. The only thing you need to download and install “separately” is Microsoft Unified Communications Managed API 4.0, Core Runtime 64-bit. There’s no need for Microsoft Knowledge Base article KB3206632 if you have a recent/patched version of Windows Server 2016. After that just copy/paste the PowerShell command from the prerequisites page:

Install-WindowsFeature NET-Framework-45-Features, RPC-over-HTTP-proxy, RSAT-Clustering, RSAT-Clustering-CmdInterface, RSAT-Clustering-Mgmt, RSAT-Clustering-PowerShell, Web-Mgmt-Console, WAS-Process-Model, Web-Asp-Net45, Web-Basic-Auth, Web-Client-Auth, Web-Digest-Auth, Web-Dir-Browsing, Web-Dyn-Compression, Web-Http-Errors, Web-Http-Logging, Web-Http-Redirect, Web-Http-Tracing, Web-ISAPI-Ext, Web-ISAPI-Filter, Web-Lgcy-Mgmt-Console, Web-Metabase, Web-Mgmt-Console, Web-Mgmt-Service, Web-Net-Ext45, Web-Request-Monitor, Web-Server, Web-Stat-Compression, Web-Static-Content, Web-Windows-Auth, Web-WMI, Windows-Identity-Foundation, RSAT-ADDS

Then run setup.exe and install Exchange. Use the default options. After completion, follow Step 6: Demonstrate EX1 as an email server in the Exchange TLG. I did NOT try to send an email message from Chris to Janet at this stage though, as I wanted to try this after the Load Balancer was installed. But for now, happy days, Exchange installed!


Script for configuring the virtual directories

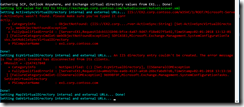
Usually when installing an Exchange server you change the virtual directories/namespace to something other than the server hostname (default). This namespace is the same name that should be included in the certificate. (I didn’t like the fact that this TLG use self-signed certificates so I added my own subchapter about getting a certificate from a domain CA, see next chapter). In a production environment you should plan the namespace and certificate prior to installation, but in this TLG it doesn’t matter that much. I decided to go with the namespace “exchange.corp.contoso.com”. (Autodiscover (DNS url) should also be included in the certificate (request), which it is by default). Anyhow, I first added the mentioned A records (exchange and autodiscover) to DNS. I pointed them to 10.0.0.11 at this stage (but that will change after the Load Balancer installation). I then changed the virtual directories according to the above plan. For this I used a nice script found from:

https://gallery.technet.microsoft.com/office/Set-all-virtual-directories-f4ec71d3

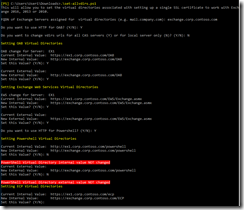
This script is very nice. The only thing that got me worried was the fact that it tried to change the PowerShell virtual directory. Afaik you shouldn’t change that. Anyway, no big deal, I just answered “no” (seen in screenshot) when the script asked me to change this. Here are a couple of screenshots from the script in action:

tlg2016_set_allvdirs_script1

Fig 2. set-allvdirs.ps1 script

tlg2016_set_allvdirs_script2

Fig 3. set-allvdirs.ps1 script, continued


Certificate from domain CA

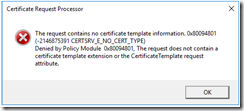
After all the virtual directories were set, it was time to get a new certificate which reflect the above changes. I headed over to trusty practical 365 to refresh my memory. This time I used EAC when requesting a new certificate. I changed the domains to reflect my newly configured environment. I added exchange.corp.contoso.com and autodiscover.corp.contoso.com and removed all the other hostnames. The other options were pretty basic so nothing special there. I then saved the certificate request and copied it over to my domain CA. However, when I tried to process the certificate request on the CA I was greeted with an error message:

tlg2016_cert_req_error_from_ca

Fig 4. Certificate Request Processor error

A bit of investigation led me to the following url: http://mytechweblog.blogspot.fi/2012/11/the-request-contains-no-certificate.html, which had a solution:

“certreq -submit -attrib “CertificateTemplate: WebServer” WebServerCertReq.txt”

tlg2016_cert_req_manual_submit

Fig 5. Certification request with manual submit.

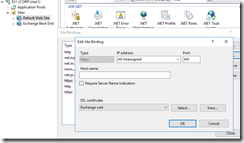
This solution worked for me, nice! I then saved the .crt file and imported it into Exchange from the same place in EAC where I made the request. However, shortly after this I noticed that EAC and OWA still gave certificate errors. This was strange, but then again nothing new. I had a look in IIS/Bindings, and surely the wrong certificate had been assigned. I corrected this so the newly requested certificate was in use:

tlg2016_cert_assignment_from_IIS_on_ex1

Fig 6. Exchange certificate from domain CA.


Zevenet Load Balancer

It was now time to install the Zevenet Load Balancer. The reason for installing the Load Balancer at this stage had to do with the fact that I had now preconfigured all the Exchange virtual directories + autodiscover in DNS. This also meant that it’ll be very easy to point DNS at the Load Balancer instead of the Exchange server/CAS further down the road.

I headed over to https://www.zevenet.com/products/community/ and downloaded the newest version. I installed it following my own old blog post. The main difference this time was that I didn’t bother to use clustered servers. (I already know that it works and we’re using clustered LB’s in production). After installation I did the initial configuration:

tlg2016_zen_new_virtual_network_interface

Fig 7. New virtual network interface. The new VIP was set to 10.0.0.61 (the server IP is 10.0.0.60).


I then created a new farm, which listens on port 443 on the newly created virtual network interface IP (VIP):

tlg2016_zen_new_farm

Fig 8. New Farm


After this I edited the farm and configured the “real IP”:

tlg2016_zen_edit_real_ip_servers_configuration

Fig 9. Real IP’s. In my case, 10.0.0.11 is the “real” IP for EX1.


I then converted the Exchange certificate (in a Linux VM) for use within Zevenet LB:

openssl pkcs12 -in file.pfx -out file.pem -nodes

Source: https://stackoverflow.com/questions/15413646/converting-pfx-to-pem-using-openssl


It was then time to import it into Zevenet LB:

tlg2016_zen_manage_certificates

Fig 10. Certificate imported


After this I made changes in DNS so that all traffic would go through the Load Balancer:

tlg2016_zen_dns_edited

Fig 11. Editing DNS.


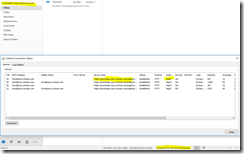
Now it was finally time to check that Outlook was working correctly from client1 (or 2):

tlg2016_outlook_connection_status_through_zen

Fig 12. Outlook Connection Status

Well yes, it was. Perfect! 🙂

That quite much summarizes the Load Balancer part. Now moving over to the installation of the second Exchange server, EX2.


Exchange 2016 – second server, EX2

Now that everything was working as it should with EX1, it was time to add another exchange server to the environment. There were no special notes about this installation, I just followed the same guide as with the first one. One thing that was different however, was the script. I now used a script that could automatically copy the virtual directories from an existing Exchange server during deployment. The script can be found at:

http://www.expta.com/2016/07/new-set-autodiscoverscp-v2-script-is-on.html

I’ll copy/paste some information:

The script is designed to be run during installation. Normally, you would run this script from an existing Exchange server of the same version while the new server is being installed.

That sounded almost too good to be true and I had to try it. That said, I had a test-run from EX1 while EX2 was installing:

tlg2016_set_autodiscover_scp_script1

Fig 13. Set-Autodiscover.ps1 script. Looks promising…

…but it wasn’t:

tlg2016_set_autodiscover_scp_script2

Fig 14. Can’t set the virtual directories.

I had the script running during the whole installation of EX2, but no luck. I suspected that it would be better running the script immediately after the installation instead. That said, I had a go just after the finished installation of EX2:

tlg2016_set_autodiscover_scp_script3

Fig 15. Running the script immediately after the EX2 installation.

Yes, much better this time. All the virt dirs were set within a couple of seconds, and I’d say this “lag” would be fine for a production environment as well. I would also like to “thank” the script for reminding me to install a certificate on this second server. That said, I opened up EAC and chose the new EX2 server from the pull-down menu under certificates. I then chose “import” and used the same certificate I made for EX1. It got imported nicely:

tlg2016_imported_cert_ex2

Fig 16. Imported domain certificate


Be sure to enable all needed services on the newly imported certificate also:

tlg2016_setting_services_on_imported_certificate_ex2

Fig 17. Overwriting existing SMTP certificate. At the same time I also chose to enable the IIS, POP and IMAP services.


Checking certificates from EMS:

tlg2016_checking_certs_from_ems

Fig 18. Checking active certificates. Looks good!


…and while you’re at it, check that OWA won’t give you certificate errors:

tlg2016_checking_that_cert_ís_ok_from_owa

Fig 19. OWA

It doesn’t. All good! (The new certificate wasn’t yet active In Fig 16, therefore the status url bar is red).

Only thing left to do now was to add this second IP (10.0.0.12) to “real servers” in Zevenet Load Balancer. After this change, the “dual exchange server setup” was ready for use.


DAG

With both EX1 and EX2 up ‘n running, it was time to configure a Database Availability Group (DAG) between the servers. I’ve done this many times before, and I’ve always used the same guide whether it’s for Exchange 2013 or Exchange 2016. The guide I’ve used is:

https://practical365.com/exchange-server/installing-an-exchange-server-2013-database-availability-group/

It’s very straight forward without any extra bs. Some notes:

  • I’m using the “SP1 (APP1)” server as the witness server.
  • I pre-staged a computer account in AD named “EXDAG”
  • I did not configure a dedicated replication network. (Overkill for a test lab).
  • I did not move the Default Mailbox Databases from the default folder path onto storage volumes dedicated to databases and transaction log files. (Again, a little overkill for a test lab).

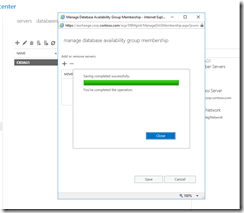
tlg2016_manage_db_availability_group_membership

Fig 20. Manage Database Availability Membership


After this step was done I configured database copies following yet another good (and familiar) follow-up guide from the same series:

https://practical365.com/exchange-server/exchange-2013-dag-database-copies/

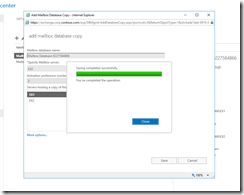
I’ve got no additional comments about the database copies, they work just as intended/written in the guide 🙂 Below you’ll find some related screenshots:

tlg2016_add_mailbox_db_copy

Fig 21. Add Mailbox Database Copy


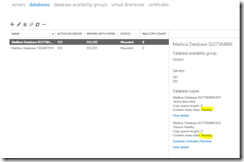
tlg2016_databases_overview_after_db_copy_and_dag

Fig 22. Database overview with database copies.


Moving users

I moved the user “Janet” from the original database on EX1 over to the database on EX2. This way I “spread out” my (two 🙂 ) users so their mailboxes are situated on different servers. This is good for failover testing and so forth.

tlg2016_move_user_janet_to_ex2

Fig 23. Moving Janet to another database (server).


tlg2016_move_user_janet_to_ex2_2

Fig 24. Moving Janet to another database (server), continued.


The above steps now completes the whole Exchange-part of the TLG.


Skype for Business Server 2015, LYNC1

It was now time to move over to the Lync-part of the TLG. The first change was actually the software itself – I’m installing Skype for Business Server 2015 instead of Lync Server 2013. As with other software in this lab, the prerequisites are way different for SfB Server compared to Lync Server. I used a combination of

https://blogs.perficient.com/microsoft/2017/08/skype-for-business-how-to-install-on-windows-server-2016/ and
http://www.garethjones294.com/install-skype-for-business-server-2015-on-windows-server-2016-step-by-step/

as a base for my deployment. Some additional notes:

  • Note to self: Use at least 3GB ram for the VM.
  • (Newest) Cumulative Update has to be installed, otherwise SfB Server won’t work at all on Windows Server 2016.
  • As I installed SfB Server in an isolated network (no internet access), I also had to define the source (which is the Windows Server 2016 DVD) in the PowerShell prerequisite command:

          tlg2016_sfb_install_prereq_from_powershell

          Fig 25. Prerequisites installation for SfB Server 2015 on Windows Server 2016.


I then continued following the TLG guide again, and moved over to the chapter “To prepare Active Directory”. Some notes:

  • Installed newest version of offline-Silverlight manually.
  • Chose not to check for updates.
  • Added the DNS SRV records, but they didn’t work when I tested them (probably outdated info in the TLG). This was no big deal, as lyncdiscoverinternal can be used instead for example. You could also Google for updated information, but I didn’t feel it was necessary for this TLG.
  • Everything went fine until “21. From the Topology Builder Action menu, select Publish Topology.” I was greeted with:

          tlg2016_sfb_publishing_topology

          Fig 26. Publishing Topology error.

          tlg2016_sfb_publishing_topology_error

          Fig 27. Publishing Topology error, continued

Well, after some investigation (googling), it turned out this just had to do with UAC: http://terenceluk.blogspot.fi/2013/03/publishing-new-lync-server-2013.html. Surely, after running the deployment wizard again as an administrator (run as), it worked!


I now moved over to the “To install Lync Server 2013 core components” -part of the TLG. Notes:

  • I was only running step 1 and 2 at this stage.
  • The IIS URL Rewrite Module problem was well known, I’ve even blogged about it.
  • After step 2 was done, it was time to install the newest CU for SfB, otherwise SfB Server won’t run at all on Windows Server 2016.
    • Remember to run the SfB Management Shell as an Administrator.
    • Everything went smoothly with the CU installation!
  • I moved over to Step 3 – Deployment Wizard/SfB Server 2015 Core Components.
    • Everything went fine!
  • Step 4 was different for SfB compared to Lync. You can’t start services from the Deployment Wizard in SfB Server 2015.
    • Instead, you start them from the SfB Management Shell with the command “Start-CsWindowsService
    • The command didn’t run as planned though:

                tlg2016_sfb_start-cswindowsservices_error

                 Fig 28. SfB Server 2015 Deployment Log.

    • I tried to manually start the “Skype for Business Front-end” service from “Services” in Windows.
      • Did not work either, got stuck in “starting…”
      • Tried old school method and rebooted the server.
        • Worked, all services were now up ‘n running after reboot 🙂
  • I moved over to the “To enable users in the Lync Server Control Panel”-part of the TLG and enabled the users.
  • Yep, all done, working! 🙂


SharePoint 2016, SP1

SharePoint was the last (and the “easiest”) software candidate on the list. Yet again the prerequisites were different compared to the 2013 version of the TLG. My notes:

  • SP1 is the server name, not Service Pack 1 🙂
  • I tried various offline methods for the prerequisite installation. What a headache. Spare yourself the pain and DO NOT try to install the prerequisites without an active internet connection. I repeat, DO NOT try it.
  • I then installed the prerequisites with “Install software prerequisites” from default.hta. Everything went smoothly.
  • I continued following the TLG and the “To prepare DC1 and SQL1 –part. Nothing to add or comment here.
  • I continued following the TLG and the “To install SharePoint Server 2013” –part. Nothing to add or comment here.
  • Happy days, SP1 installed!


Configure integration between EX1, LYNC1, and SP1

As a last step in this TLG, I configured server integration between the servers. I would advise you to stay away from the TLG script and use newer information instead. The script has failed me before, and surely it failed this time also when I tried it. In other words, skip the script.

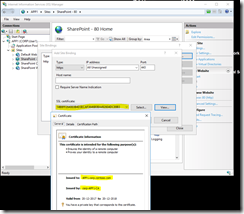
As a first step though, check the SP1/APP1 certificate. The TLG tells you to add a https site binding and select the certificate with the name sp1.corp.contoso.com. This won’t work, at least not for me (never has). Instead, when creating the new https binding, choose the certificate that has been issued to the SP1/APP1 server (never mind the confusing “friendly” name):

tlg2016_sp_checking_cert

Fig 29. Checking SSL certificate in SharePoint/IIS

I got a warning about the certificate already being used for the Default Web Site, but this can be ignored (at least in this TLG).


Now we’re ready to move over to some “fresh” information about integration. For starters, have a look at:

Exchange <-> SfB: http://lyncdude.com/2015/10/06/the-complete-skype-for-business-exchange-2016-integration-guide-part-i/index.html
Exchange –> SharePoint and SfB: https://technet.microsoft.com/en-us/library/jj649094(v=exchg.160).aspx
SfB –> SharePoint: https://technet.microsoft.com/en-us/library/jj204975.aspx
SharePoint –> Exchange: https://technet.microsoft.com/en-us/library/jj655399.aspx
SharePoint –> SfB: https://technet.microsoft.com/en-us/library/jj670179.aspx

All links are compatible with the 2016 versions also. Here are the results from my own environment:


Skype for Business:

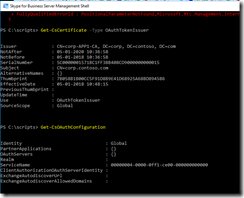
tlg2016_oauth_sfb_check_current_cert

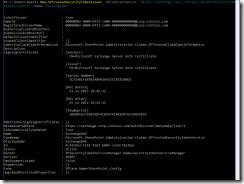
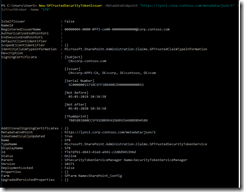
Fig 30. Checking current OAuth certificate and OAuth configuration.

tlg2016_oauth_sfb_setting_cs_auth_configuration

Fig 31. Setting OAuth configuration and checking the configuration.


tlg2016_oauth_sfb_to_ex

Fig 32. SfB –> Exchange integration

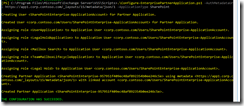
tlg2016_oauth_sfb_to_sp

Fig 33. SfB –> SharePoint integration


tlg2016_oauth_sfb_to_ex_and_sp_check

Fig 34. Checking partner applications. Both Exchange and SharePoint are integration partners.


Exchange:

tlg2016_oauth_ex_to_sfb

Fig 35. Exchange –> SfB integration

tlg2016_oauth_ex_to_sp

Fig 36. Exchange –> SharePoint integration


tlg2016_oauth_ex_to_sfb_and_sp_checking

Fig 37. Checking partner applications. Both SfB (Lync) and SharePoint are integration partners.


SharePoint:

tlg2016_oauth_sp_to_ex

Fig 38. SharePoint –> Exchange integration

tlg2016_oauth_sp_to_sfb

Fig 39. SharePoint –> SfB integration


tlg2016_oauth_sp_to_ex_and_sfb_checking

Fig 40. Checking partner applications. Both Exchange and SfB are integration partners.


The integration chapter above now finalizes this whole TLG. It was a fun project and I hope someone will find this information useful.

Disabled (AD) users still searchable in Lync/SfB

Well, this was a bit of a nightmare to debug. I started the whole project with some googling on how to (automatically) remove AD-disabled users from Lync (SfB) Server. This procedure is by no means automatic, and If you disable a user in AD they can still use Lync (at least for some time). Have a look at https://ucgeek.co/2014/04/lync-users-can-login-after-domain-account-disabled/ for some deeper details.

My concern wasn’t about the fact that the users still could use Lync however, it was more about the fact that they are “hanging around” like ghosts on the Lync Server for no good reason. In plain English – users should be disabled if their AD account is also disabled.

I’ll now present MANY different ways to get rid of the unwanted users in the Lync/SfB Address Book. One method might work for someone, and another method might work for someone else. Hell, you might even need to use all the methods combined 🙂


Method 1: Disable AD-disabled users on Lync/SfB Server

This idea led me to some PowerShell scripts. Here are a couple of examples that will disable users on the Lync Server if they are disabled in Active Directory:

http://www.markc.me.uk/blog/files/ADDisabled.html
https://www.ucunleashed.com/265
https://trogjels.wordpress.com/2012/08/16/lync-disable-ad-disabled-users/

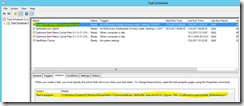
This worked just fine and I got all the accounts removed from the Lync Server. A little addition to the above links is that I now use this script from a Scheduled Task:

disableADdisabledaccount_task_scheduler


The PowerShell “script” itself looks like this:

# disable_ADdisabled.ps1 , source http://www.markc.me.uk/blog/files/ADDisabled.html
# J.S. 13.9.2017
Import-Module ‘C:\Program Files\Common Files\Microsoft Lync Server 2013\Modules\Lync\Lync.psd1’
Get-CsAdUser -ResultSize Unlimited | Where-Object {$_.UserAccountControl -match “AccountDisabled” -and $_.Enabled} | Disable-CsUser

Well, still no luck. You think your users wouldn’t show up when searching in Lync (Address Book) if they are no longer activated on Lync Server (and also has the –HiddenFromAddressListsEnabled flag, see next chapter). Well, they do. At least for us. This was getting pretty weird. I tried googling but all I could come up with was “Update-CsAddressBook” and so forth. Examples:

http://lyncinsider.com/lync-server-2010/updating-lync-contacts-sync-error-fixes-part-2-of-3/
http://www.fots.nl/lync-address-book-sync-process-information/
http://blog.schertz.name/2010/09/updating-the-lync-2010-address-book/
https://social.technet.microsoft.com/Forums/sharepoint/en-US/2e0d1200-b924-42dd-8700-55893b8cfc03/deleted-lync-user-still-in-list-showing-presence-unknown?forum=officeitpro
https://technet.microsoft.com/en-us/library/gg429695(v=ocs.15).aspx

No. Still no luck. I could see the “old” users which aren’t enabled in AD nor on the Lync Server. This was getting frustrated. Better turn to my old friend Event Viewer. Yes, some hits indeed:

Event ID 21054, Error:
Users are not indexed in the database that should be.

Expected indexed user count: 0
Actual indexed user count: 1999
Cause: User replication issue.
Resolution:
Run Update-CsAddressBook to synchronize all accounts.

Well, what command did I just run? Did it help? No. Then again if you Google the message you’ll soon notice that this error is nothing to worry about:

“As long as “Objects not indexed that should be” and “Abandoned Objects” are zero, the database is okay.” I did run the Debug-csAddressBookReplication and “my” objects were zero. Fine.

Source: https://social.technet.microsoft.com/Forums/lync/en-US/49de4752-a73e-4a55-98d6-a48409a02d94/alert-lync-users-are-not-indexed-in-the-database-that-should-be?forum=lyncdeploy (you can find this information in many other sources as well…)


Method 2: HiddenFromAddressListsEnabled PowerShell command

There are many different flavors of this command, but the one we’re using is something like the one found at https://stackoverflow.com/questions/7974204/powershell-command-to-hide-user-from-exchange-address-lists (and the answer “I use this as a daily scheduled task to hide users disabled in AD from the Global Address List”). We also use it in a Scheduled Task.

This HiddenFromAddressListsEnabled –method was applied at an earlier stage, as we had “problems” with Outlook / Exchange showing disabled users in Global Address List (GAL). The above PowerShell-trick solved the problem on the Outlook/Exchange-side. It SHOULD however also work with Lync/SfB if you are using the Unified Contact Store, UCS. More information about UCS in the next chapter. However, it didn’t work for us. We still saw disabled users in Lync’s Address Book 😦


Method 3: Rollback from UCS

What now? I’m ok with just ignoring the event in Event Viewer, but I still have the same problem. My disabled users are visible in Lync’s Address Book. This got me thinking about the Exchange <-> Lync relationship. I know they are a tight fit. Like all MS products. The https://social.technet.microsoft.com/Forums/sharepoint/en-US/2e0d1200-b924-42dd-8700-55893b8cfc03/deleted-lync-user-still-in-list-showing-presence-unknown?forum=officeitpro post had some hints at the end also. Many, MANY Google searches later got me to https://support.office.com/en-us/article/Set-Personal-options-c09b21ac-7334-49cf-a510-d8c432fcaf01

And there it was. The answer I was (partly) looking for:

You specify how Skype for Business interacts with other Office programs.

  1. In Personal options, under Personal information manager, select either Microsoft Exchange or Microsoft Outlook or None from the drop-down list. When you select Microsoft Exchange or Microsoft Outlook, the Skype for Business search feature uses the Microsoft Outlook Contact list as a source of contacts, in addition to the global address list.

    When you select None, the Skype for Business search feature returns contacts only from the global address list. It doesn’t use either the Windows Address Book or the Outlook Contact list.

Source: https://support.office.com/en-us/article/Set-Personal-options-c09b21ac-7334-49cf-a510-d8c432fcaf01

So, was my solution setting this setting to “None”? You’d think so. Think again. This setting is different in the SfB client. You CAN’T set it to none. Have a look at https://answers.microsoft.com/en-us/msoffice/forum/msoffice_sfb-mso_winother/skype-for-business-2016-personal-information/67d14b5e-23d7-4d23-ab6e-5710739cb0d3 for example.

Well, as my integration is controlled “by my administrator” (which would be myself thank you very much), it got me thinking that it HAS to be a server setting. Now the question was, WHICH setting specifically? Now I honestly don’t remember what I googled to find this, but in the end it got me to http://techgenix.com/integrating-exchange-server-2013-and-skype-business-server-2015-part6/

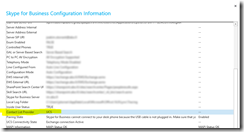
Well well well. This was all new to me. I ran the command Get-CSUserServicePolicy and found out that UcsAllowed was set to true. It was indeed enabled for ALL our users. I also checked from the SfB client itself, and yes, (not surprisingly) same result:

UCS_screenshot_SfB_configuration_information


So, what is UCS?

Detailed Description

The unified contact store introduced in Lync Server 2013 gives administrators the option of storing a user’s contacts in Exchange instead of in Skype for Business Server 2015; in turn that allows the user to access the same set of contacts in Outlook and Outlook Web Access as well as. (Alternatively, you can continue to store contacts in Skype for Business Server 2015. In that case, users will have to maintain two separate sets of contacts: one for use with Outlook and Outlook Web Access, and one for use with Skype for Business.)

Source: https://technet.microsoft.com/en-us/library/jj205414.aspx

Now the big problem here is that our user accounts used in different systems aren’t disabled at the same time. Users aren’t automatically disabled in Exchange if they get disabled in AD (at least not yet, but this will probably change when our imap-server retires). See the pattern here? What this means is that if a user is still “active” (from Exchange’s point of view), it ALSO lists this person in LYNC’s Address Book. This also means that I’ve found the root problem for our “ghost users”.

The solution is NOT using UCS, and rollback to the system where the contacts are stored on the Lync Server instead of Exchange. Well yeah, you COULD disable UCS, but it feels like going the wrong way. If you still want to test however, the information for this procedure is available here:

https://technet.microsoft.com/en-us/library/jj205224(v=ocs.15).aspx (To rollback unified contact store contacts from Exchange 2013 to Lync Server 2013).
https://technet.microsoft.com/en-us/library/jj688083.aspx

I myself only tried it for a single user as a test, and it worked just fine.

Step one:

New-CsUserServicesPolicy -Identity “NoUCS” -UcsAllowed $False

Step two:

Grant-CsUserServicesPolicy -Identity “mytestuser” -PolicyName “NoUCS”

Step three:

Invoke-CsUcsRollback -Identity “mytestuser”

This removes UCS Address Book from the user and the contacts will be retrieved from the Lync Server instead. This method did INDEED WORK. I did NOT see the disabled users anymore in Lync’s Address Book.

I thought this was the perfect solution/method. However, it feels like going against Microsoft’s thoughts about a more unified Address Book on all MS platforms. I therefore buried this idea.


Method 4: ABSConfig

Even further googling led me to:

http://www.justin-morris.net/how-to-hide-users-from-the-lync-address-book/
https://social.technet.microsoft.com/Forums/lync/en-US/269159b0-3850-4bd6-83ed-1a00516417b8/using-the-abs-configuration-tool-to-limit-the-address-book-to-accounts-which-have-a-sip-address?forum=ocsaddressbook

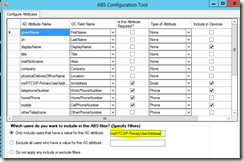
which use yet another method to hide unwanted users from the Address Book, namely ABSConfig. I changed the configuration to this:

lync_server2013_abs_configuration_tool

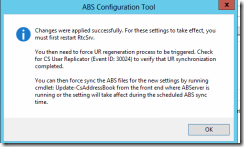
…and was then greeted with:

lync_server2013_abs_configuration_tool_changes_applied

Ok, so I did the following:

  1. Restart RtcSrv = Restarted Lync Server Front-End service
  2. Update-CsUserDatabase (https://social.technet.microsoft.com/Forums/lync/en-US/5cb81b13-bed4-4068-af9b-d917a65094a8/lync-server-user-regeneration?forum=ocsaddressbook)
  3. Update-CsAddressBook

Was this finally the solution to all Address Book problems? Well yes, actually it was 🙂

To sum it up: In our case the problem was solved by using methods 1,2 and 4. Results may vary though – what worked for us might not work for you.

Update for Conferencing Server fails to install on Skype for Business Server 2015

I finally had some time to install and play around with Skype for Business Server 2015 and Exchange Server 2016 in my test environment. One of the features I was looking forward to in SfB Server 2015 was the ability to use offline messaging. I followed lots and lots of different articles, and this feature should be enabled out of the box from CU3(?) onwards. You can enable it manually on older CU’s also, following

https://technet.microsoft.com/en-us/library/mt756734.aspx
http://communicationsknowledge.blogspot.fi/2016/11/how-to-enable-offline-instant-messaging.html

for example. There are many other guides as well, but they’re all about the same. However, I learned the hard way that this feature is not yet enabled in the on-premise version of SfB Server 2015. Correct me if I’m wrong though. Some info regarding this (without an answer):

https://social.technet.microsoft.com/Forums/en-US/61648721-8693-4805-8fe3-82ca8a88aa34/when-will-be-be-offline-im-available-for-sfb-onpremise?forum=sfbfr

After some serious Googling I was still unable to enable offline messaging though. This basically means that all of my updating was for “nothing”. Well, not completely. At least I learned how to force-update SfB Server 2015 🙂


First I installed the latest CU for SfB Server 2015 from https://support.microsoft.com/en-us/help/3061064/updates-for-skype-for-business-server-2015 (in my case February 2017 Cumulative Server Update Installer) as this should’ve “fixed” lots of offline messaging stuff. Well, installing this CU wasn’t so straight forward after all. I followed the installation method to apply the update to a back end server or Standard Edition server. This is where the problems started.

The first problem was regarding the Url rewrite module 2.0 for IIS on Windows Server 2016. It wouldn’t install and you’ll receive an error while running the SfB Server 2015 Update Installer. Luckily I found a solution at http://stackoverflow.com/questions/35319942/url-rewrite-does-not-install-on-windows-10-iis-10. (You should edit the windows registry before running the Update Installer). Well, the problems didn’t stop here. After this problem was fixed I was greeted with:

sfb_server_update_installer_error


and after a while the Update installer told me that the Conferencing Server update failed:

sfb_server_update_installer_error2

(never mind the versions in the screenshot, they are wrong as I had to “borrow” this picture from the ucsorted.com link below).


If you read the log it’ll tell you “ERROR 1603: OCSMCU.msp had errors installing”. I did some googling and found these:

https://social.technet.microsoft.com/Forums/ie/en-US/42e284fb-ae07-424c-9ed3-07b6a85748da/skype-for-business-server-components-install-fails-when-patching-ocsmcumsi?forum=sfbfr
https://ucsorted.com/2016/11/19/error-returned-while-installing-ocsmcu-msi-code-1603/

The TechNet forum post suggest uninstalling some updates which I couldn’t even find on my system. This made the whole “fix” rather useless. The other link also talks about problematic updates, or the fact that you shouldn’t let SfB Server update itself at all before installing a new CU. This seemed very weird and the solution to reinstall everything from scratch also seemed very far fetched. There had to be a better solution.


Well, using my own common sense I started thinking about alternatives. After a while I figured why not uninstall the Conferencing Server component from the SfB Server 2015 installation and replace it with the stock one from the installation media? That said, I uninstalled the problematic component (even though SfB tells you it’s “dangerous”):

sfb_server_conferencing_server_uninstallation

After uninstallation of the Conferencing Server component, I copied the OCSMCU.msi file from the original install media (X:\Setup\amd64\Setup) and ran it. It installed without problems. It was now time to run the Skype for Business Server 2015 Update Installer again:

sfb_server_update_installer_success_cmd_prompt

Success 🙂


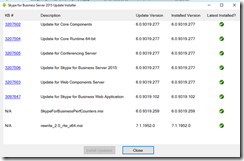
And just in case I ran the Skype for Business Server 2015 Update Installer once again to see the result:

sfb_server_update_installer_success_green

All dots are green, success indeed 🙂


I then continued following the installation instructions and ran:

Stop-CsWindowsService
net start w3svc

followed by:

Install-CsDatabase -Update –LocalDatabases:

sfb_server_install_csdatabase_after_update

sfb_server_install_csdatabase_after_update2

All good and everything seems to be working 🙂

I do wonder why there always seem to be problems with every update for Lync/SfB Server… oh well.

Lync Server 2013 Health Checking

I thought I’d write a tiny follow up to my previous blog post Health Checking / Monitoring Exchange Server 2013/2016. I got exited about all the health checking stuff, so naturally I had to do some research about Lync/SfB Server as well. That  said, I found a very comprehensive script written by Steve Moore. You can get the script from:

https://blogs.msdn.microsoft.com/canberrapfe/2014/12/11/lync-server-2013-health-check-script/

I’ve tested the script on both Lync Server 2013 and SfB Server 2015 with success. To put it briefly, it’s awesome! 🙂

As with the Exchange scripts, I wanted to use a scheduled task for running the script. I tried the same methods as with Exchange, but it failed. It turned out that this script wouldn’t accept the $true or $false parameters when running from a scheduled task. From the instructions:

Running the Script

To run the script you can use the following command line:

.\SystemStatus.ps1 -Action status -ServerFile c:\scripts\systemstatus\servers.txt -PoolName lync-pool.contoso.org -SendEmail $true -Environment Contoso -EventData $True


However, running the script from cmd (not PowerShell) or task scheduler you’ll get an error:

“Cannot convert value “System.String” to type “System.Boolean”, parameters of this type only accept booleans or numbers, use $true, $false, 1 or 0 instead”

My solution was to hard-code the parameters in the script itself, like so:

Lync-serverhealth-script-edit

There was no need to edit PoolName but I did it anyways – it’s one less parameter to define when running the script. Same goes for Environment. The interesting parameter however was [bool]$SendEmail=$False. I changed this to $True so I didn’t have to specify it as a parameter when running the script. As a bonus I also removed CC and BCC from

Send-MailMessage -To $Recipients -From $FromAddress -CC $CC -BCC $BCC -Subject $strMailSubject -BodyAsHtml:$True -SmtpServer $SMTPHost -Body $strBody #Send the email

as I have no need to send CC’s or BCC’s. In other words:

Send-MailMessage -To $Recipients -From $FromAddress -Subject $strMailSubject -BodyAsHtml:$True -SmtpServer $SMTPHost -Body $strBody #Send the email


With these changes in place, it was easy setting up Task Scheduler:

  • General: Run whether user is logged on or not. Run with highest privileges
  • Trigger: Weekly, at 00:00 every Wednesday of every week.
  • Action: Start a program
    • Program/script: C:\Windows\System32\WindowsPowerShell\v1.0\powershell.exe
    • Add arguments (optional): -NoProfile -ExecutionPolicy Bypass -File “c:\software\scripts\SystemStatus.ps1” -Action status -ServerFile c:\software\scripts\servers.txt

servers.txt include the name of our front-end server.

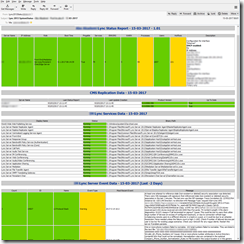
And that’s it. You’ll then get a sexy report emailed back to you every Wednesday looking something like this:

Lync-serverhealth-report-screenshot

Just some non-critical warnings and nothing major to worry about. All good!

Happy monitoring to you all! 🙂

Adding Edge and Reverse Proxy Servers to an Existing Lync 2013 Environment

Update: Also have a look at my newer blog post: Deploying Skype for Business 2015, including Edge and Reverse Proxy Servers

My recent task was to expand our existing Lync environment (Lync Server 2013 Standard) with an Edge and a Reverse proxy server. (This guide probably works for Skype for Business as well). Our old Lync environment had been in test usage for a while (with a rather small test-user group), but with more and more Lync users adding up it was time to expand. As a matter of fact, a Lync environment without Edge and reverse proxy servers is rather useless – you are unable to organize external meetings.

First, let me start off by saying that there are A LOT of “moving parts” involved in configuring a reverse proxy and an Edge server. You must plan for IP addresses, DMZ settings, DNS settings, certificates, firewall settings and so forth. To get a grasp of the whole picture I’m suggesting that you read/watch the following:

https://www.youtube.com/watch?v=2TdoVb1Grak
https://technet.microsoft.com/en-us/library/dn594589.aspx – A very good protocol poster (Skype for Business Server 2015 Protocol Workloads) that helps with the overall picture. It’s also very good for checking firewall requirements/port configurations. Yes, it’s a bit overwhelming but very good in the end 🙂
https://technet.microsoft.com/en-us/library/jj204756%28v=ocs.15%29.aspx – Explains (firewall) ports.

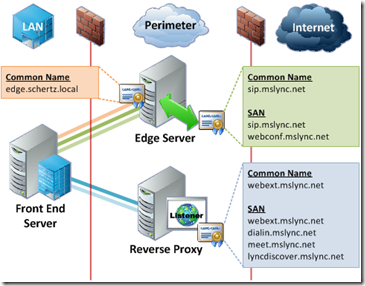
A good place to continue after this would be http://blog.schertz.name/2012/07/lync-edge-server-best-practices/. It’s a very nice all-around document about Edge and Reverse proxy. Pay close attention to the chapter about Best Practices. Our goal in the end was to get something that resembles this picture:

lync-schertz-best-practise-pic-single-topology

Fig 1. Lync Front-end in combination with Edge and Reverse proxy – Simple Topology. (Pic source: http://blog.schertz.name/2012/07/lync-edge-server-best-practices/)


Even after a lot of reading, It’s hard to know where to start (in this blog post). There are soooooo many different things going on and a lot of stuff to remember. A good place to start could be certificate planning, which also means that you have to decide which IPs/hostnames you’ll be using in your own environment. Then again, I think the best place to start is planning network infrastructure/topology. First, consider whether you are going with a simple topology (Front-end, Edge server, Reverse proxy – we’re using this) OR a complex topology (multiple Front-ends, Edge servers, Reverse proxies). Second, It’s very important to have a working DMZ, and you should also know if you’ll be using (only) Public IP addresses or public IPs in combination with NATed ones. After you’ve got an answer to these questions it will be much easier planning for the other requirements. With this in mind, I’ll start off with the networking part. I’ll then move over to areas like DNS, certificates, actual Edge server installation, IIS ARR installation and finally some words about mobility and federation.

But first off, here’s a short explanation of what the Edge and Reverse proxy servers bring to the table:

Edge

Includes 4 modules:

  • Access Edge service. The Access Edge service provides a single, trusted connection point for both outbound and inbound Session Initiation Protocol (SIP) traffic.
  • Web Conferencing Edge service. The Web Conferencing Edge service enables external users to join meetings that are hosted on your internal Lync Server 2013 deployment.
  • A/V Edge service. The A/V Edge service makes audio, video, application sharing, and file transfer available to external users. Your users can add audio and video to meetings that include external participants, and they can communicate using audio and/or video directly with an external user in point-to-point sessions. The A/V Edge service also provides support for desktop sharing and file transfer.
  • XMPP Proxy service. The XMPP Proxy service accepts and sends extensible messaging and presence protocol (XMPP) messages to and from configured XMPP Federated partners.


Reverse proxy

The reverse proxy is required for the following:

  • To allow users to connect to meetings or dial-in conferences using simple URLs
  • To enable external users to download meeting content
  • To enable external users to expand distribution groups
  • To allow the user to obtain a user-based certificate for client certificate based authentication
  • To enable remote users to download files from the Address Book Server or to submit queries to the Address Book Web Query service
  • To enable remote users to obtain updates to client and device software
  • To enable mobile devices to automatically discover Front End Servers offering mobility services
  • To enable push notifications to mobile devices from the Office 365 or Apple push notification services

Source: https://technet.microsoft.com/en-us/library/gg425779%28v=ocs.15%29.aspx.


Networking / Network interfaces

I’m now assuming that you have:

  • A working Lync Server Standard/Enterprise 2013 (or Skype for Business) Front-end
  • A soon-to-become (Lync) Reverse Proxy server (Windows Server 2012 R2)
  • A soon-to-become Lync Edge server (Windows Server 2012 R2)
  • Talked to your network guys about the network infrastructure (IPs/DMZ). Hardware (F5) load balancers can be a whole different story for example.
  • Talked to your firewall guys about opening ports. I myself sat down with the Skype for Business Server 2015 Protocol Workloads printout and had a long discussion with a firewall guy. We/he got the job done without any hiccups. (It’s still working fine today 🙂 )


On the Reverse Proxy:

Assign one IP for the internal network adapter and one for the external network adapter. Internal and External should be in different subnets. One interface is communicating with the internet and the other one is communicating with your internal network/AD. Have a look at https://technet.microsoft.com/en-us/library/gg429707%28v=ocs.15%29.aspx or https://technet.microsoft.com/en-us/library/jj204691%28v=ocs.15%29.aspx for examples. (I’m not going into much DNS details (yet), but you could name these new IPs lyncproxy-int.domain.com and lyncproxy-ext.domain.com for example).

  • Set the default gateway on the external network adapter only
  • Assign static routes. From my experience, the information regarding this can be a bit difficult to understand. Let me copy/paste the information from the above link:

Important: Similar to the Edge Servers, you set the default gateway on the external network adapter only. The default gateway will be the IP address of the router or external facing firewall that directs traffic to the Internet. For traffic that is destined from the reverse proxy to the internal facing network adaptor, you must use persistent static routes (such as the route command in Windows Server) for all subnets containing servers referenced by the web publishing rules. Setting a persistent route does not cause the computer to become a router. If IP forwarding is not enabled, the computer is acting only to direct specific traffic destined for another network to the appropriate interface. This is essentially setting two gateways – one as the default pointing to the external networks, and one for traffic destined to the internal interface and on to a router or other network.
However, creating persistent routes for all subnets may not be necessary if your network’s routers are configured to summarize routes. Create a persistent route to the network where the router is defined and use the router as the default gateway. If you are not sure how your network is configured and need guidance on what persistent routes need to be created, consult with your company’s Network Engineers.
The reverse proxy must be able to resolve the DNS host (A) records for the internal Director or Front End Server and next hop pool FQDNs used in the web publishing rules. As with the Edge Servers, for security reasons, we recommend that you do not configure a reverse proxy to use a DNS server located in the internal network. This means you either need DNS servers in the perimeter, or you need HOSTS file entries on the reverse proxy that resolves each of these FQDNs to the internal IP address of the servers”.

In plain English this means that you configure the external interface “normally”, as you would with any other external network interface in your infrastructure. You should define the gateway as the “IP address of the router or external facing firewall that directs traffic to the Internet”. Your network guys can help you with this if unsure (also see the next chapter). The internal side on the other hand should not have a default gateway – instead you configure static routes. I’ll try to explain this:

Example network subnets (defined by your network administrators):

External DMZ (16 addresses, all are not needed but room for expansion)

Range:  123.123.123.16/28
Mask:    255.255.255.240
GW:       123.123.123.30

Internal DMZ (16 addresses, all are not needed but room for expansion)

Range:   123.123.123.0/28
Mask:     255.255.255.240
GW:        123.123.123.14


Server configuration:

Example external network adapter configuration on the server:

IP:         123.123.123.20
Mask:   255.255.255.240
GW:      123.123.123.30

Example Internal network adapter configuration on the server:

IP:         123.123.123.3
Mask:   255.255.255.240
GW:      no gw

We’re using split-brain DNS so the internal and external DNS names are the same. All IP’s are from a Class B chunk, and they’re all public IP’s that are defined as internal or external in the firewall/DNS. With the above configuration in place, you should now add a route to the internal interface on the reverse proxy server. This is done with the route add command (The –p switch make the changes persistent). Here’s an example using the above IP schema:

C:\>route add -p 123.123.17.0 mask 255.255.240.0 123.123.123.14
C:\>route add -p 123.123.90.0 mask 255.255.240.0 123.123.123.14
C:\>route add -p 123.123.154.0 mask 255.255.240.0 123.123.123.14
C:\>route add -p 123.123.207.0 mask 255.255.240.0 123.123.123.14
C:\>route add -p 123.123.106.0 mask 255.255.224.0 123.123.123.14

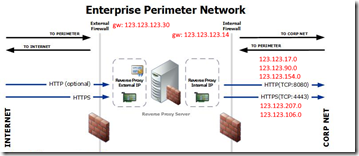
The above command example would make all of the above IP ranges take the route against the internal interface. All other IPs would take the external route. The above ranges are also defined as internal in DNS/firewall. Do the same for all of your internal IP ranges. This method is different when using NAT and/or non-split-brain configurations. (In case of NAT, your internal IPs are in the 192.168.x.x, 10.x.x.x, or 172.16.x.x. range). Perhaps a picture will tell more than words:

lync-proxy-int-ext-subnets

Fig 2. Internal and external overview. (Picture source: https://technet.microsoft.com/en-us/library/jj204756%28v=ocs.15%29.aspx)

This should be it for the networking part on the Reverse proxy server. Now we do the same on the Edge server.


On the Edge server:

The network configuration on the Edge server follow the same pattern as the Reverse proxy. I’m using three external IPs and one internal IP. This is by best practice design (https://technet.microsoft.com/en-us/library/gg412847%28v=ocs.15%29.aspx). If you are in a limited-budget-external-IP-dilemma, you can also make it work with one external IP (not including that option in this text however).

  • Assign three external IPs
    • one for SIP traffic
    • one for AV traffic
    • one for Web Conferencing
  • Assign one internal IP

I’m not going much into DNS details now either, but you could name these new IPs lyncedge-int.domain.com, lyncedgesip-ext.domain.com, lyncedgeav-ext.domain.com and lyncedgewc-ext.domain.com for example. There’s nothing much to add here. Follow the same procedure as for the reverse proxy when configuring your internal and external network interfaces:
Server configuration:

Example Internal network adapter configuration on the server:

IP:        123.123.123.4
Mask:  255.255.255.240
GW:      no gw

Example external network adapter configuration on the server:

IP1:       123.123.123.21
Mask:   255.255.255.240
GW:      123.123.123.30

IP2:       123.123.123.22
Mask:   255.255.255.240
GW:      123.123.123.30

IP3:       123.123.123.23
Mask:   255.255.255.240
GW:      123.123.123.30


Now add the same routes as you did on the reverse proxy. There you have it, we can now move over to the DNS part.


DNS

I assume that you by now have figured out your topology and configured networking on the involved servers. Good, that’s one step in the right direction. You might have noticed that I haven’t talked much about host names, only IP addresses. This is mostly because you can configure the networking part this far without knowing (almost) any host names. (Of course you most certainly will ask for a hostname at the same time you get an IP address, but anyways).

I have to say that DNS was one of the most confusing/difficult/challenging/painful parts in this whole configuration/deployment. There were tons and tons of misleading/wrong information, and it required countless hours of testing. Anyways, I’ll spare you the DNS-pain and tell you about our configuration in a while. But before I do, I make you read some homework. Here are a couple of interesting links (with or without errors):

https://technet.microsoft.com/en-us/library/dn951397.aspx
https://technet.microsoft.com/en-us/library/gg398758%28v=ocs.15%29.aspx
http://jackstromberg.com/2013/06/lync-2013-dns-settings/
https://technet.microsoft.com/en-us/library/gg425874%28v=ocs.15%29.aspx
https://technet.microsoft.com/en-us/library/gg398287%28v=ocs.15%29.aspx
http://msunified.net/2013/08/07/lync-client-sign-in-and-dns-records-recommendations/

Let me start off by saying that I like the jackstromberg article. All my testing was actually based on the DNS table from that article. However those records were also a bit confusing, and some even unnecessary. Here are our DNS records with comments:


Internal DNS:

lync-internalDNS

Fig 3. Internal DNS

No other records are required for our specific configuration/environment (at the moment). SRV records are a thing of the past and only needed when working with Lync 2010 clients. See http://blog.schertz.name/2012/12/lync-2013-client-autodiscover/ for more information. If you are going to use federation however (which we probably are in the future), you SHOULD set up SRV records (though not needed if manually entering servers). See: http://windowsitpro.com/skype-business/understanding-main-types-federation-skype-and-lync-environments. As you can see, Allowed Partner Server (Direct Federation) works without SRV records but specifying the records when you federate will probably still make your life easier.

I will now also make a statement about the lyncdiscover.mydomain.com record in the Internal DNS. You can read on many, MANY places on the Internet that you should have this record present in the internal DNS so that mobility works. I can confirm that our users mobile phones (WP, iOS, Android) work just FINE without this record. The key is to have the external Web Services record present in the internal DNS (webext.mydomain.com) and point it to the reverse proxy. If you DO use lyncdiscover in the internal DNS, ALL traffic will go through the proxy. This is probably not a desirable configuration. Yes, I’ve seen this “live” in our environment so I know what I’m talking about. The “problem” went away after we removed the lyncdiscover.mydomain.com record from the internal DNS. Good info about this:

http://blog.schertz.name/2013/07/understanding-lync-2013-mobility/
http://www.ucprimer.com/tech-blog/5-essential-tips-for-deploying-lync2013-mobility-service
https://technet.microsoft.com/en-us/library/hh690030%28v=ocs.15%29.aspx

Read the above links CAREFULLY and you’ll have a MUCH better understanding, believe me 🙂 Again, this setup works FOR US. I’m not saying that the lyncdiscover.mydomain.com record should be removed from every internal DNS configuration out there.
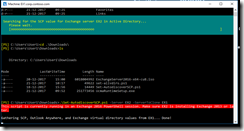
 

External DNS:

lync-externalDNS

Fig 4. External DNS.

External DNS was much more straight forward. Comments are included in the picture.

The DNS records are (as you can see) a bit different for the external network/outside world compared to the internal network. All external traffic goes through the reverse proxy, which in turn use URL rewrites to connect to the corresponding URLs on the inside network. (I’ll leave the URL rewrite / ISS/ARR discussion for a later chapter).


Hosts file:

You have probably noticed that the webext.mydomain.com record is present in BOTH the internal and external DNS. The reason for this is mobile devices. Mobile devices need to access the mobility service, and they do that ONLY from the outside. I’m yet again referring to the Mobility service flow using AutoDiscover (picture) at https://technet.microsoft.com/en-us/library/hh690030%28v=ocs.15%29.aspx. Lyncs own autodiscover feature will know if the client is on the internal or external network based on the lyncdiscover/lyncdiscoverinternal record. However, it’s a whole different story with webext.mydomain.com. If this URL is accessed from either the inside or outside network, the client is unable to know it’s final destination. This is because you’re pointing the client (in both cases) to the reverse proxy, which in turn point to the same URL internally and externally. This means that you’ll end up in an endless loop. To solve this you’ll edit the hosts-file.
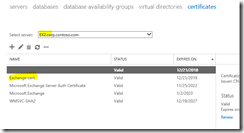
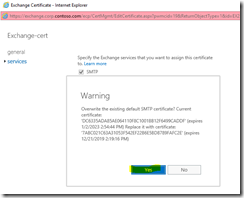
You also have to add a local DNS record for lyncdiscover, otherwise this record will remain unresolvable as it’s not present in the internal DNS. This was all a big mystery for me, as the documentation seldom mentioned this dilemma. I got an idea after hours of googling though – the holy hosts-file. Thanks to http://kressmark.blogspot.fi/2015/06/windows-2012-r2-iis-85-and-arr-30-as.html for the idea. This was by no means a big surprise, but you’ll get lost (in DNS) after hours and hours of testing. Believe me.

This means that you’ll have to add local DNS records on the reverse proxy. Fire up notepad and edit the C:\Windows\System32\drivers\etc\hosts –file on the reverse proxy. Add the following:

123.123.123.10    webext.mydomain.com, where 123.123.123.10 is the IP of your Front-end server.
123.123.123.10    lyncdiscover.mydomain.com, where 123.123.123.10 is the IP of your Front-end server.

(Meet and dialin are already resolvable by internal DNS and correctly points to the Front-end).

Now when a client resolves webext (internally or externally), it always gets sent to the reverse proxy. The reverse proxy in turn resolves webext to the front-end via the hosts-file. Lyncdiscover in turn won’t be resolvable internally after it reaches the reverse proxy if no hosts file-record is added. There you have it – all your DNS problems solved 🙂


Certificates

Certificates and DNS go somewhat hand-in-hand as you need to know which hostnames you’ll be using in the certificates. I’d probably start off by reading again. Some information to get you started:

https://technet.microsoft.com/en-us/library/jj204747%28v=ocs.15%29.aspx
https://technet.microsoft.com/en-us/library/jj205381%28v=ocs.15%29.aspx
http://skype4b.uk/2015/08/29/skype-for-business-certificate-requirements-the-definitive-guide/
http://social.technet.microsoft.com/wiki/contents/articles/24210.demystify-lync-2013-server-internal-certificate-requirements.aspx

Take your time to read and plan – this way you’ll be rewarded in the end. The above links discuss both internal and external certificates. They also discuss the differences between the reverse proxy and the Lync Edge certificates.

We’re not completely going by best practice regarding the certificates. We’re using external certificates on the internal front-end server. This is due to the fact that we already had an external certificate installed on the Front-end. It doesn’t do much harm either, and at least for us it’s not an extra expense.

Without further stories I’ll present our “certificate solution”. We’re using one certificate per interface on the edge server, but you could also use just one certificate will all hosts included. This would be more expensive due to the fact that you’ll have to pay extra for additional SAN-names. (You DON’T need a certificate for the AV-interface on the Edge server).

lync-certificate-chart

Fig 5. Edge and Reverse proxy certificate chart.

To add to this list, our Front-end needed to get its public certificate renewed with the added host webext.domain.com. Before the renewal, it included public certs for lyncdiscover, lyncdiscoverinternal, meet, dialin and sip. Now it includes all those + webext. Webext is needed for the external Web Services (externally accessing the front-end). More about that later on.

The following chapters has information about how to install the certificates on the servers.


Configuring the Lync Front-end Server for Edge / Installing the Edge Server / Edge Server Certificate Installation

Congratulations If you’ve had the energy to read this far. It’s now finally time to install the Edge server 🙂 Much of the Edge installation/configuration is actually tied to the Front-end server however. You’ll start by making changes to your current topology and then export/publish the topology on the Edge server. Like you’ve probably noticed before, it’s the prep work that takes most of the time. (Internet is full of articles on how to install an Edge server). That said, I happen to like the post at http://www.sherweb.com/blog/installing-lync-2013-edge-server/ and our installation is based on this article. However, there are some differences. In Step 6, the article tells you to request internal and external certificates from the setup itself. We didn’t do it this way because our internal CA isn’t an “online certification authority” (it doesn’t respond to online web requests due to security reasons). Instead we made an offline request and signed it manually on the CA. A little bit more hassle, but worked just fine in the end.

We didn’t use the certificate request wizard for the external certificate either, as those gets created by our “certificate guy”. He uses his own methods and just delivers a fully working certificate. I won’t go into the details, but it works. So in the end, whatever floats your boat and can get you the correct certificates is fine 🙂

If using this “manual method” (alternative to Step 6 in the guide), you must manually install the certificate(s) in the certificate store(s) before continuing. This is by no means difficult. For the internal/external certificates do the following:

  • Fire up “mmc.exe” on the Edge server
  • Add the certificates Snap-in. Select computer account –> local computer and click OK.
  • Right click on the Personal –> Certificates folder.
    • Select All Tasks… Import
    • Imported certificate will show up in this location.
  • Move the different certificates to their corresponding places (Personal, Trusted Root Certification Authorities, Intermediate Certification Authorities). See screenshots/figures below.

lyncedge-cert-personal

Fig 6. Personal certificate (computer)

lyncedge-cert-trusted-root

Fig 7. Trusted Root CA certificate

lyncedge-cert-intermediate

Fig 8. Intermediate CA certificate

  • Done. External certificates are also showing in this list as I have imported them in the same manner.

Now, back to the installation post at http://www.sherweb.com/blog/installing-lync-2013-edge-server/.

Some of my own notes:

  • Followed the guide.
    • Network specifications were OK.
    • Software specifications were OK. Didn’t (need to) install Windows Identity Foundation on the Front-end. (It should be installed as a pre-requirement on the Edge server however).
    • Fired up Topology Builder on the front-end and followed the guide.
      • FQDN of the new edge pool should match the FQDN (CN) on the internal certificate: lyncedge-int.domain.com from certificate chart
      • Access Edge service should match the FQDN (CN) on the external certificate: lyncedgesip-ext.domain.com
      • Web Conferencing Edge service should match the FQDN (CN) on the external certificate: lyncedgewc-ext.domain.com
      • A/V Edge service should match the FQDN (CN) on the external certificate: lyncedgeav-ext.domain.com
        • NOTE: This is a “DNS/certificate-thing”. Whatever certificate CN-record you created for the above services should be used. You can swap CN and SAN records for a more “clean” name, i.e. lyncedgeav-ext.domain.com vs. av.domain.com. (See above DNS/certificate chart and the note about switching places between CN and SAN).
      • Enabled federation (not xmpp yet though)
      • Defined internal and external IP addresses
      • Defined Next hop pool: our front-end
    • Changed the External web services in the Topology builder to match the one we have defined in DNS and in the certificate (would be webext.domain.com in the example).

lync_ext_web_services

Fig 9. External web services

    • Published the topology
    • Exported the configuration (step 4 in guide).
  • Moved over to the Edge server itself
    • Installed Lync server and imported the configuration (step 5 in guide)
    • The certificates were already installed in the certificate store so no need to request certificates (step 6)
      • Defined the existing certificates
    • Started services
    • Done! (no need for step 8 and 9, yet)


Installing and configuring the Reverse Proxy server / Reverse Proxy server Certificate Installation

I’m now assuming that you have a working Edge server. You can install the reverse proxy server without a working Edge server also, but installing the Edge server first makes it easier to test the reverse proxy functionality right after the installation. First some homework/reading:

https://technet.microsoft.com/en-us/library/jj204691%28v=ocs.15%29.aspx
https://technet.microsoft.com/en-us/library/gg398069%28v=ocs.15%29.aspx
https://blogs.technet.microsoft.com/nexthop/2013/02/19/using-iis-arr-as-a-reverse-proxy-for-lync-server-2013/
http://jackstromberg.com/2014/11/tutorial-deploying-a-reverse-proxy-for-lync-server-2013/
http://kressmark.blogspot.fi/2015/06/windows-2012-r2-iis-85-and-arr-30-as.html
https://thamaraw.com/2013/07/15/publish-lync-server-external-web-services-using-iss-arr/

I decided to go with a combination of the Microsoft guide and the jackstromberg one this time. In the end, it worked perfectly. I had lots of problems and headaches down the line, but this time it had nothing to do with the guides (rather it had to do with typos and a non-working ARR that had to be reinstalled).

Before following the (Microsoft) guide however, we have to install the certificates the same way we did on the Edge server. The reverse proxy certificates are of course different, but I’m assuming that you have requested them at the same time as the Edge certificates. Just follow the Edge steps (fire up mmc.exe and so on) and you’re good to go. One different step is that you have to bind the certificates in IIS, otherwise they won’t be used when clients connect via the reverse proxy. It’s rather easy, let me show you some screenshots:

lync_reverse-proxy-cert-installation-IIS

Fig 10. Adding https bindings in IIS.

lync_reverse-proxy-cert-installation-IIS-binding

Fig 11. Adding https bindings in IIS. Remember to add both the internal and the external interface, with their own certificate.

Now continue following the guides, or use another guide of your choice.

I used the following simple URLs:

  • meet.domain.com
  • dialin.domain.com
  • webext.domain.com
  • lyncdiscover.domain.com

All good, tested and working! 🙂

A note from my own experiences: ARR is VERY STRICT regarding the URL rewrite rules. If something isn’t working, be sure to double check the rules!


Mobility

I wasn’t quite sure if there was a need for a separate mobility chapter as I’ve covered this area quite well in the DNS and certificate chapters. I guess a couple of lines won’t do no harm however. I’ll once again start by giving you a nice list of homework/reading:

https://technet.microsoft.com/en-us/library/hh690030%28v=ocs.15%29.aspx
http://blog.schertz.name/2013/07/understanding-lync-2013-mobility/
http://www.ucprimer.com/tech-blog/5-essential-tips-for-deploying-lync2013-mobility-service 
http://www.lyncexch.co.uk/lyncdiscover-and-auto-discovery-deeper-dive/
http://blog.schertz.name/2012/12/lync-2013-client-autodiscover/
http://www.ucprimer.com/tech-blog/5-essential-tips-for-deploying-lync2013-mobility-service
https://blogs.technet.microsoft.com/nexthop/2012/02/21/troubleshooting-external-lync-mobility-connectivity-issues-step-by-step/
https://ucgeek.co/2014/02/lync-mobility-dns-records/
http://www.lyncinsider.com/lync-mobile/external-lync-2013-users-need-a-2013-edge-server-to-use-mobility-services/
https://social.technet.microsoft.com/Forums/lync/en-US/daacb3f7-4c09-4d2d-aca4-354cba7a6acc/mobility-without-using-edge-server-2013?forum=lyncdeploy
https://social.technet.microsoft.com/Forums/lync/en-US/b6519fb1-ce56-4977-aaec-3ad23900d8e6/lync-2013-topology-change-now-require-a-reverse-proxy?forum=lyncdeploy
http://windowsitpro.com/lync/decoding-lyncs-endpointconfigurationcache-file (deleting cache)

Much of the mobility stuff has to do with the fact that the mobility service isn’t working properly via lyncdiscoverinternal. Instead you configure the mobile devices to go the external way, via the reverse proxy. See the following picture:

lync-mobility-overview

Fig 12. Lync mobility (source: http://www.ucprimer.com/tech-blog/5-essential-tips-for-deploying-lync2013-mobility-service)

The mobility bit was a big headache, but in the end we got it working in a desirable way. The secret was to remove lyncdiscover.domain.com from the internal DNS (against many recommendations). See the DNS chapter for more information.


Federation

We’re definitely interested in federation, but we haven’t federated with any partners yet. It’s no harm reading about federation though, and in the end it will be much easier setting it up once you’ve done your homework. I’ve done my homework, so why wouldn’t you 🙂 Here you go:

http://windowsitpro.com/skype-business/understanding-main-types-federation-skype-and-lync-environments
https://technet.microsoft.com/en-us/library/jj204800%28v=ocs.15%29.aspx
https://blogs.technet.microsoft.com/uclobby/2013/09/30/difference-between-open-and-closed-federation-in-lync-20102013/
https://technet.microsoft.com/en-us/library/jj205134.aspx

The Edge server is already enabled for federation, but the front-end is not. This is easily fixed in the Topology builder once we/you decide to federate:

lync-enable-federation-on-FE

Fig 13. Enable federation on the Front-end.

In addition to this, it’s also recommended that you add a DNS SRV record (_sipfederationtls._tcp.domain.com).


And finally here’s a screenshot I took sometime in the middle of the whole deployment. As I’ve stated before, there were lots and lots of googling and homework to be done 🙂

lync_tab_hell_firefox

Fig 14. Google is your friend. Don’t believe everything you read though…

That’s Firefox with Tab Mix Plus and Multirow Bookmarks Toolbar Plus Extensions, btw.


This quite much summarizes the Lync Edge and Reverse Proxy server deployment. Hope you’ve enjoyed reading 🙂

Lync 2013 Persistent Chat problem

I was testing the Lync 2013 Persistent Chat feature the other day and was soon greeted with the error message “1 Warning(s), All the channel servers are down”. I tried googling but didn’t really find any good solutions. Some people suggest removing and then publishing the topology again, but it didn’t work for me.

Here’s an example of a non-working solution:

http://lyncme.co.uk/microsoft-lync-server-2013/all-the-channel-servers-are-down-after-installing-persistent-chat-collocated-on-fe/ 

That said, it could work for someone else. Not saying that the post is useless, just not working in my case.

Some of the errors:

lync_error1

Fig 1. Error in Event Viewer


lync_error3

Fig 2. Service says running even though it isn’t.


I’ll save you the pain of googling. Here’s the solution (in the comments):

http://windowspbx.blogspot.fi/2012/07/step-by-step-installing-lync-server_19.html

These specific comments helped me:

“thanks for the article i have gone through it and got everything working,
i was getting the error where I was unable to start the persistent chat service and this would then show the error where chat channel unavailable.
i installed the hotfix found at http://support.microsoft.com/kb/2848328
installed the lyncserver update and let this run.
restarted the server and the service started and i was able to set up the persistent chat category.
hope this help out”

“Hi, I just thought I’d post this in case it helps anyone. If you’ve just installed the pChat role into an existing Lync environment that has already been patched, you will get the “all channel servers down” error. You will also notice that when trying to start the pChat services, you will get incompatible database errors as Seyed above.
You need to re-launch the lyncServerUpdateInstaller from the CU level of your Lync Front End server(s). You’ll notice that the Installed Version for Persistent Chat is not up to date. Click Install Updates, then run from Lync Powershell the Install-Database Command against the Persistent Chat Role / SQL Server / DB Instance and the service should now start and you can continue.
Hopefully this helps.”

In other words, just install the hotfix and everything should be running smoothly again. At least it was for me.

lync_error2

Fig 3. Hotfix notices that Persistent Chat is out of date.


After the update I gave it a go. In the screenshot I’ve given the user “Kalle” rights to create a chat room. As you can see, the room was successfully created.

lync_chat_room_created

Fig 4. Creating a chat room – working 🙂


lync_chat_room_in_action

Fig 5. Chat room in action. Janet and Kalle having a “conversation”.