WARNING! This is a pretty long and detailed blog post 🙂
I decided to upgrade (or actually reinstall) my test lab with the most recent version of Windows Server (including the most recent versions of Exchange, SfB Server and SharePoint). All my server virtual machines are built from a cloned “Golden Windows Server Image” in VMware workstation, and I also use the same principle for my clients. This way you can deploy new servers/clients very fast, and they will take up much less disk space compared to installing from scratch.
This “custom” TLG is based on:
Windows Server 2012 R2 Test Lab Guide (including the Basic PKI add-on from here) and
Test Lab Guide: Configure an Integrated Exchange, Lync, and SharePoint Test Lab
with my own Exchange add-ons including:
- A script for configuring the virtual directories
- Certificate from domain CA
- Zevenet Load Balancer (formerly known as Zen)
- A second server (EX2)
- Another script for copying the virtual directories from an existing server to a new one
- Database Availability Group (DAG) between EX1 and EX2
- Moving a user from one database to another
More about these later on.
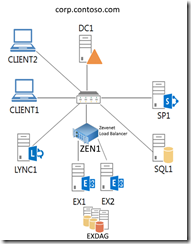
I’ll start with an overview of the whole TLG, including my own add-ons:
Fig 1. Test Lab overview – a modified picture from the TLG. (I also configured the Internet subnet (131.107.0.0/24), even though not visible in this picture).
The whole project started by following the Windows Server 2012 R2 Test Lab Guide. I then added the Basic PKI infrastructure. These Test Lab Guides were actually “translatable” straight from Windows Server 2012 R2 to Windows Server 2016. I got a “Duplicate IP address error” on one of the servers however, but it was easily solved by following: http://support.huawei.com/enterprise/en/knowledge/KB1000068724. (I have no idea why I got this error (hasn’t happened before), but then again it doesn’t matter now that it was solved).
I then moved over to the Test Lab Guide: Configure an Integrated Exchange, Lync, and SharePoint Test Lab. Step 1 was already done so I moved over to Step 2 and 3 – Installing and configuring a new server named SQL1. Step 3 includes a link to a separate SQL Server 2012 Test Lab Guide, and this TLG also happen to be more or less translatable straight to SQL Server 2016. So yeah, I actually have no further comments about the installation. Step 4 guides you through the Client2-installation, but there’s really nothing to comment about this installation either (pretty basic stuff).
Exchange 2016, EX1
It was now time for the Exchange server, EX1. Note to self: Use at least 6GB ram for the VM or the memory will run out. This installation also has a separate guide:
It’s fine for the most part, however instead of downloading the evaluation version of Exchange I suggest you download the newest Exchange Server 2016 CU instead. This way you’ll get the newest updates from scratch. And yes, all setup files are included in the CU so you can use it as a “clean install”. The prerequisites for Exchange 2016 (on Windows Server 2016) are a bit different compared to Exchange 2013 (on Windows Server 2012 R2) also. The only thing you need to download and install “separately” is Microsoft Unified Communications Managed API 4.0, Core Runtime 64-bit. There’s no need for Microsoft Knowledge Base article KB3206632 if you have a recent/patched version of Windows Server 2016. After that just copy/paste the PowerShell command from the prerequisites page:
Install-WindowsFeature NET-Framework-45-Features, RPC-over-HTTP-proxy, RSAT-Clustering, RSAT-Clustering-CmdInterface, RSAT-Clustering-Mgmt, RSAT-Clustering-PowerShell, Web-Mgmt-Console, WAS-Process-Model, Web-Asp-Net45, Web-Basic-Auth, Web-Client-Auth, Web-Digest-Auth, Web-Dir-Browsing, Web-Dyn-Compression, Web-Http-Errors, Web-Http-Logging, Web-Http-Redirect, Web-Http-Tracing, Web-ISAPI-Ext, Web-ISAPI-Filter, Web-Lgcy-Mgmt-Console, Web-Metabase, Web-Mgmt-Console, Web-Mgmt-Service, Web-Net-Ext45, Web-Request-Monitor, Web-Server, Web-Stat-Compression, Web-Static-Content, Web-Windows-Auth, Web-WMI, Windows-Identity-Foundation, RSAT-ADDS
Then run setup.exe and install Exchange. Use the default options. After completion, follow Step 6: Demonstrate EX1 as an email server in the Exchange TLG. I did NOT try to send an email message from Chris to Janet at this stage though, as I wanted to try this after the Load Balancer was installed. But for now, happy days, Exchange installed!
Script for configuring the virtual directories
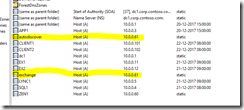
Usually when installing an Exchange server you change the virtual directories/namespace to something other than the server hostname (default). This namespace is the same name that should be included in the certificate. (I didn’t like the fact that this TLG use self-signed certificates so I added my own subchapter about getting a certificate from a domain CA, see next chapter). In a production environment you should plan the namespace and certificate prior to installation, but in this TLG it doesn’t matter that much. I decided to go with the namespace “exchange.corp.contoso.com”. (Autodiscover (DNS url) should also be included in the certificate (request), which it is by default). Anyhow, I first added the mentioned A records (exchange and autodiscover) to DNS. I pointed them to 10.0.0.11 at this stage (but that will change after the Load Balancer installation). I then changed the virtual directories according to the above plan. For this I used a nice script found from:
https://gallery.technet.microsoft.com/office/Set-all-virtual-directories-f4ec71d3
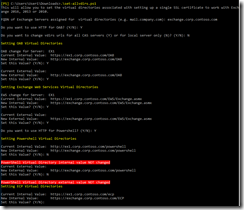
This script is very nice. The only thing that got me worried was the fact that it tried to change the PowerShell virtual directory. Afaik you shouldn’t change that. Anyway, no big deal, I just answered “no” (seen in screenshot) when the script asked me to change this. Here are a couple of screenshots from the script in action:
Fig 2. set-allvdirs.ps1 script
Fig 3. set-allvdirs.ps1 script, continued
Certificate from domain CA
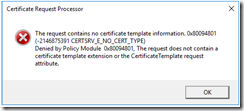
After all the virtual directories were set, it was time to get a new certificate which reflect the above changes. I headed over to trusty practical 365 to refresh my memory. This time I used EAC when requesting a new certificate. I changed the domains to reflect my newly configured environment. I added exchange.corp.contoso.com and autodiscover.corp.contoso.com and removed all the other hostnames. The other options were pretty basic so nothing special there. I then saved the certificate request and copied it over to my domain CA. However, when I tried to process the certificate request on the CA I was greeted with an error message:
Fig 4. Certificate Request Processor error
A bit of investigation led me to the following url: http://mytechweblog.blogspot.fi/2012/11/the-request-contains-no-certificate.html, which had a solution:
“certreq -submit -attrib “CertificateTemplate: WebServer” WebServerCertReq.txt”
Fig 5. Certification request with manual submit.
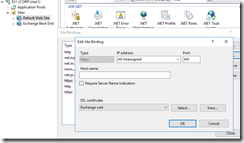
This solution worked for me, nice! I then saved the .crt file and imported it into Exchange from the same place in EAC where I made the request. However, shortly after this I noticed that EAC and OWA still gave certificate errors. This was strange, but then again nothing new. I had a look in IIS/Bindings, and surely the wrong certificate had been assigned. I corrected this so the newly requested certificate was in use:
Fig 6. Exchange certificate from domain CA.
Zevenet Load Balancer
It was now time to install the Zevenet Load Balancer. The reason for installing the Load Balancer at this stage had to do with the fact that I had now preconfigured all the Exchange virtual directories + autodiscover in DNS. This also meant that it’ll be very easy to point DNS at the Load Balancer instead of the Exchange server/CAS further down the road.
I headed over to https://www.zevenet.com/products/community/ and downloaded the newest version. I installed it following my own old blog post. The main difference this time was that I didn’t bother to use clustered servers. (I already know that it works and we’re using clustered LB’s in production). After installation I did the initial configuration:
Fig 7. New virtual network interface. The new VIP was set to 10.0.0.61 (the server IP is 10.0.0.60).
I then created a new farm, which listens on port 443 on the newly created virtual network interface IP (VIP):
Fig 8. New Farm
After this I edited the farm and configured the “real IP”:
Fig 9. Real IP’s. In my case, 10.0.0.11 is the “real” IP for EX1.
I then converted the Exchange certificate (in a Linux VM) for use within Zevenet LB:
openssl pkcs12 -in file.pfx -out file.pem -nodes
Source: https://stackoverflow.com/questions/15413646/converting-pfx-to-pem-using-openssl
It was then time to import it into Zevenet LB:
Fig 10. Certificate imported
After this I made changes in DNS so that all traffic would go through the Load Balancer:
Fig 11. Editing DNS.
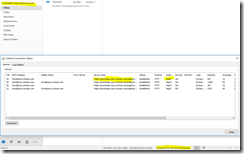
Now it was finally time to check that Outlook was working correctly from client1 (or 2):
Fig 12. Outlook Connection Status
Well yes, it was. Perfect! 🙂
That quite much summarizes the Load Balancer part. Now moving over to the installation of the second Exchange server, EX2.
Exchange 2016 – second server, EX2
Now that everything was working as it should with EX1, it was time to add another exchange server to the environment. There were no special notes about this installation, I just followed the same guide as with the first one. One thing that was different however, was the script. I now used a script that could automatically copy the virtual directories from an existing Exchange server during deployment. The script can be found at:
http://www.expta.com/2016/07/new-set-autodiscoverscp-v2-script-is-on.html
I’ll copy/paste some information:
“The script is designed to be run during installation. Normally, you would run this script from an existing Exchange server of the same version while the new server is being installed.”
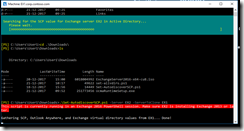
That sounded almost too good to be true and I had to try it. That said, I had a test-run from EX1 while EX2 was installing:
Fig 13. Set-Autodiscover.ps1 script. Looks promising…
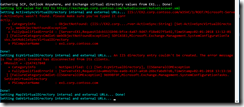
…but it wasn’t:
Fig 14. Can’t set the virtual directories.
I had the script running during the whole installation of EX2, but no luck. I suspected that it would be better running the script immediately after the installation instead. That said, I had a go just after the finished installation of EX2:
Fig 15. Running the script immediately after the EX2 installation.
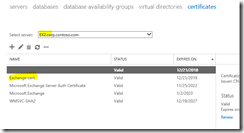
Yes, much better this time. All the virt dirs were set within a couple of seconds, and I’d say this “lag” would be fine for a production environment as well. I would also like to “thank” the script for reminding me to install a certificate on this second server. That said, I opened up EAC and chose the new EX2 server from the pull-down menu under certificates. I then chose “import” and used the same certificate I made for EX1. It got imported nicely:
Fig 16. Imported domain certificate
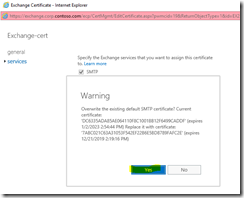
Be sure to enable all needed services on the newly imported certificate also:
Fig 17. Overwriting existing SMTP certificate. At the same time I also chose to enable the IIS, POP and IMAP services.
Checking certificates from EMS:
Fig 18. Checking active certificates. Looks good!
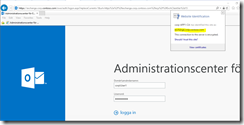
…and while you’re at it, check that OWA won’t give you certificate errors:
Fig 19. OWA
It doesn’t. All good! (The new certificate wasn’t yet active In Fig 16, therefore the status url bar is red).
Only thing left to do now was to add this second IP (10.0.0.12) to “real servers” in Zevenet Load Balancer. After this change, the “dual exchange server setup” was ready for use.
DAG
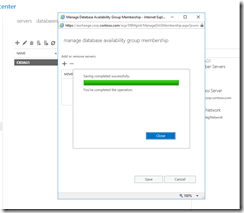
With both EX1 and EX2 up ‘n running, it was time to configure a Database Availability Group (DAG) between the servers. I’ve done this many times before, and I’ve always used the same guide whether it’s for Exchange 2013 or Exchange 2016. The guide I’ve used is:
It’s very straight forward without any extra bs. Some notes:
- I’m using the “SP1 (APP1)” server as the witness server.
- I pre-staged a computer account in AD named “EXDAG”
- I did not configure a dedicated replication network. (Overkill for a test lab).
- I did not move the Default Mailbox Databases from the default folder path onto storage volumes dedicated to databases and transaction log files. (Again, a little overkill for a test lab).
Fig 20. Manage Database Availability Membership
After this step was done I configured database copies following yet another good (and familiar) follow-up guide from the same series:
https://practical365.com/exchange-server/exchange-2013-dag-database-copies/
I’ve got no additional comments about the database copies, they work just as intended/written in the guide 🙂 Below you’ll find some related screenshots:
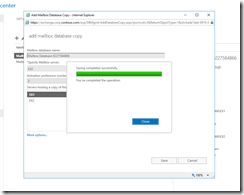
Fig 21. Add Mailbox Database Copy
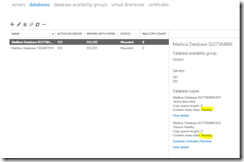
Fig 22. Database overview with database copies.
Moving users
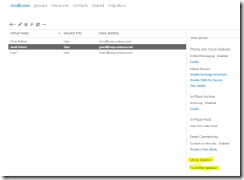
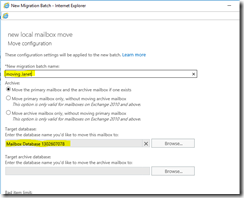
I moved the user “Janet” from the original database on EX1 over to the database on EX2. This way I “spread out” my (two 🙂 ) users so their mailboxes are situated on different servers. This is good for failover testing and so forth.
Fig 23. Moving Janet to another database (server).
Fig 24. Moving Janet to another database (server), continued.
The above steps now completes the whole Exchange-part of the TLG.
Skype for Business Server 2015, LYNC1
It was now time to move over to the Lync-part of the TLG. The first change was actually the software itself – I’m installing Skype for Business Server 2015 instead of Lync Server 2013. As with other software in this lab, the prerequisites are way different for SfB Server compared to Lync Server. I used a combination of
https://blogs.perficient.com/microsoft/2017/08/skype-for-business-how-to-install-on-windows-server-2016/ and
http://www.garethjones294.com/install-skype-for-business-server-2015-on-windows-server-2016-step-by-step/
as a base for my deployment. Some additional notes:
- Note to self: Use at least 3GB ram for the VM.
- (Newest) Cumulative Update has to be installed, otherwise SfB Server won’t work at all on Windows Server 2016.
- As I installed SfB Server in an isolated network (no internet access), I also had to define the source (which is the Windows Server 2016 DVD) in the PowerShell prerequisite command:
Fig 25. Prerequisites installation for SfB Server 2015 on Windows Server 2016.
I then continued following the TLG guide again, and moved over to the chapter “To prepare Active Directory”. Some notes:
- Installed newest version of offline-Silverlight manually.
- Chose not to check for updates.
- Added the DNS SRV records, but they didn’t work when I tested them (probably outdated info in the TLG). This was no big deal, as lyncdiscoverinternal can be used instead for example. You could also Google for updated information, but I didn’t feel it was necessary for this TLG.
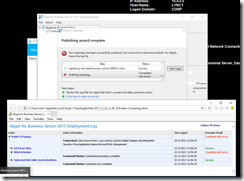
- Everything went fine until “21. From the Topology Builder Action menu, select Publish Topology.” I was greeted with:
Fig 26. Publishing Topology error.
Fig 27. Publishing Topology error, continued
Well, after some investigation (googling), it turned out this just had to do with UAC: http://terenceluk.blogspot.fi/2013/03/publishing-new-lync-server-2013.html. Surely, after running the deployment wizard again as an administrator (run as), it worked!
I now moved over to the “To install Lync Server 2013 core components” -part of the TLG. Notes:
- I was only running step 1 and 2 at this stage.
- The IIS URL Rewrite Module problem was well known, I’ve even blogged about it.
- I did not use the registry hack this time though, instead I just downloaded a newer version of the IIS URL Rewrite Module.
- I Installed the new version of the IIS Rewrite Module and ran step 2 again. This time it worked!
- After step 2 was done, it was time to install the newest CU for SfB, otherwise SfB Server won’t run at all on Windows Server 2016.
- Remember to run the SfB Management Shell as an Administrator.
- Everything went smoothly with the CU installation!
- I moved over to Step 3 – Deployment Wizard/SfB Server 2015 Core Components.
- Everything went fine!
- Step 4 was different for SfB compared to Lync. You can’t start services from the Deployment Wizard in SfB Server 2015.
- Instead, you start them from the SfB Management Shell with the command “Start-CsWindowsService”
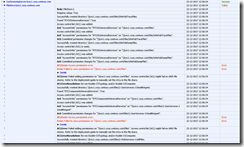
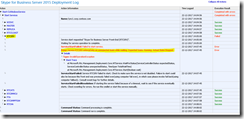
- The command didn’t run as planned though:
Fig 28. SfB Server 2015 Deployment Log.
- I tried to manually start the “Skype for Business Front-end” service from “Services” in Windows.
- Did not work either, got stuck in “starting…”
- Tried old school method and rebooted the server.
- Worked, all services were now up ‘n running after reboot 🙂
- I moved over to the “To enable users in the Lync Server Control Panel”-part of the TLG and enabled the users.
- Yep, all done, working! 🙂
SharePoint 2016, SP1
SharePoint was the last (and the “easiest”) software candidate on the list. Yet again the prerequisites were different compared to the 2013 version of the TLG. My notes:
- SP1 is the server name, not Service Pack 1 🙂
- I tried various offline methods for the prerequisite installation. What a headache. Spare yourself the pain and DO NOT try to install the prerequisites without an active internet connection. I repeat, DO NOT try it.
- I then installed the prerequisites with “Install software prerequisites” from default.hta. Everything went smoothly.
- I continued following the TLG and the “To prepare DC1 and SQL1” –part. Nothing to add or comment here.
- I continued following the TLG and the “To install SharePoint Server 2013” –part. Nothing to add or comment here.
- Happy days, SP1 installed!
Configure integration between EX1, LYNC1, and SP1
As a last step in this TLG, I configured server integration between the servers. I would advise you to stay away from the TLG script and use newer information instead. The script has failed me before, and surely it failed this time also when I tried it. In other words, skip the script.
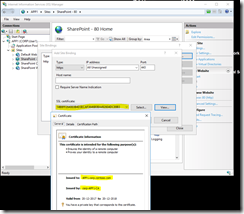
As a first step though, check the SP1/APP1 certificate. The TLG tells you to add a https site binding and select the certificate with the name sp1.corp.contoso.com. This won’t work, at least not for me (never has). Instead, when creating the new https binding, choose the certificate that has been issued to the SP1/APP1 server (never mind the confusing “friendly” name):
Fig 29. Checking SSL certificate in SharePoint/IIS
I got a warning about the certificate already being used for the Default Web Site, but this can be ignored (at least in this TLG).
Now we’re ready to move over to some “fresh” information about integration. For starters, have a look at:
Exchange <-> SfB: http://lyncdude.com/2015/10/06/the-complete-skype-for-business-exchange-2016-integration-guide-part-i/index.html
Exchange –> SharePoint and SfB: https://technet.microsoft.com/en-us/library/jj649094(v=exchg.160).aspx
SfB –> SharePoint: https://technet.microsoft.com/en-us/library/jj204975.aspx
SharePoint –> Exchange: https://technet.microsoft.com/en-us/library/jj655399.aspx
SharePoint –> SfB: https://technet.microsoft.com/en-us/library/jj670179.aspx
All links are compatible with the 2016 versions also. Here are the results from my own environment:
Skype for Business:
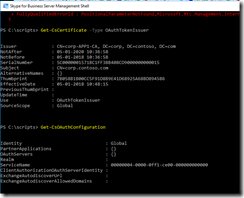
Fig 30. Checking current OAuth certificate and OAuth configuration.
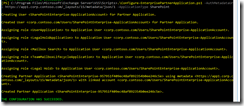
Fig 31. Setting OAuth configuration and checking the configuration.
Fig 32. SfB –> Exchange integration
Fig 33. SfB –> SharePoint integration
Fig 34. Checking partner applications. Both Exchange and SharePoint are integration partners.
Exchange:
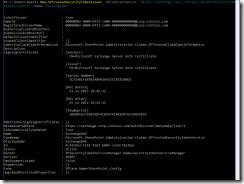
Fig 35. Exchange –> SfB integration
Fig 36. Exchange –> SharePoint integration
Fig 37. Checking partner applications. Both SfB (Lync) and SharePoint are integration partners.
SharePoint:
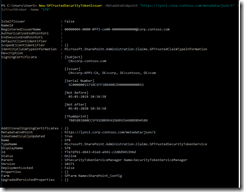
Fig 38. SharePoint –> Exchange integration
Fig 39. SharePoint –> SfB integration
Fig 40. Checking partner applications. Both Exchange and SfB are integration partners.
The integration chapter above now finalizes this whole TLG. It was a fun project and I hope someone will find this information useful.









Great article and thanks for reporting any issues that you encountered. I’m about to do a similar exercise in my home lab so this will come in very handy I’m sure!! 🙂